Skip to content
  • There are no suggestions because the search field is empty.

Connecting & Configuring Your Email

ACCOUNT SETUP
Connect your inbox, manage your organization's mailboxes and signatures, and authenticate your sending domain so every email lands where it should.
7 steps6 min readAdmins & recruiters
 
1
Step 1
Connect your Email

Connecting your inbox lets you send and receive email directly inside SCALIS.
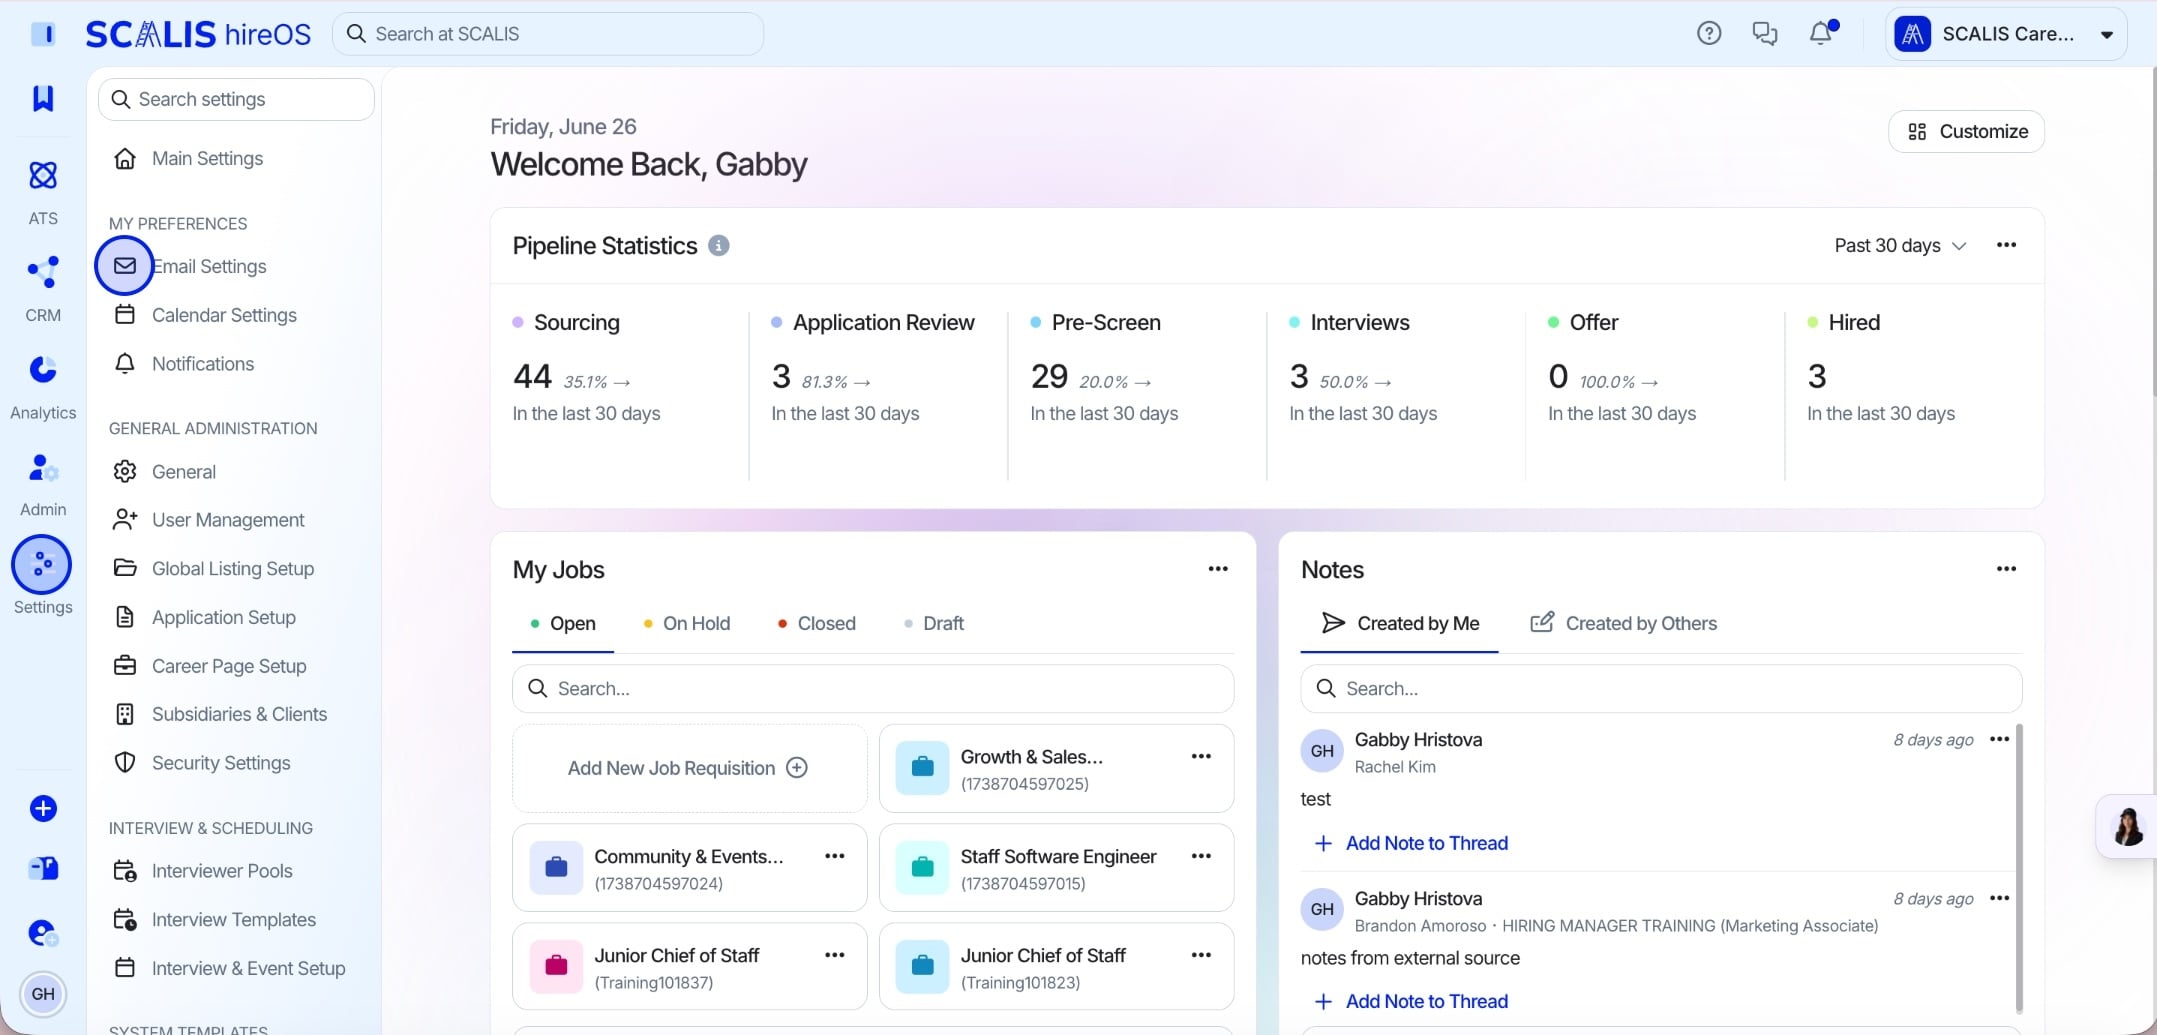
 
Navigate to Settings in the left navigation, then click Email Settings.
 
On the Connected Email tab, choose the provider your company uses (Google or Microsoft), then click Connect.
 
Follow the prompts in the pop-up to authorize the connection.
💡 Note: Once connected, you're ready to send emails from SCALIS right away.
Navigating to Email Settings in SCALIS
Settings > Email Settings in the left navigation
 
2
Step 2
Set your inbox sending limits

Control how quickly a mailbox sends across all sequences. Lower values protect your sender reputation.
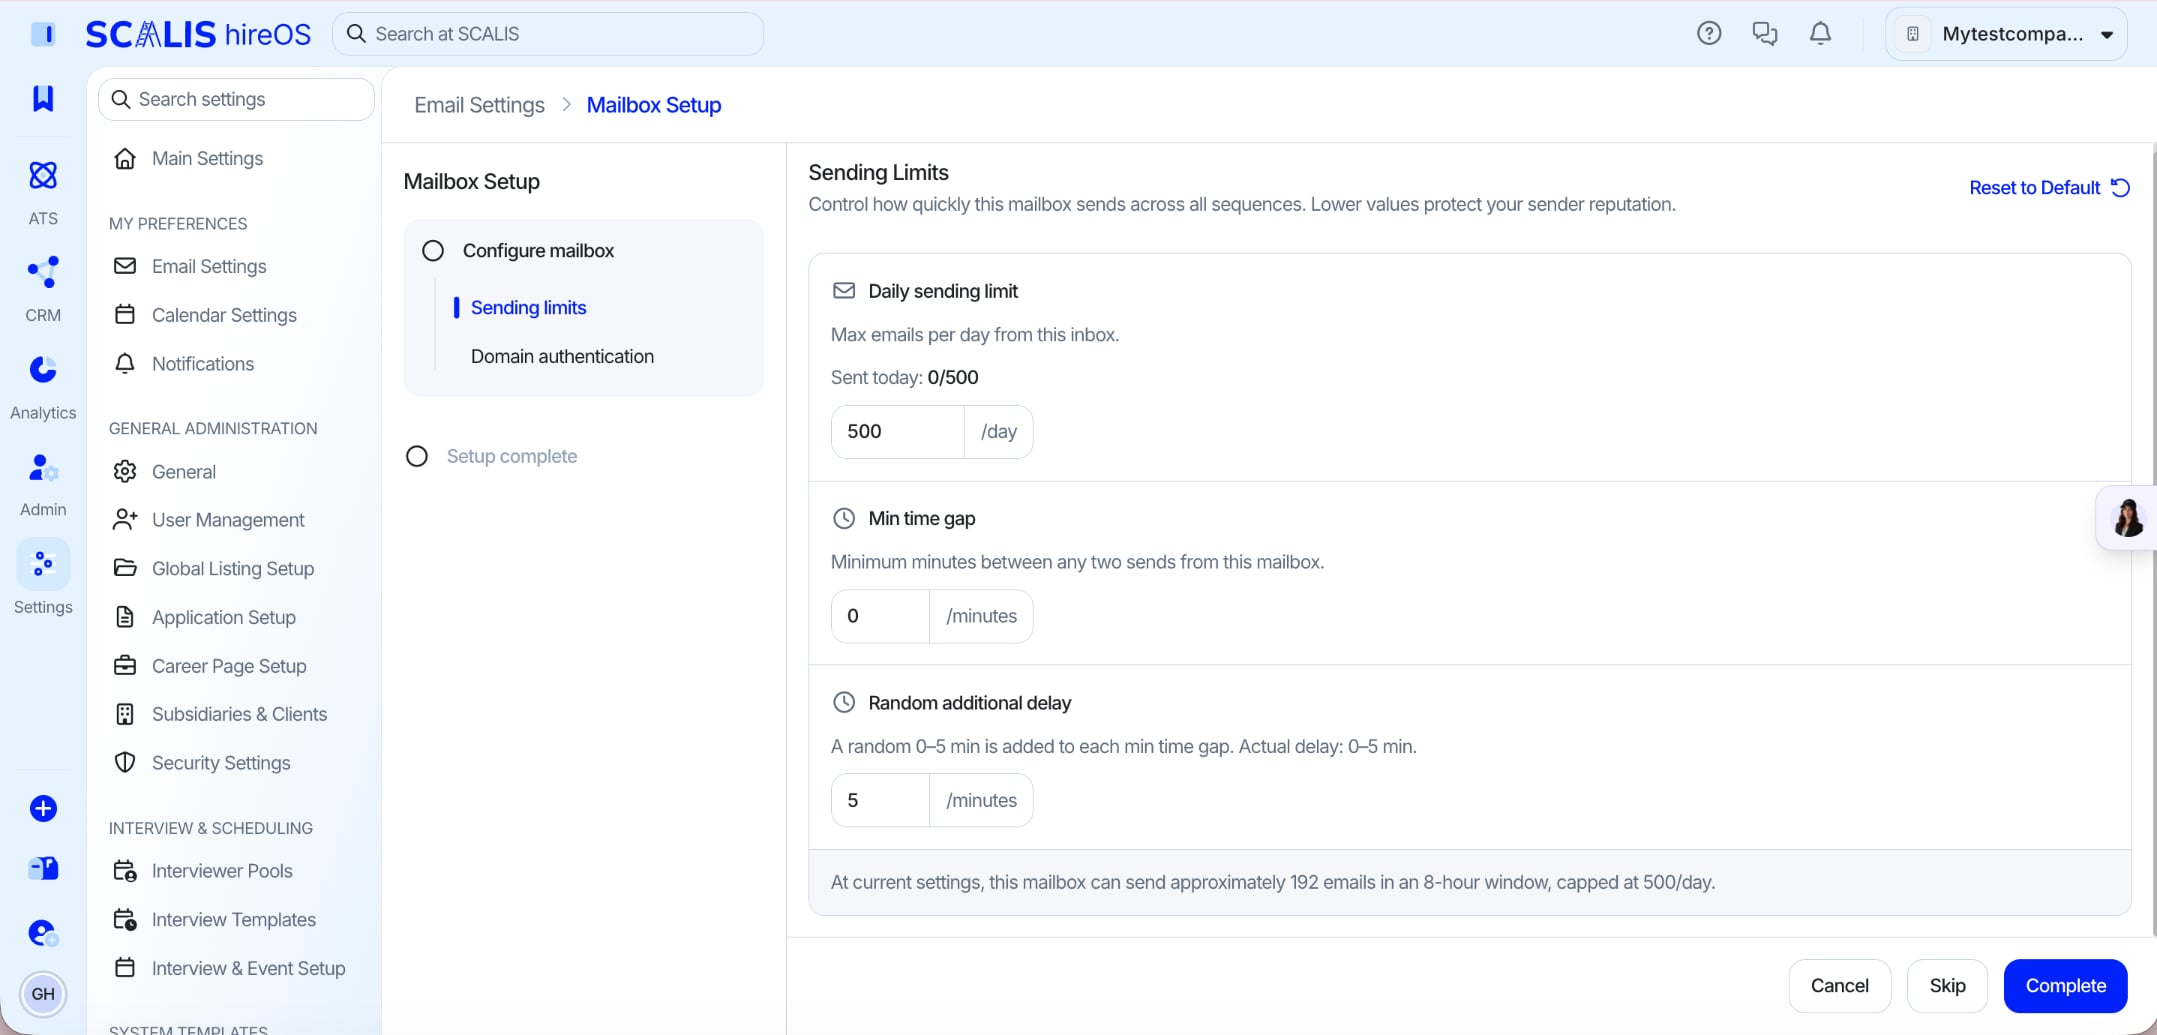
 
From Email Settings, open Mailbox Setup for the inbox you want to configure, then go to Sending limits.
 
Daily sending limit: the maximum emails per day from this inbox.
 
Min time gap: the minimum minutes between any two sends from this mailbox.
 
Random additional delay: a random 0 to 5 min added to each gap to keep sending natural.
 
Click Complete to save, or Reset to Default to restore the recommended values.
💡 Note: Lower limits protect your domain's sender reputation, which matters most for newer or lightly used inboxes.
The Mailbox Setup Sending Limits panel showing Daily sending limit, Min time gap, and Random additional delay fields
Mailbox Setup > Sending limits
 
3
Step 3
Run a Domain Authentication health check

Domain Authentication confirms your sending domain is set up correctly so your emails land in inboxes instead of spam.
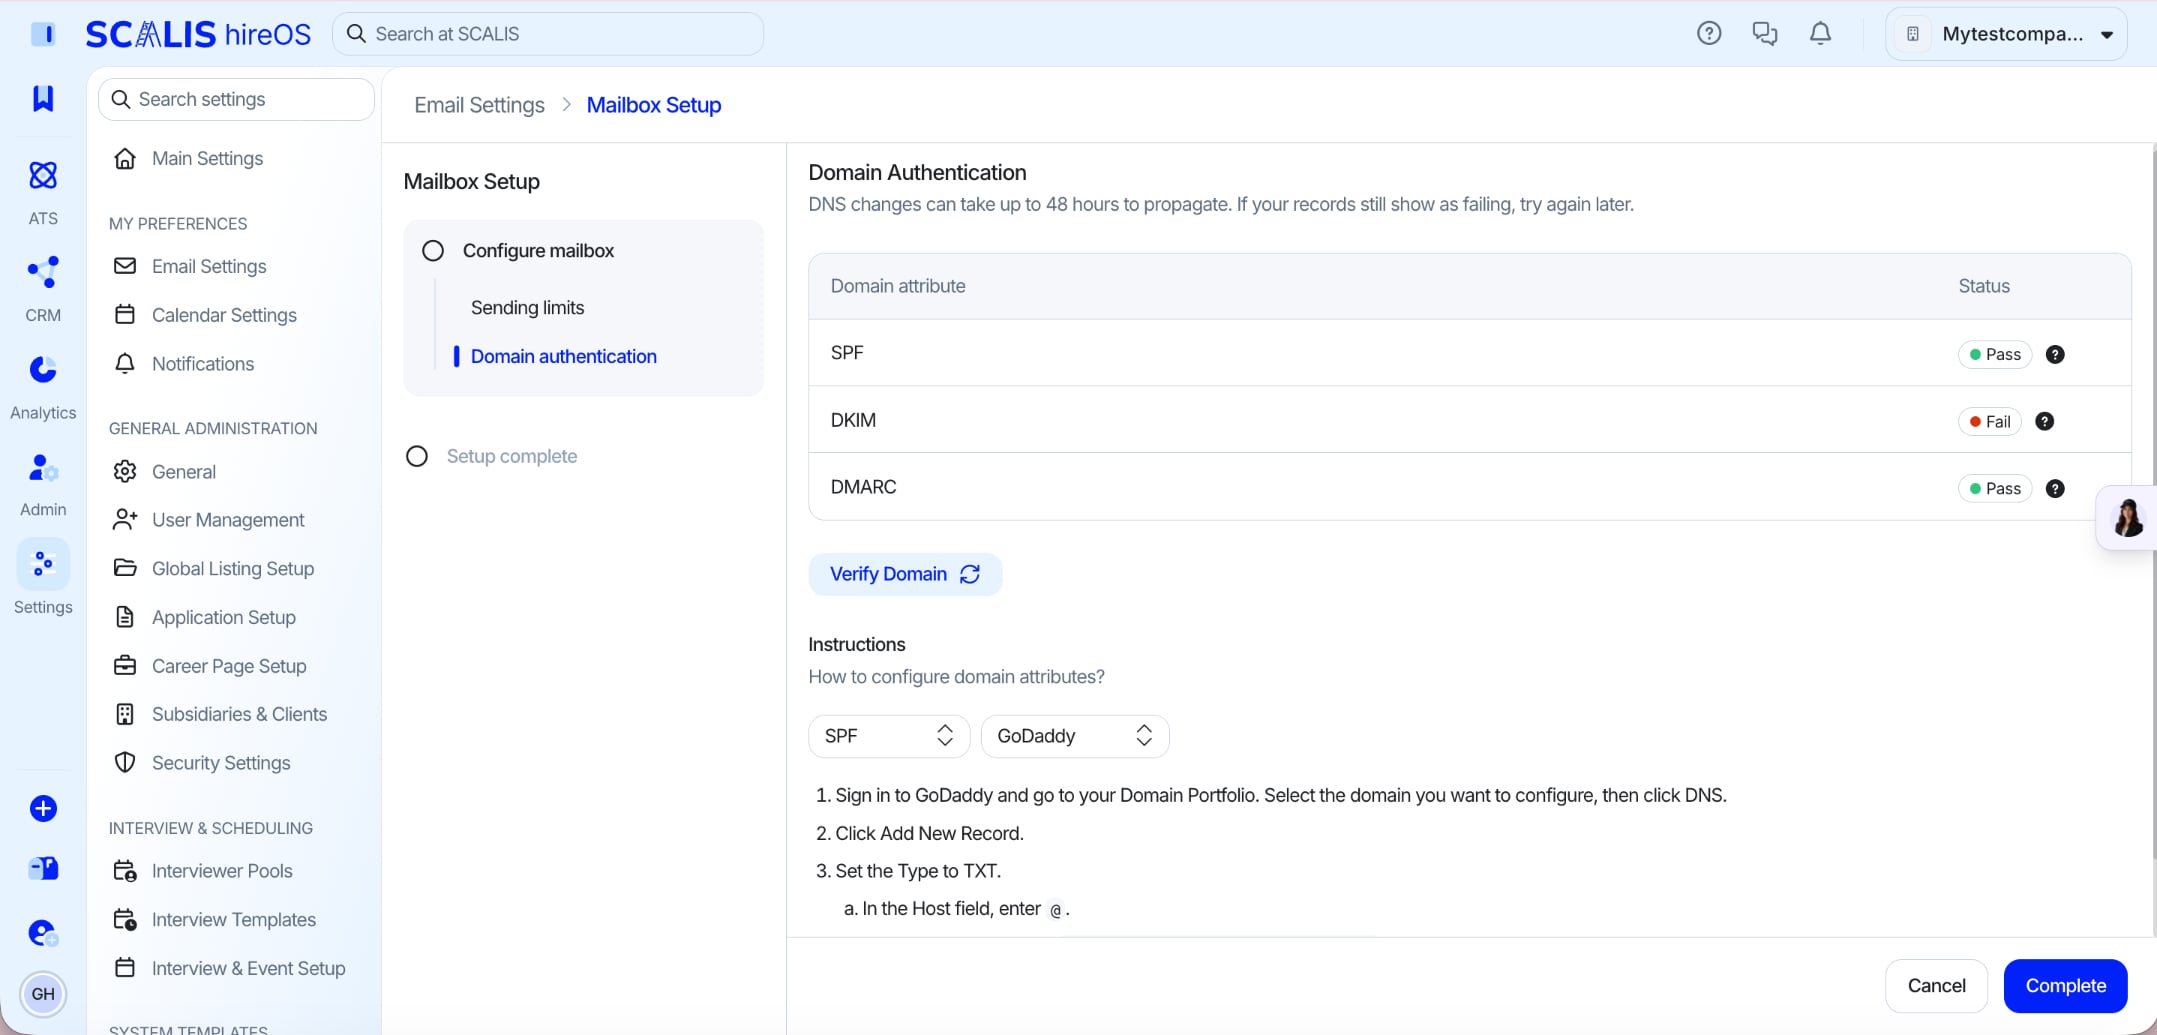
 
In Mailbox Setup, open the Domain authentication tab.
 
Click Verify Domain to pull the current status of each DNS record.
 
SCALIS checks three records and shows whether each is passing or still pending: SPF, DKIM, and DMARC on your sending domain.
 
For any missing record, follow the on-screen instructions to add it with your DNS provider (the example uses GoDaddy).
 
Re-run Verify Domain after adding records to confirm they're passing.
💡 Note: This isn't required to send email, but it's strongly recommended. It's a deliverability health check that makes sure your domain is properly authenticated.
The Domain authentication tab showing the SPF, DKIM, and DMARC records with passing/pending status and the Verify Domain button
The Domain authentication tab
 
4
Step 4
Open the Email Signatures tab

Create and manage email signatures for yourself and your company. Personal signatures allow individual customization, while company default signatures keep branding consistent across all users.
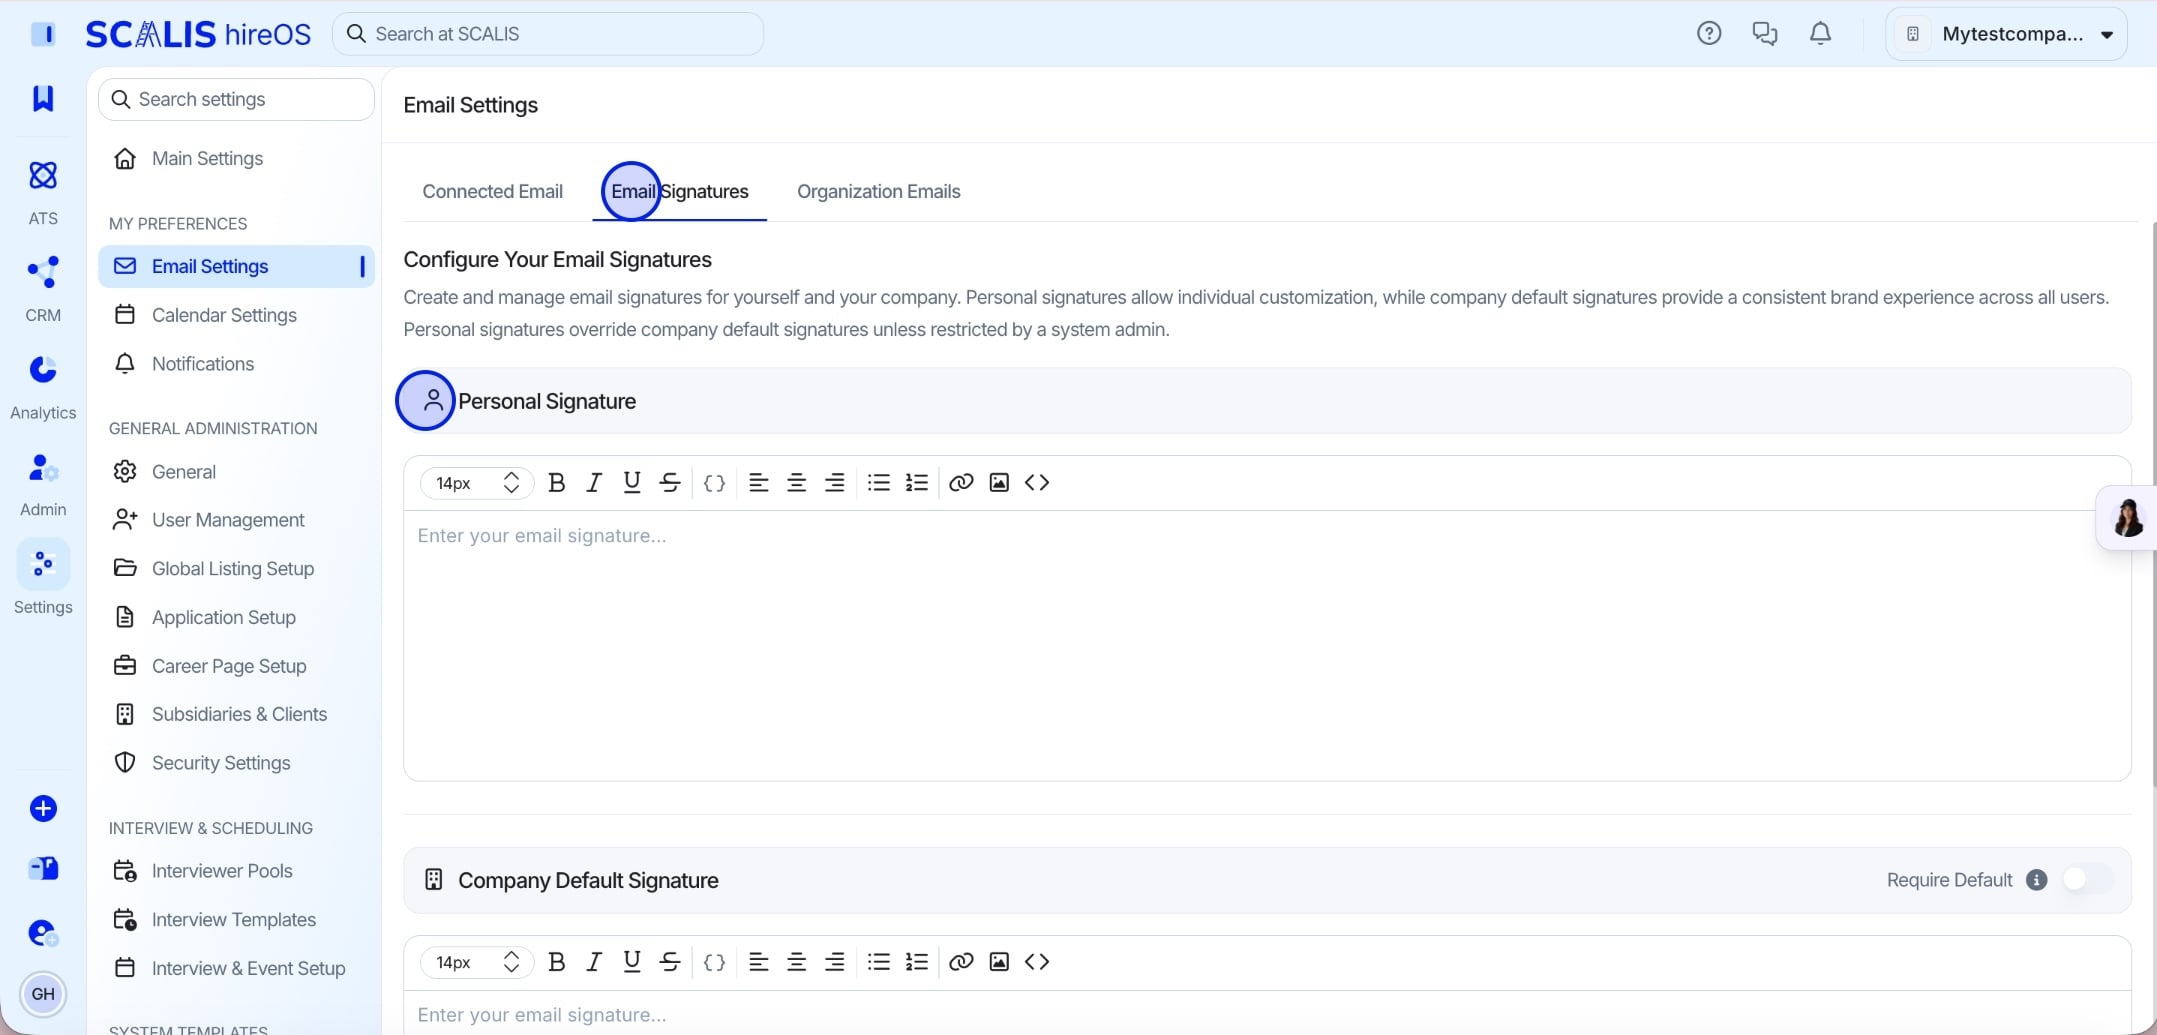
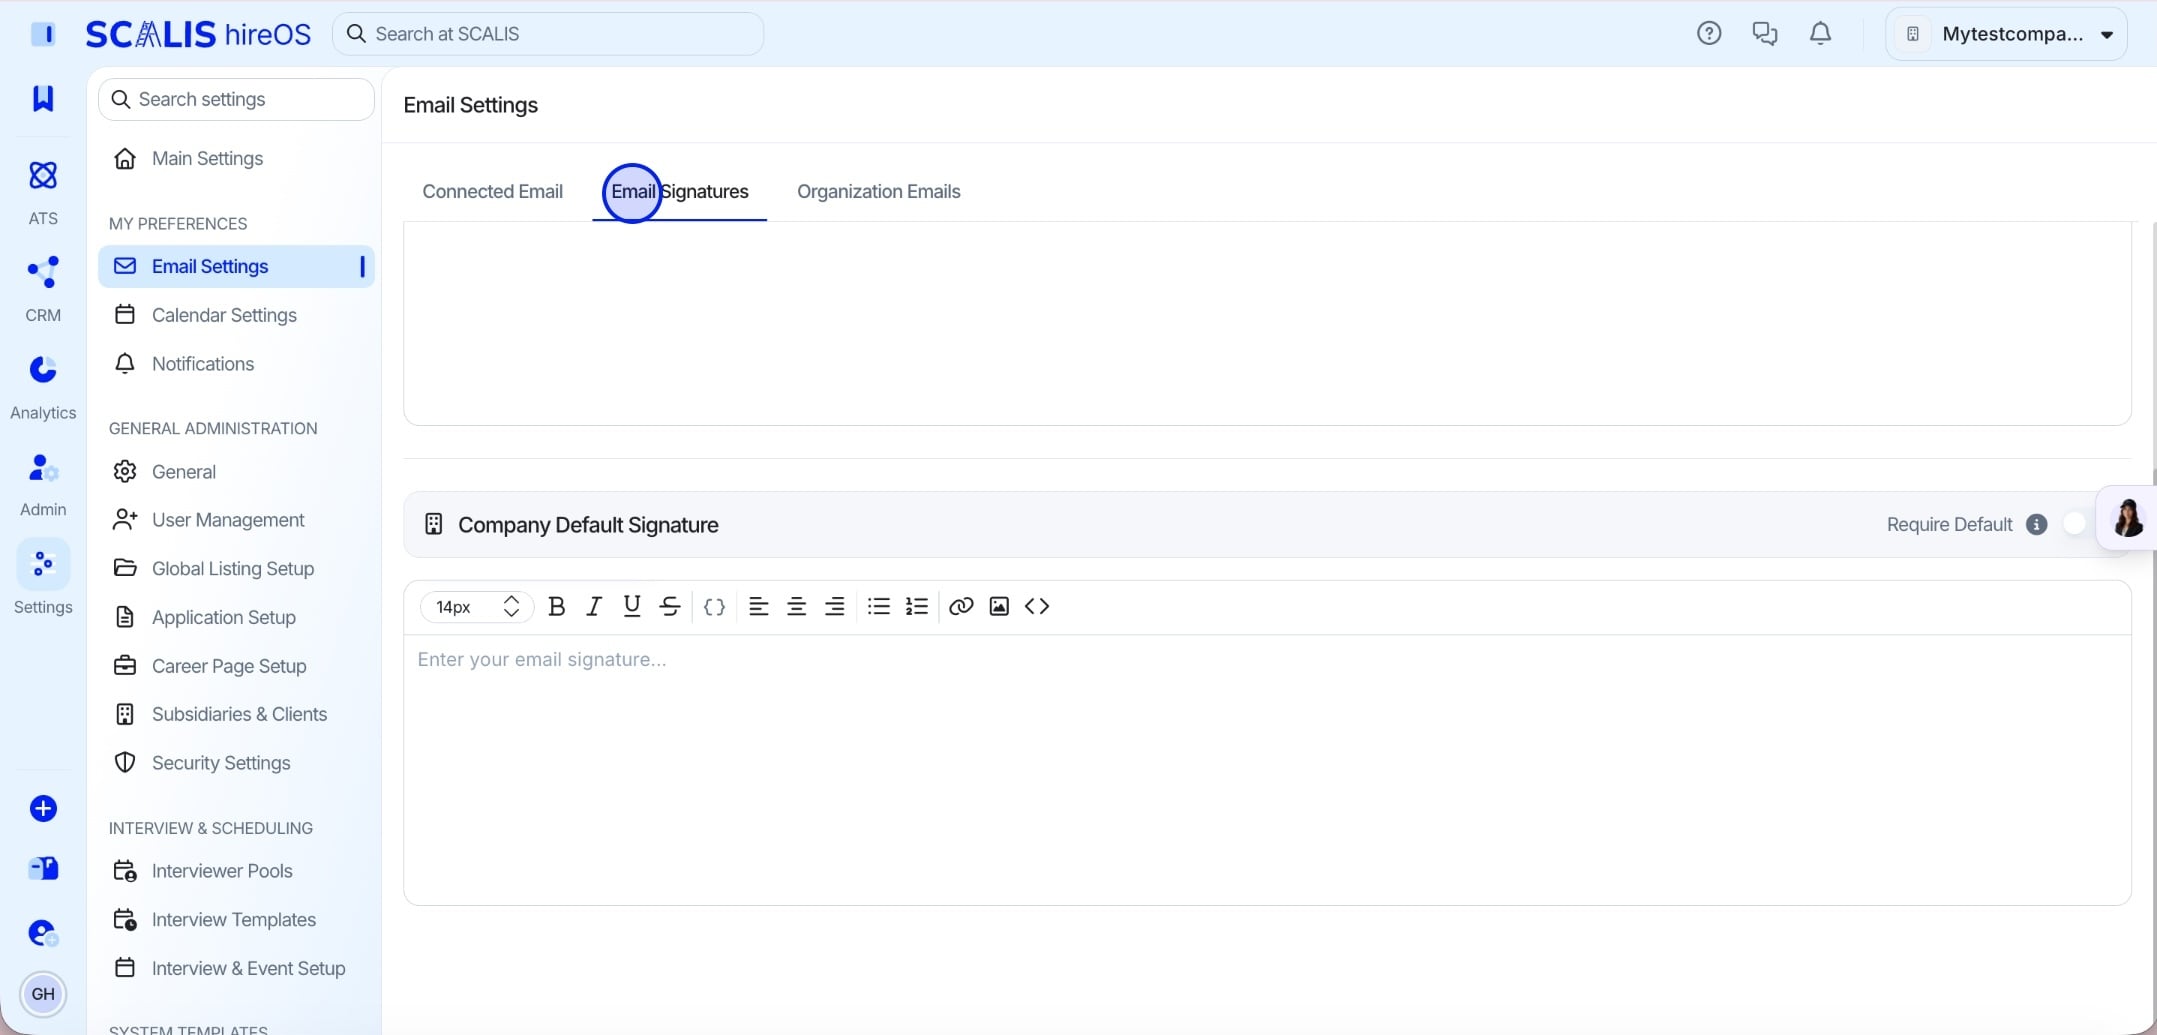
 
From Email Settings, go to the Email Signatures tab.
The Email Signatures tab
The Email Signatures tab in Email Settings
 
5
Step 5
Add your personal signature
 
Enter your personal signature in the editor.
 
Personal signatures override the company default signature unless a system admin restricts them.
Adding a personal email signature
 
6
Step 6
Add a company default signature
 
Add a company default signature for your organization workspace.
 
This gives every user a consistent, on-brand signature out of the box.
💡 Note: To display a signature in an email, insert the signature token. Find it by clicking the Token button ( { } ) under My Information.
Adding a company default email signature
Final Step
Manage your Organization Emails

The Organization Emails tab is where admins set the company-wide default sender and manage every connected team mailbox in one place.
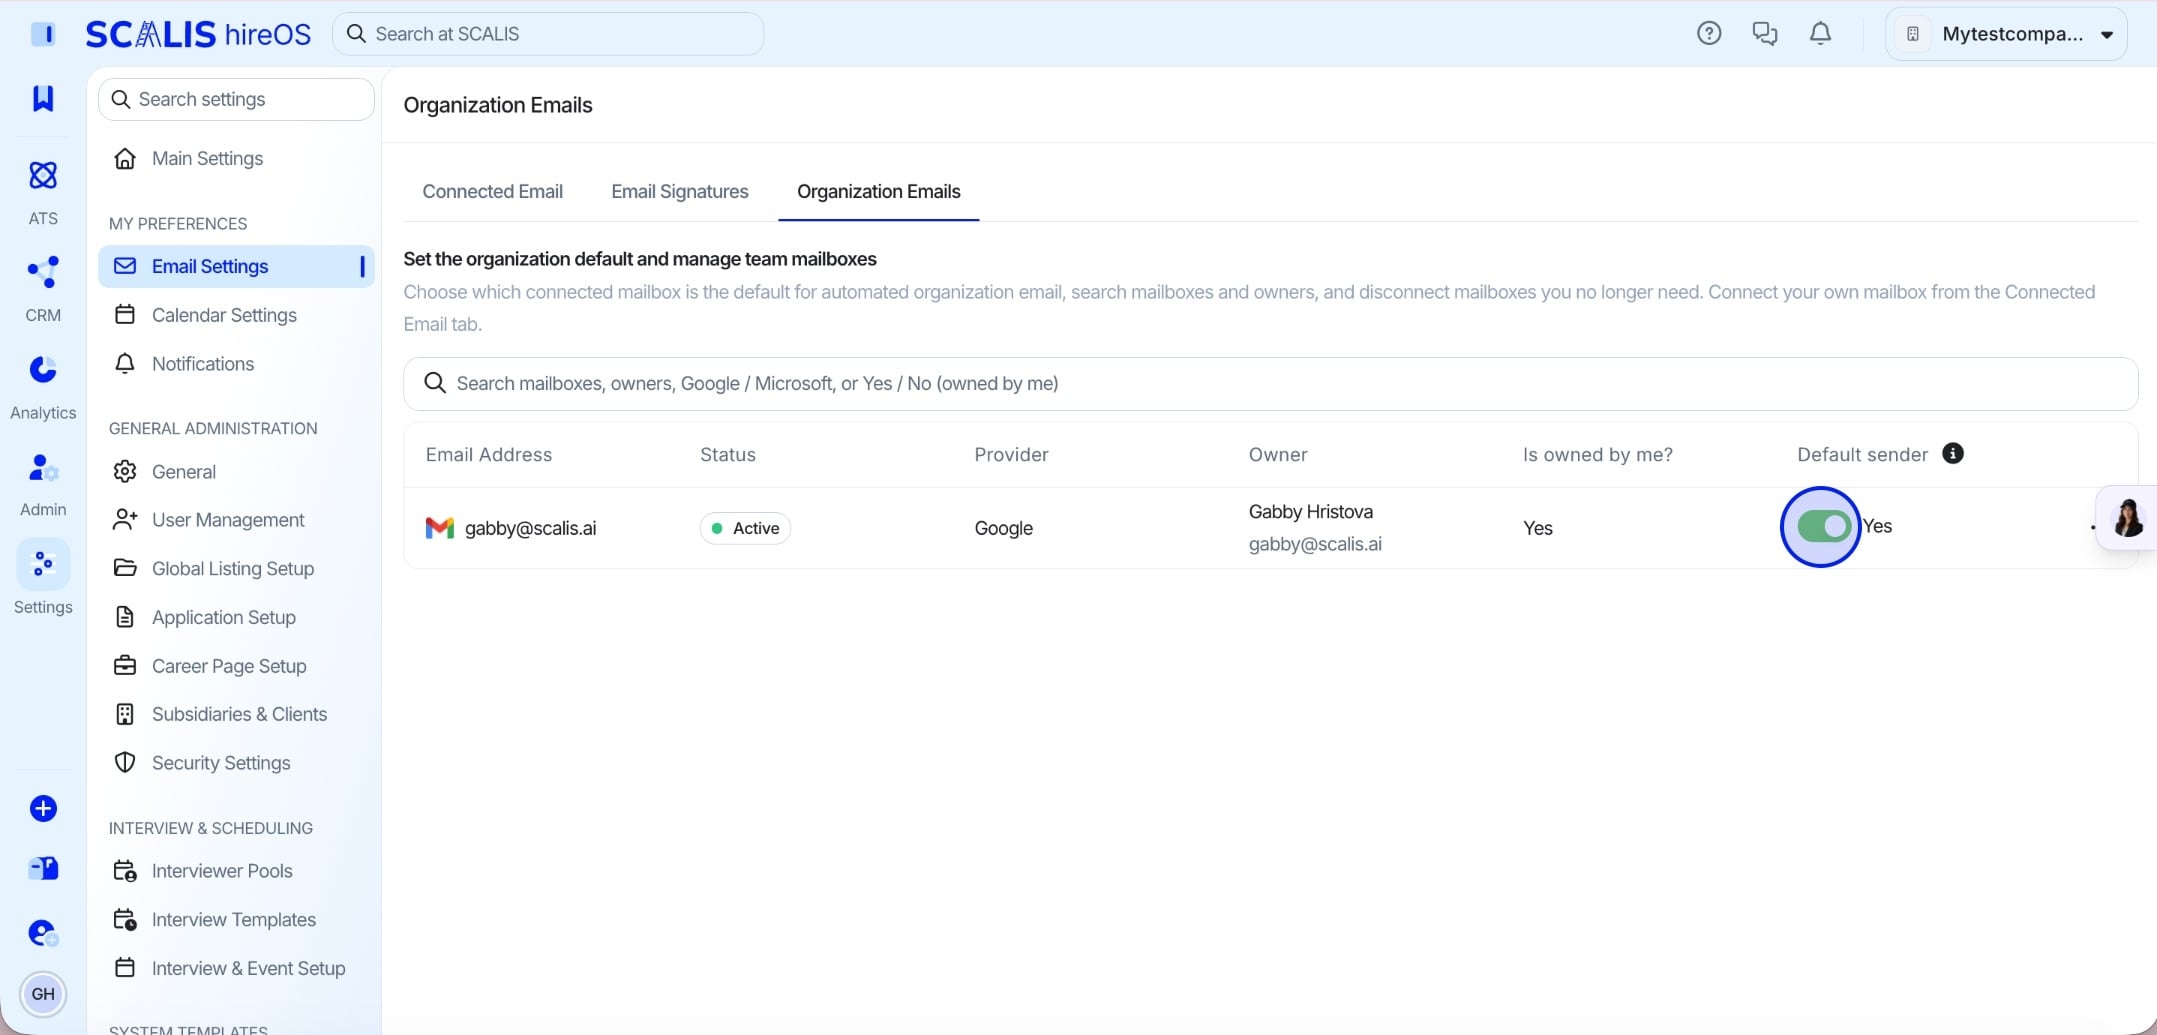
 
Open the Organization Emails tab in Email Settings.
 
Review every connected mailbox. Each row shows the Email Address, Status, Provider, and Owner.
 
Use the Default sender toggle to choose which connected mailbox sends automated organization email.
 
Manage individual inboxes from the row's ••• menu.
 
Turn an inbox on or off, or disconnect any mailbox you no longer need.
 
Use the search bar to filter by mailbox, owner, provider (Google / Microsoft), or ownership (Yes / No).
💡 Note: Connect your own mailbox first on the Connected Email tab, it will then appear here for management.
The Organization Emails tab showing the mailbox table with columns for Email Address, Status, Provider, Owner, Is owned by me?, and the Default sender toggle
The Organization Emails tab in Email Settings

That's it! Your email is connected, branded, and authenticated, so you're ready to send from SCALIS with confidence. Reach out to your customer success manager any time you need a hand.