.png?width=1391&height=437&name=SCALIS%20Logo%20(1).png)
CANDIDATE MANAGEMENT
Tailor your candidate upload experience by displaying the fields that matter most to your team. You can easily add custom fields to the Upload Candidate drawer by following the steps below.
4 steps3 min read
1
Step 1
Create or Edit a Custom Field
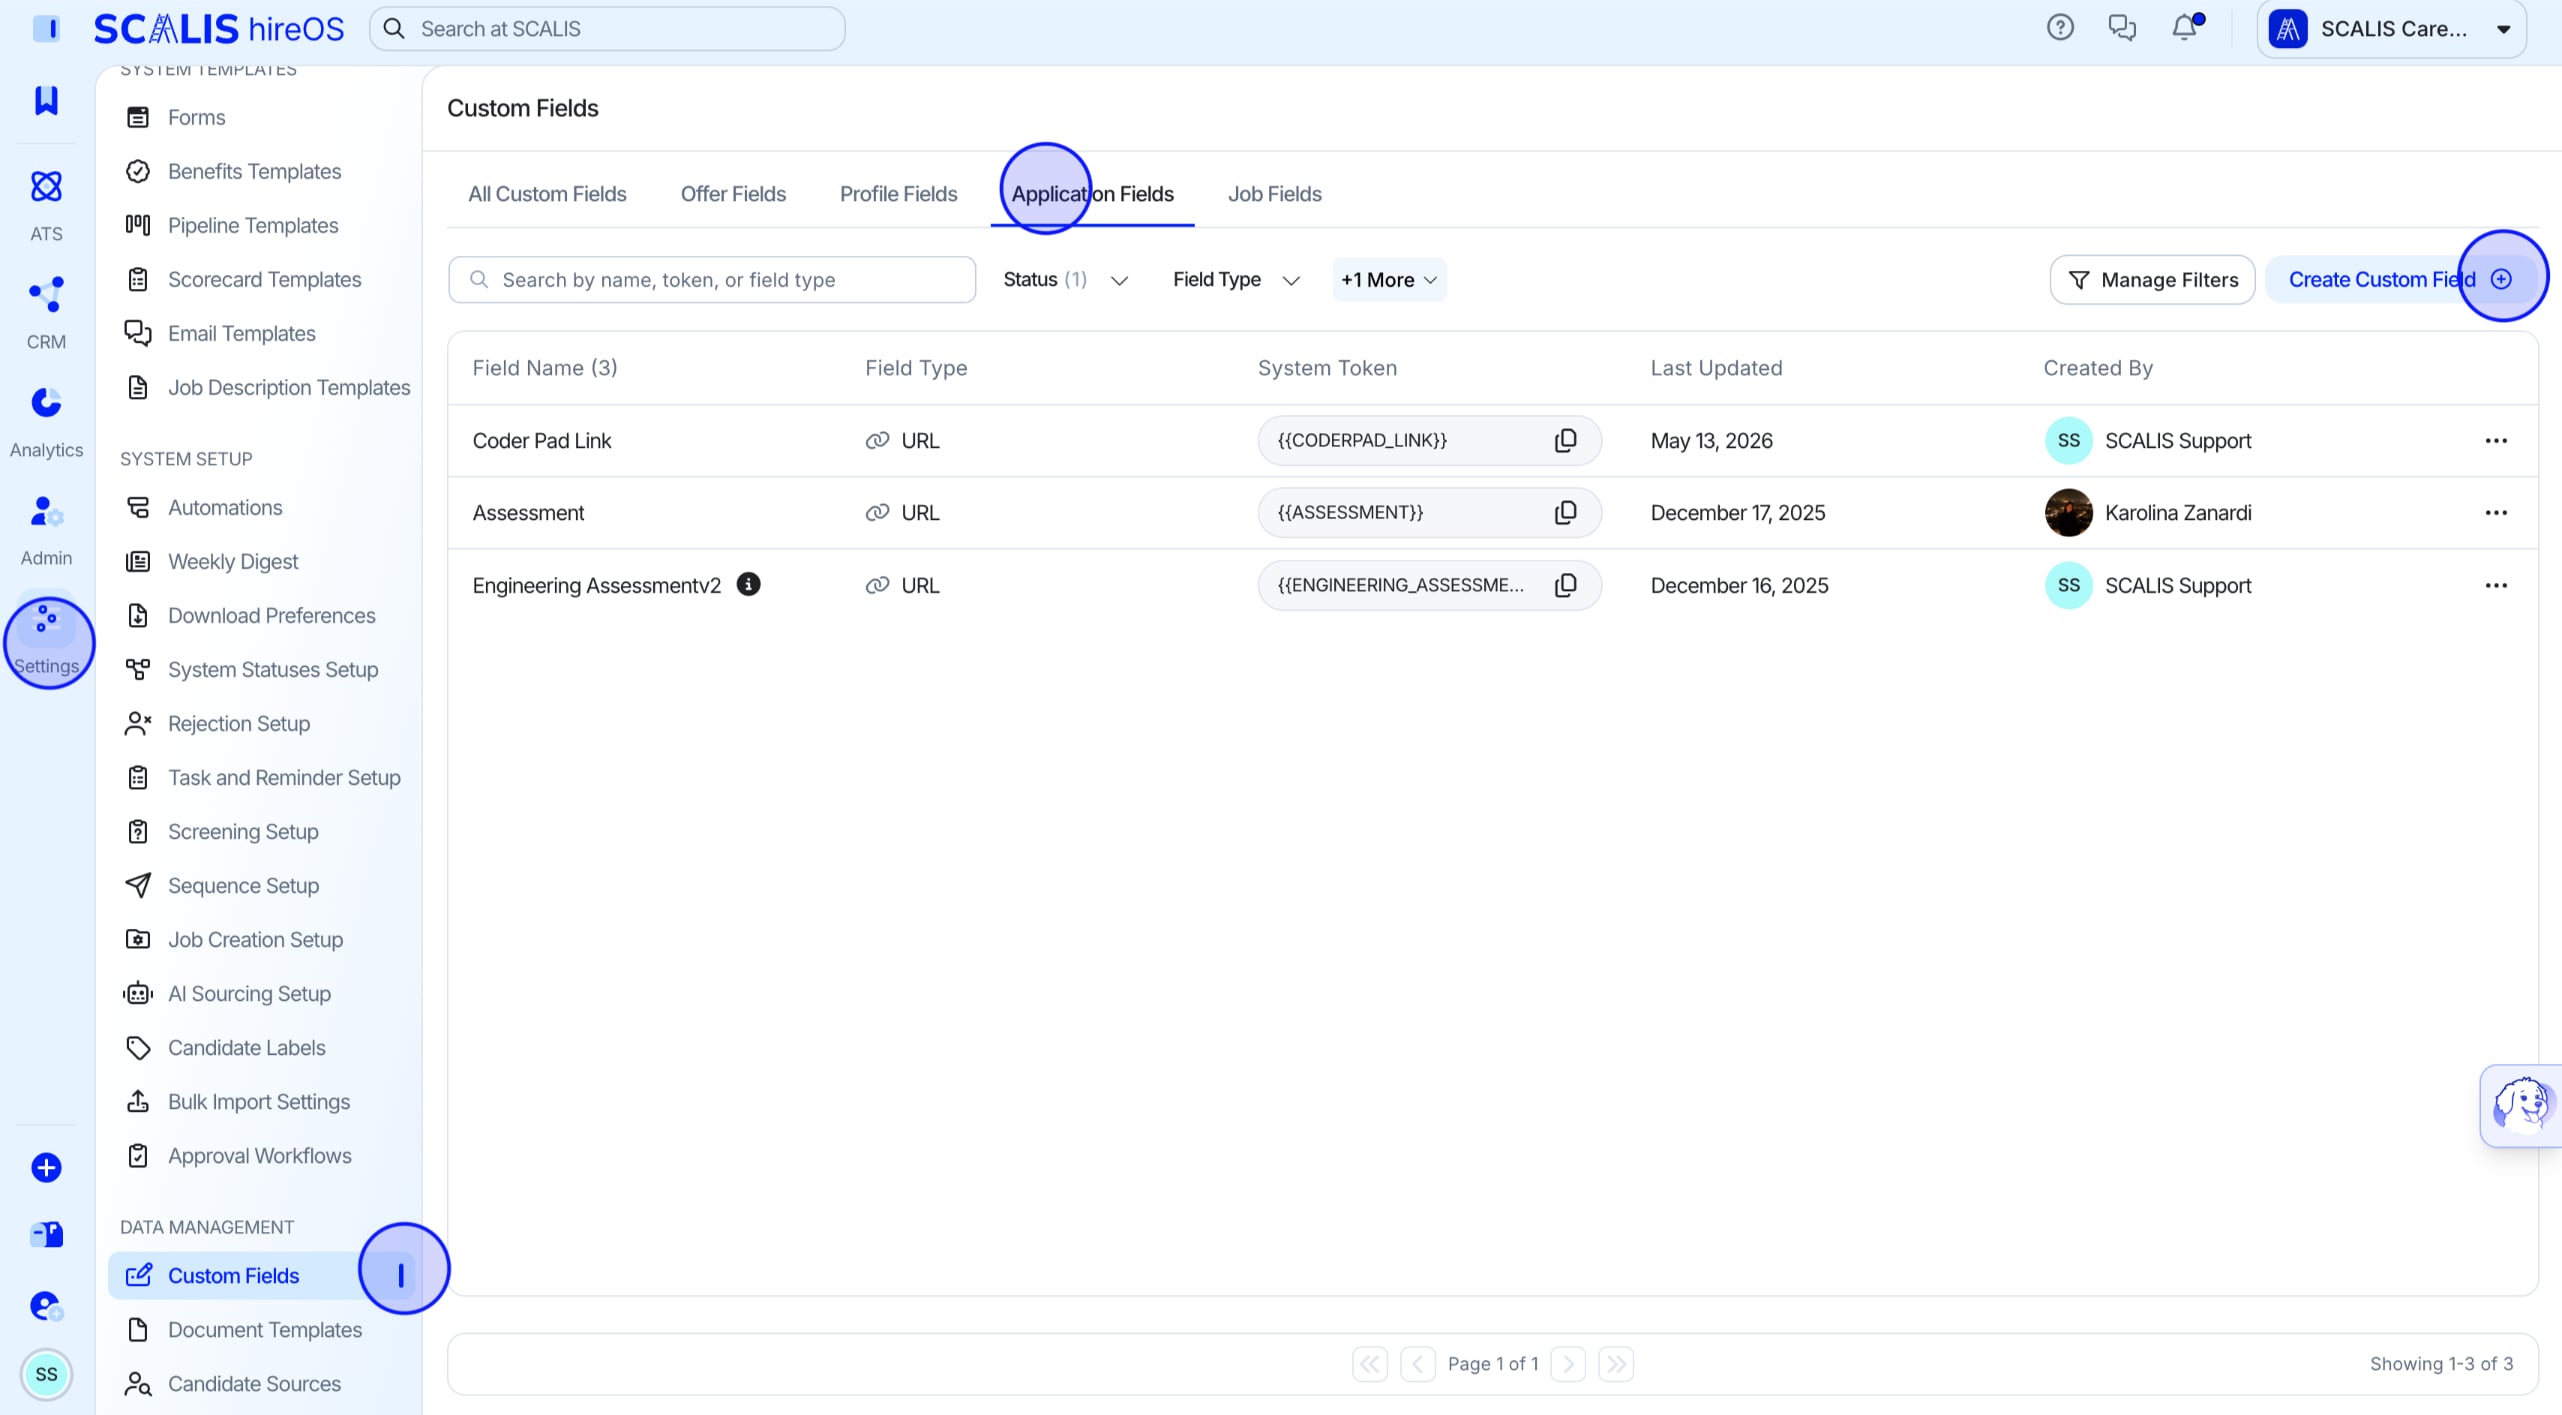
Navigate to your Company Settings.
Go to Custom Fields.
Select between the field type you want to create (Profile Fields or Application Fields).
Select Create Field.
💡 Note: Only Custom Profile Fields or Custom Application Fields can be added to the Upload Process.
2
Step 2
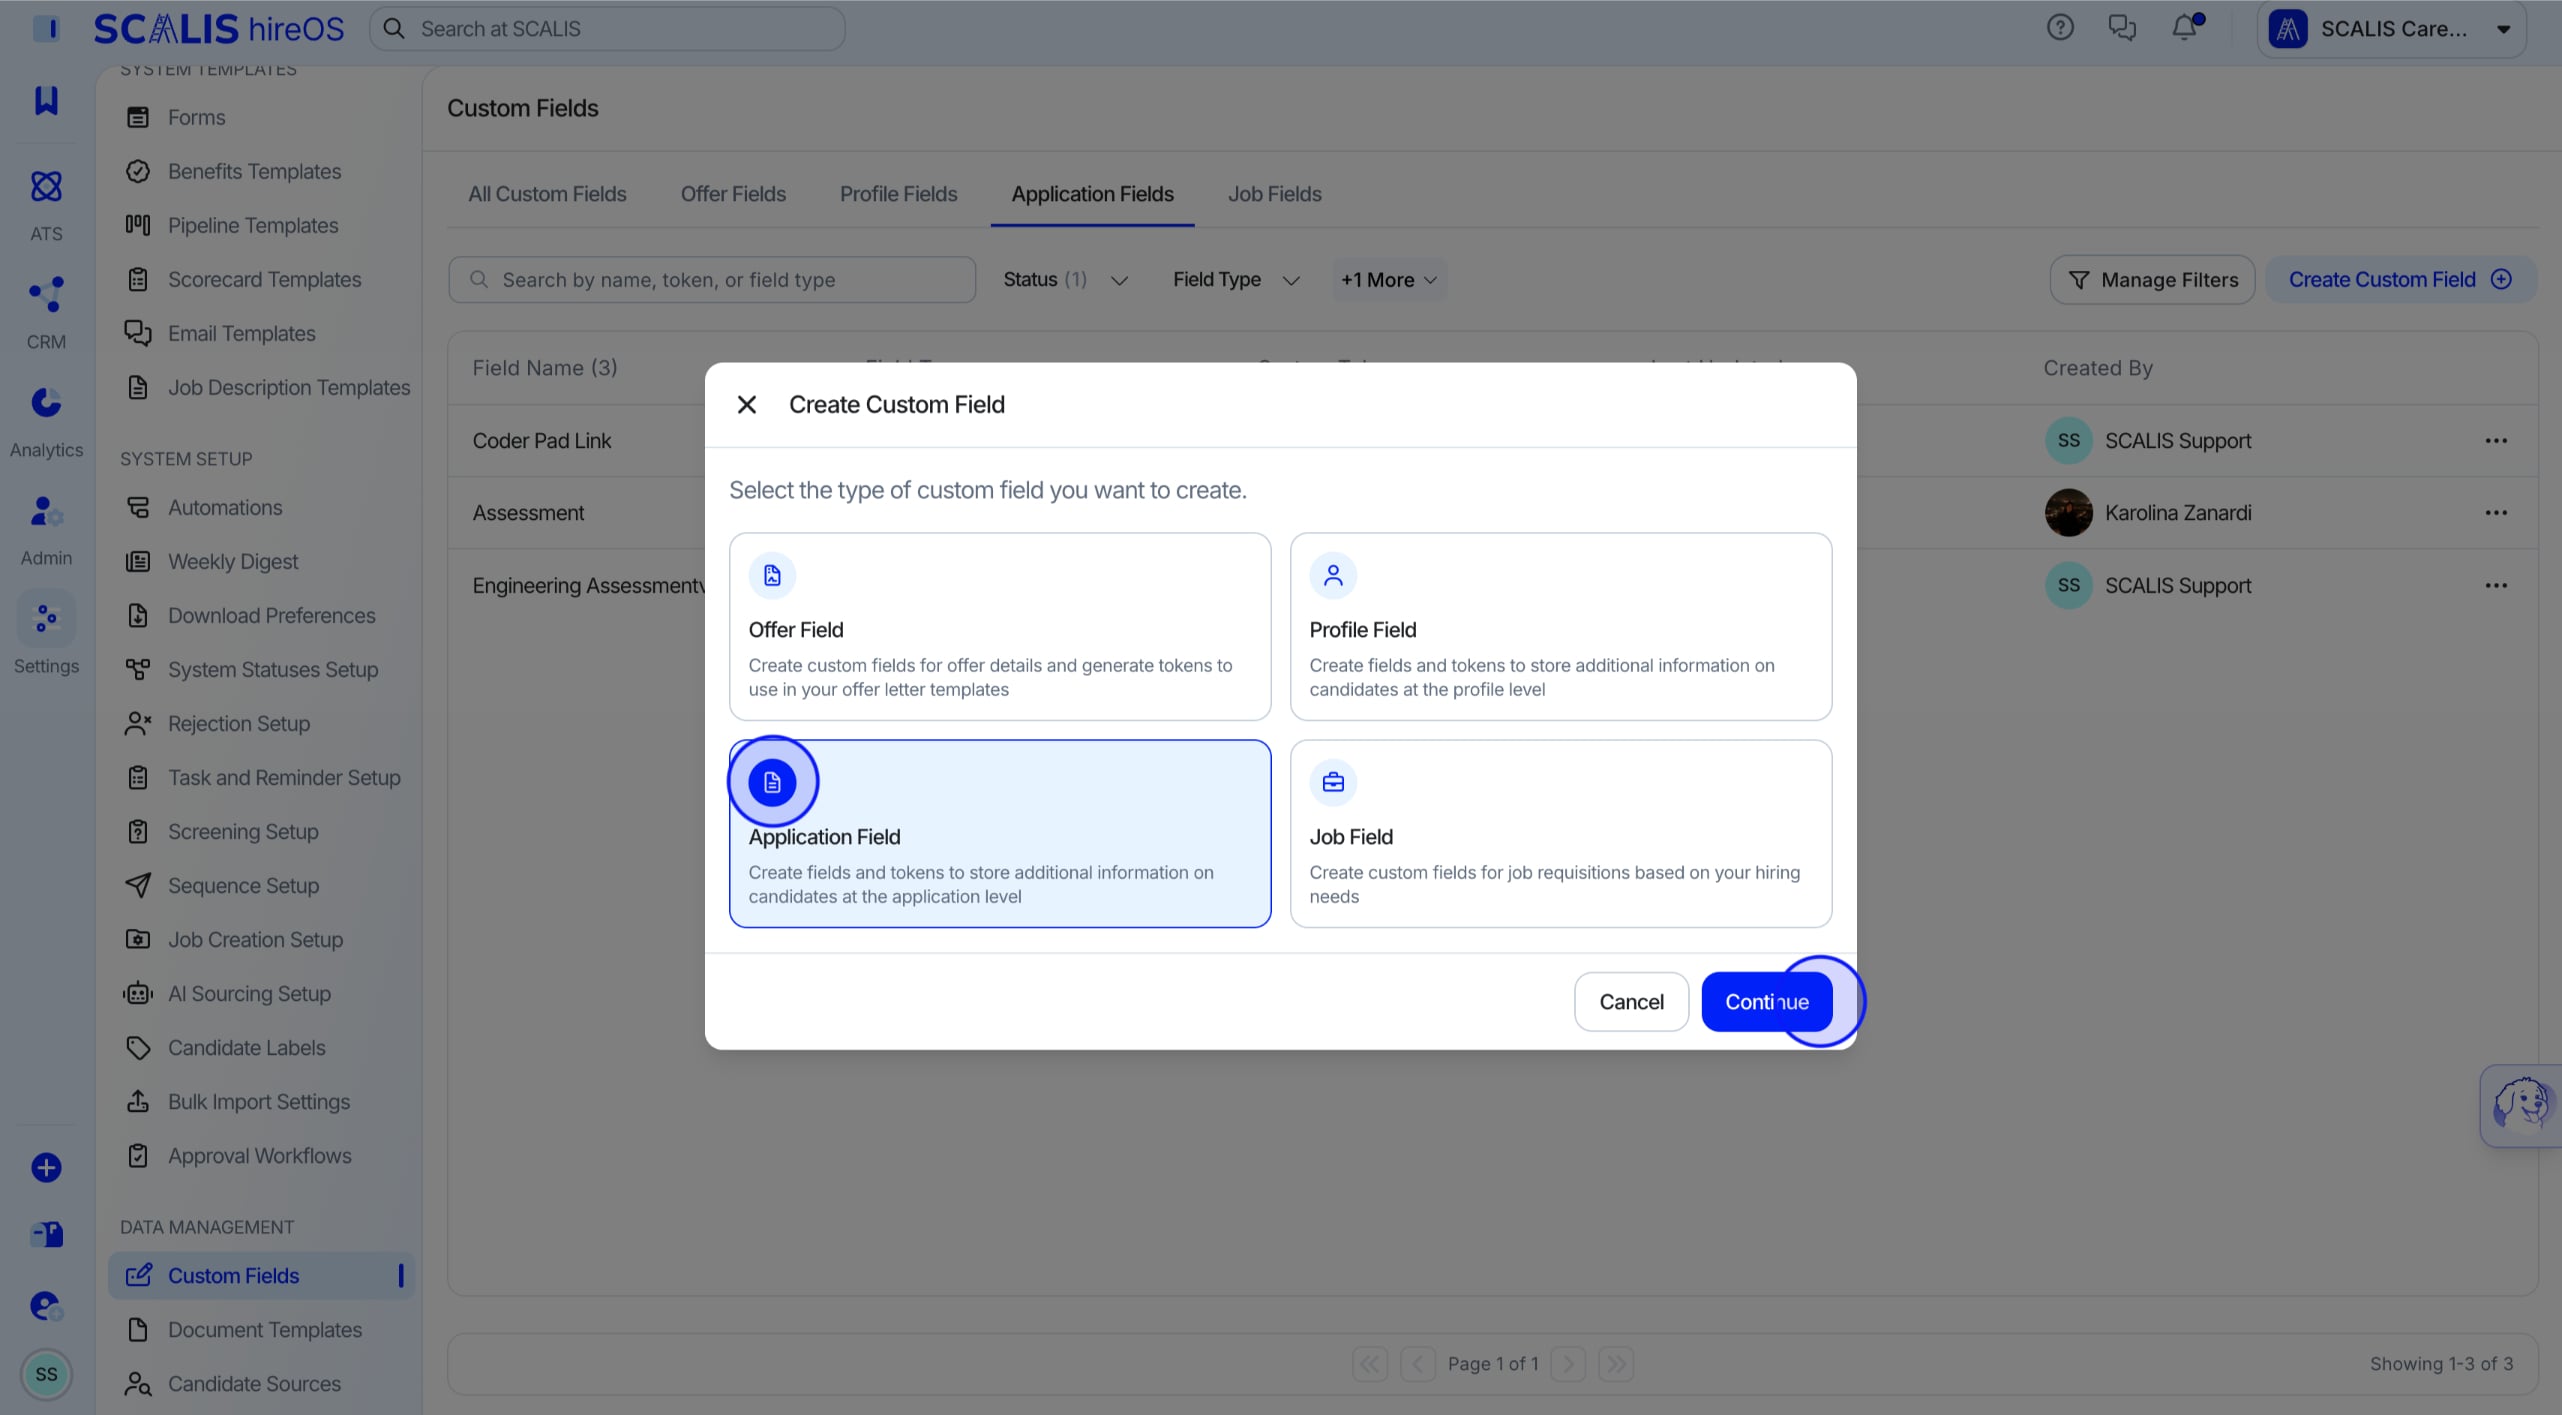
Select Application Field
A popup will appear. Select Application Field.
3
Step 3
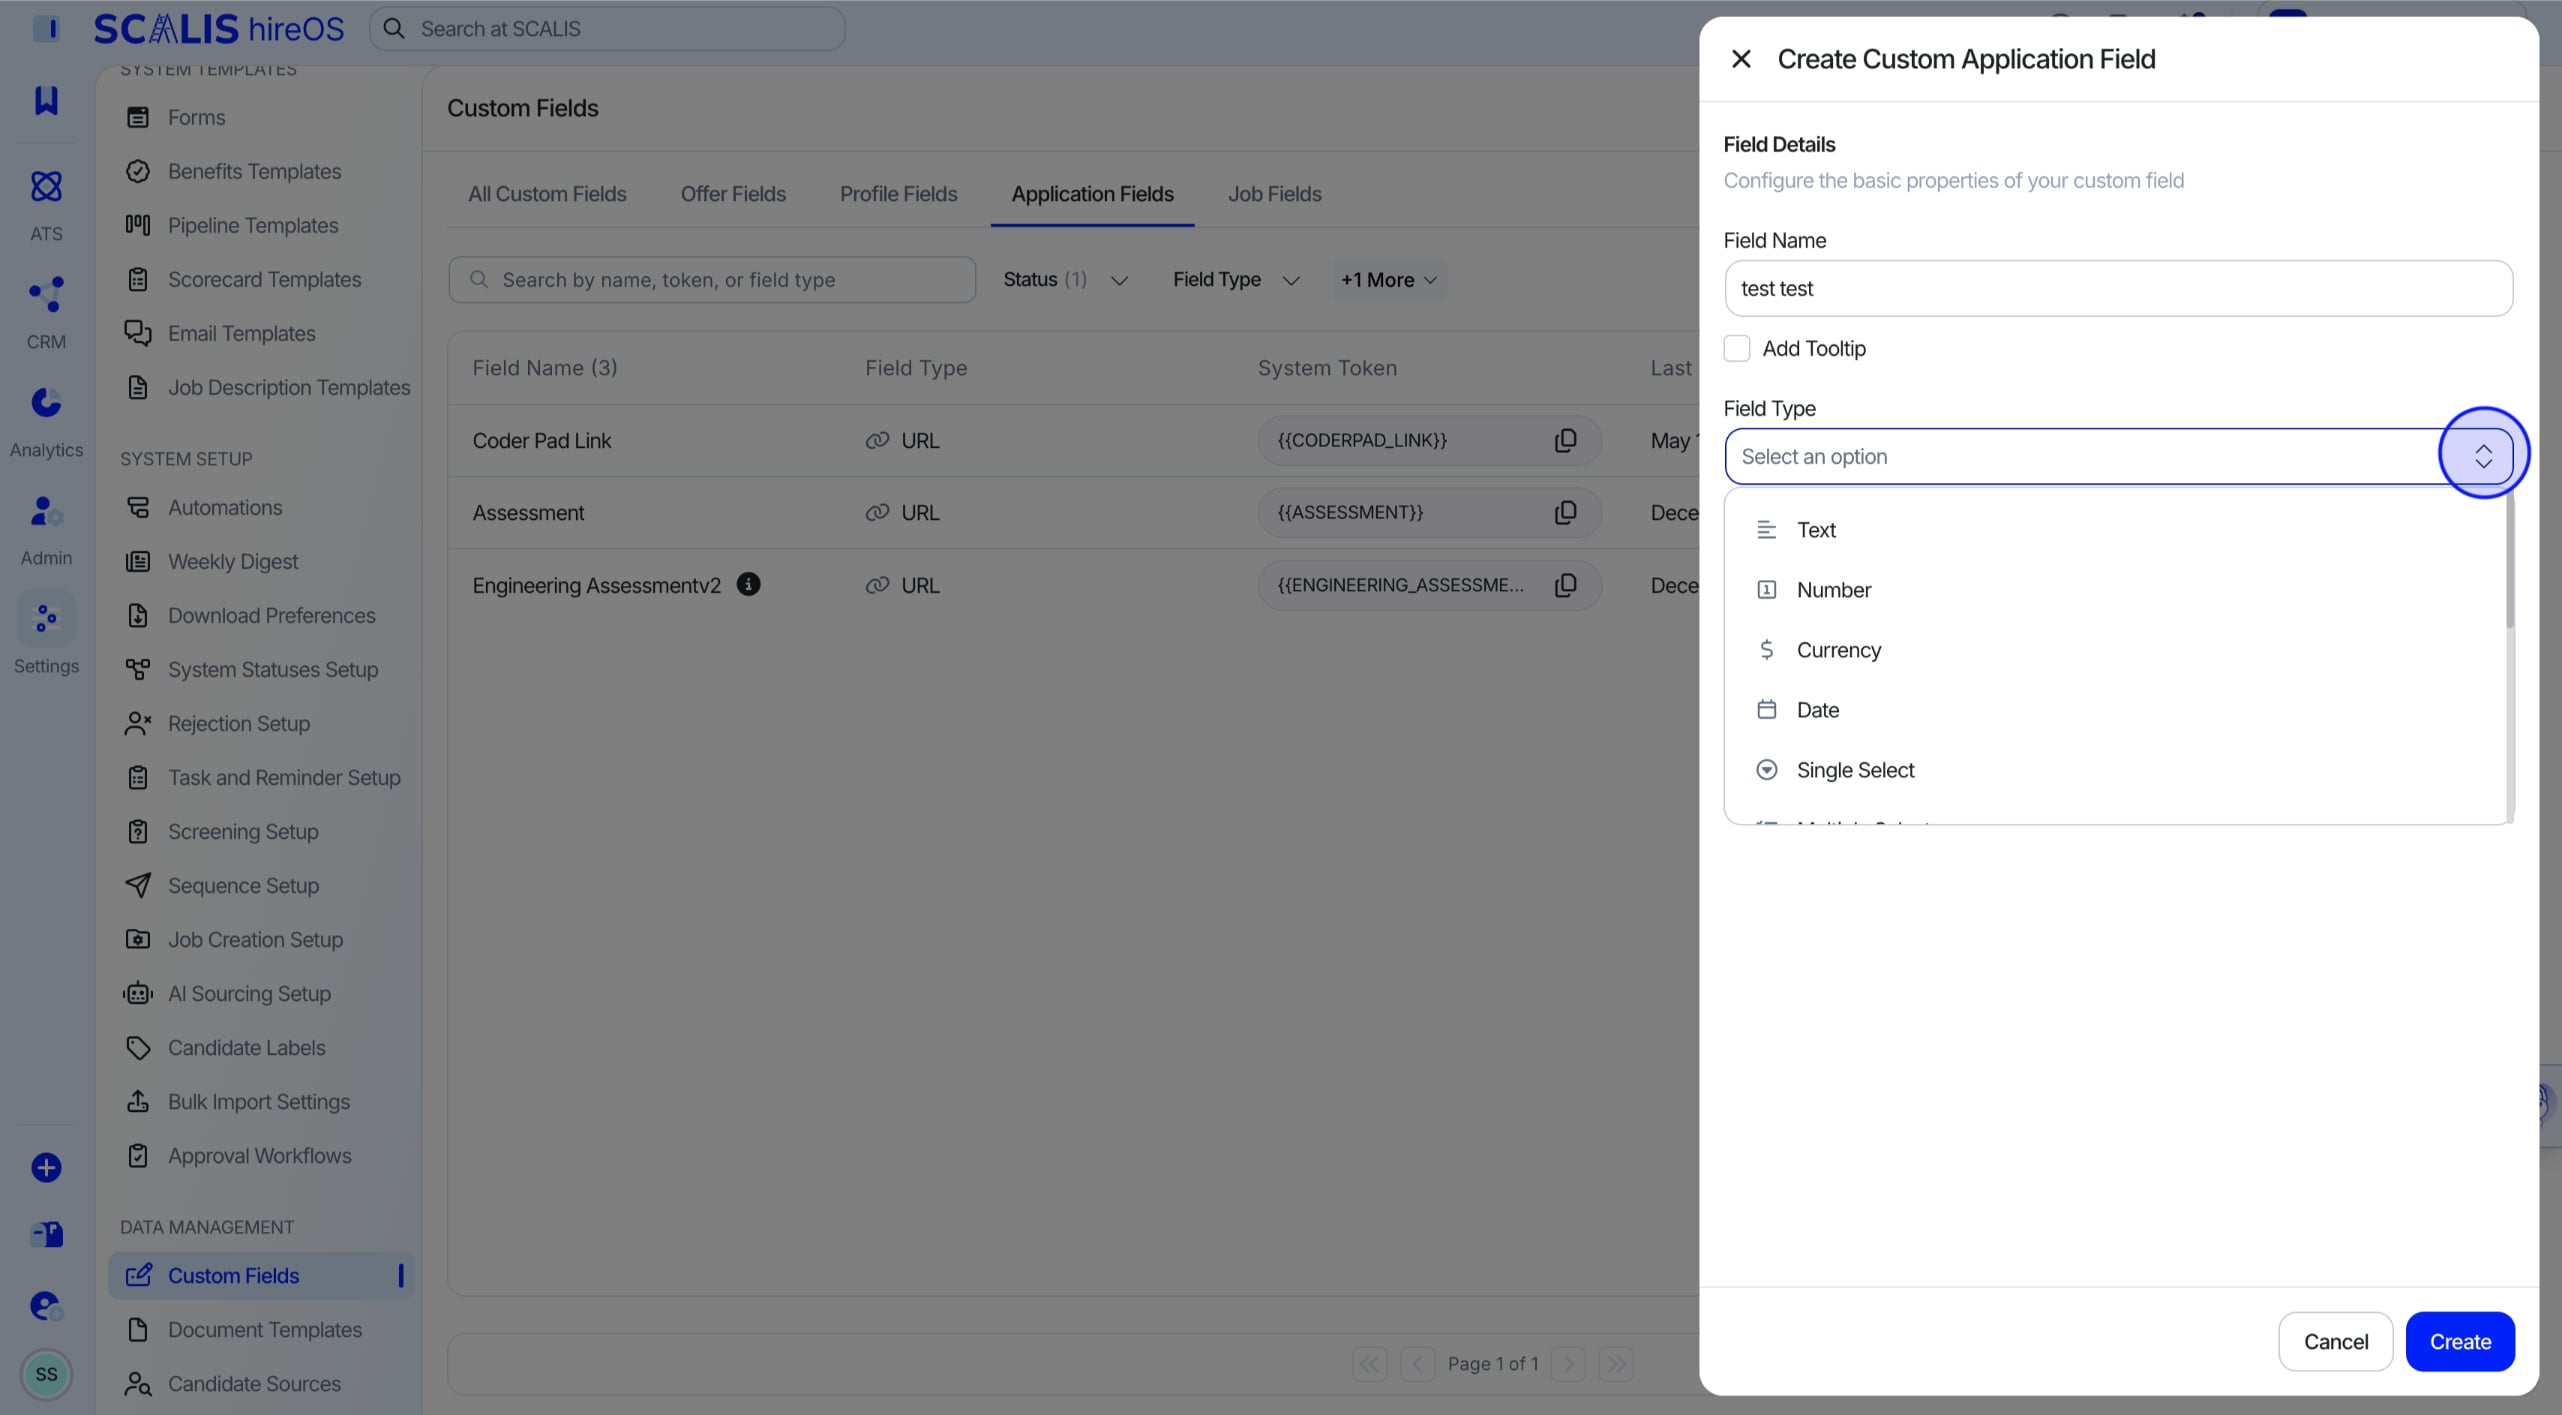
Add the Type of Field
Choose the data type for the field, such as text, dropdown, or date.
✓
Final Step
Enable the Field in the Upload Candidate Drawer
Under the Upload Candidate section, check the options you want:
Show when uploading candidates, to display the field in the drawer.
Require when uploading candidates, to make the field mandatory during upload (optional).
Select Save to apply your changes.
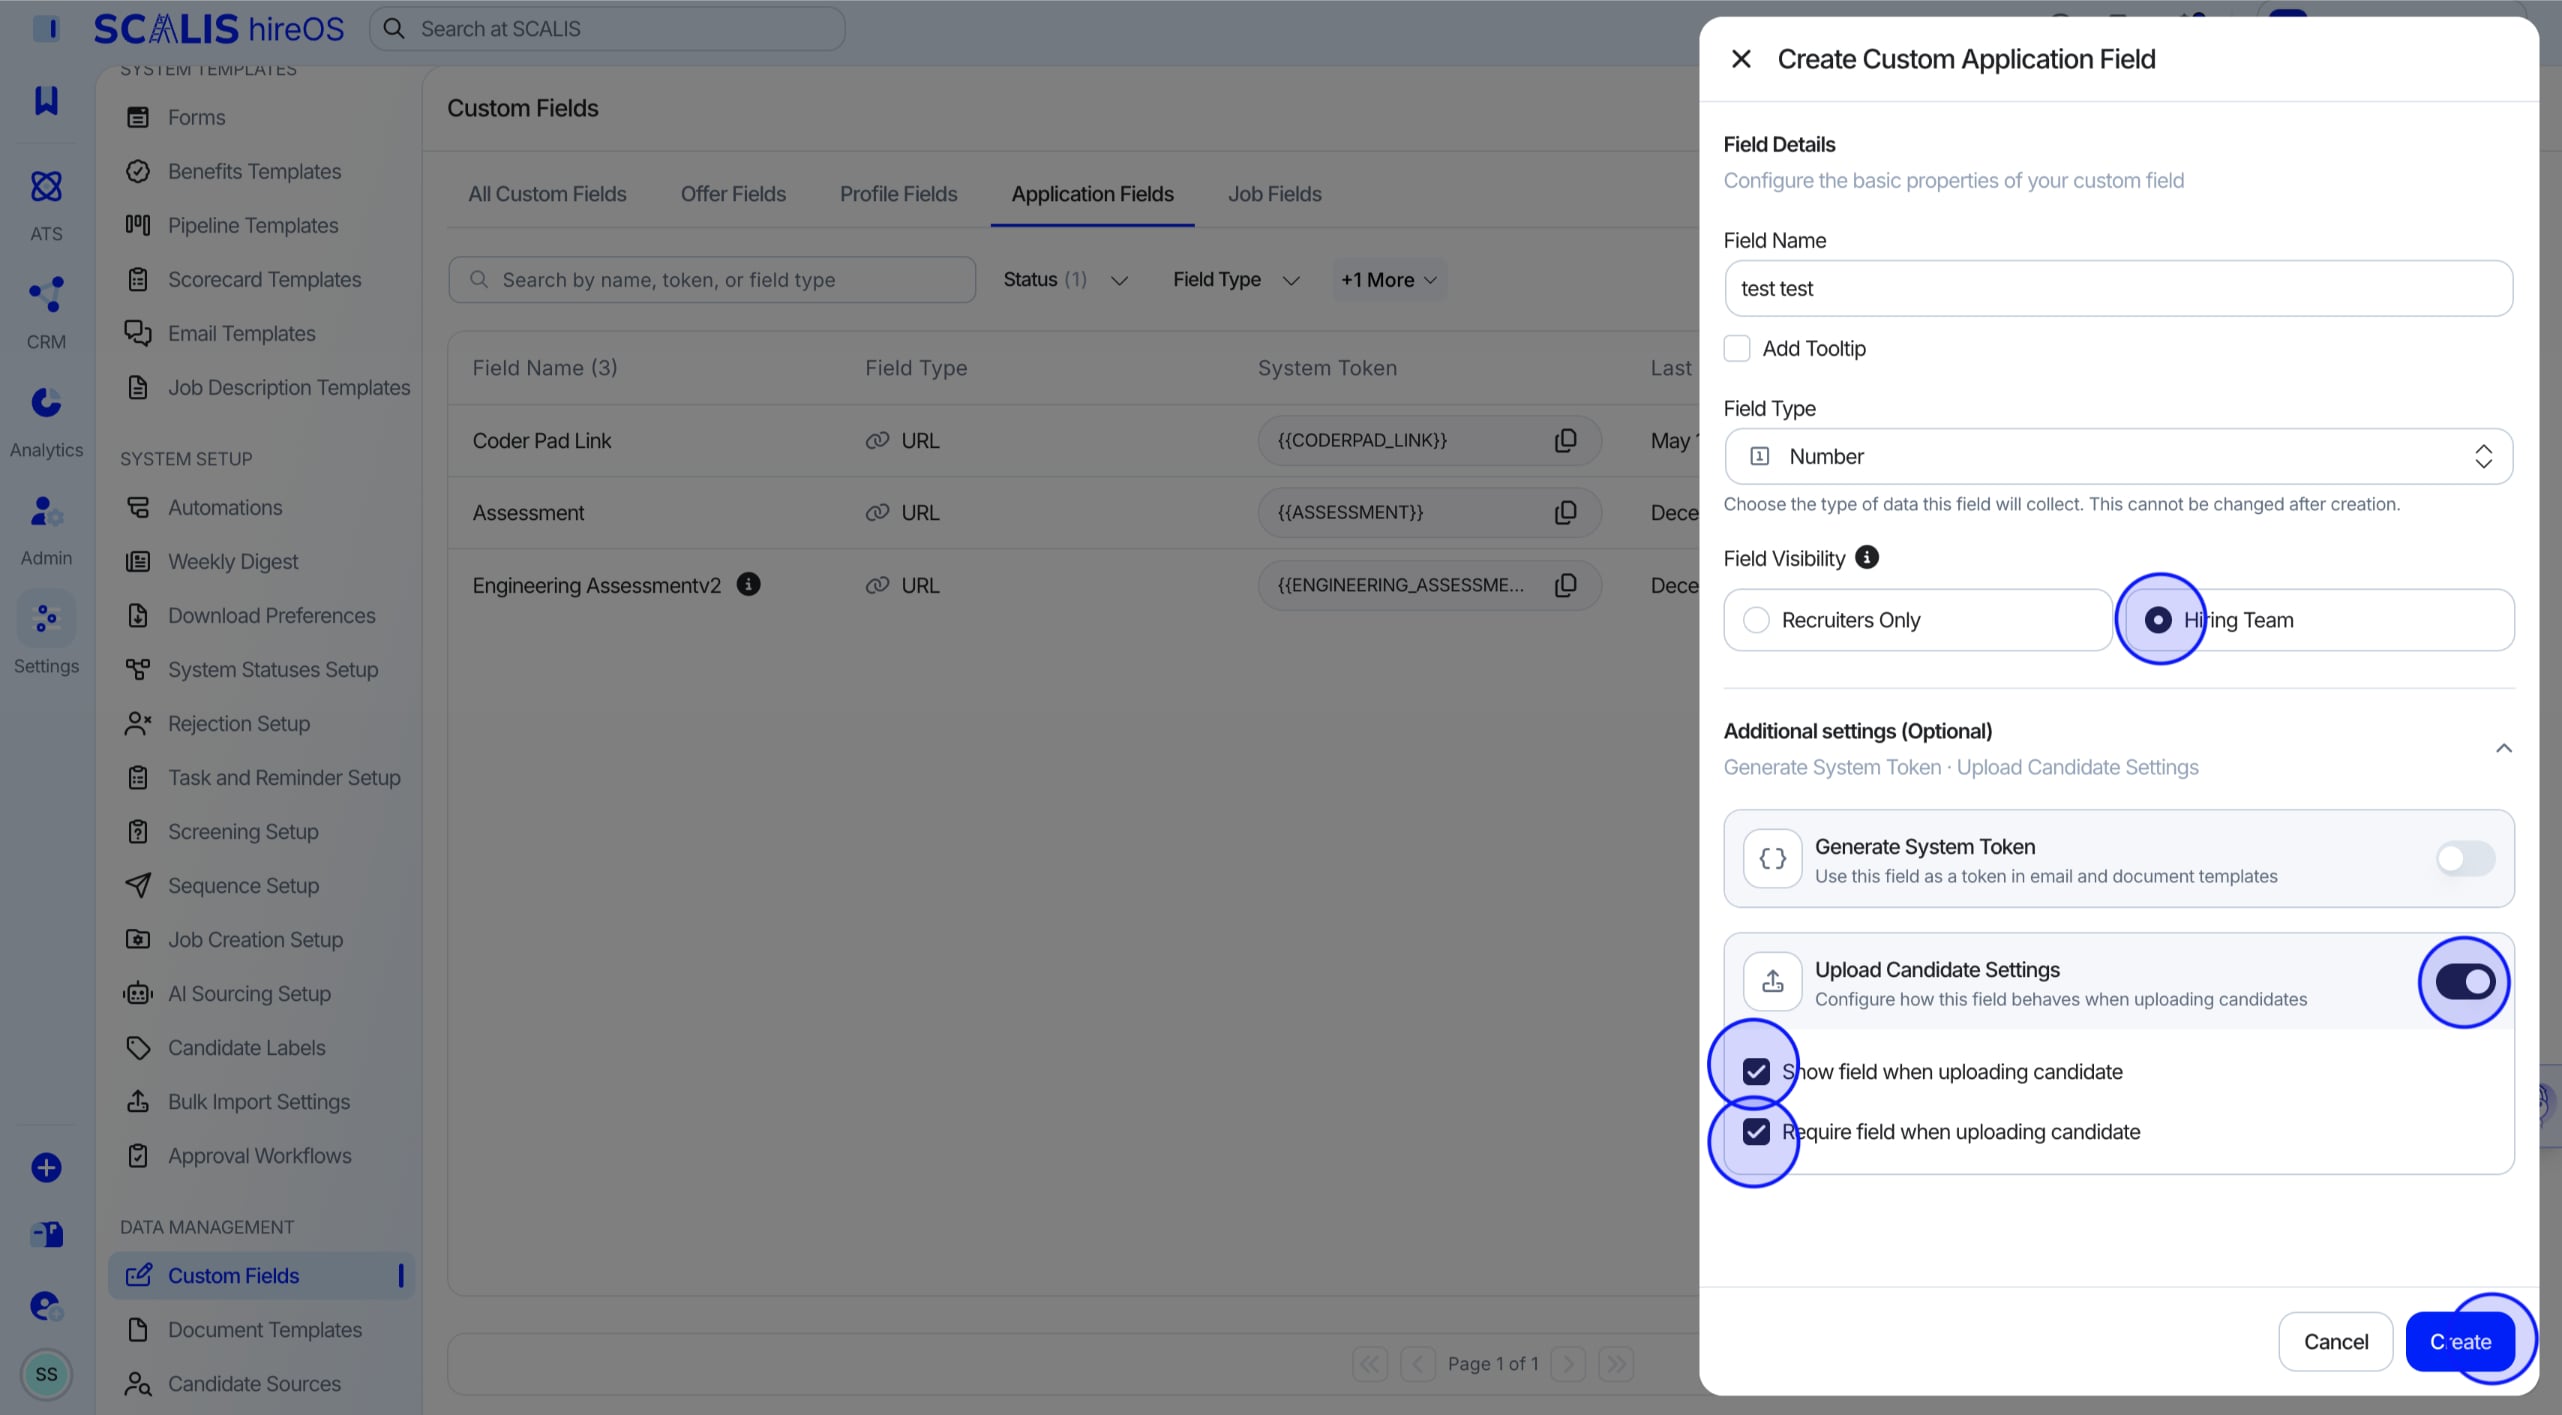
Once saved, the field will appear the next time you or a teammate uploads a candidate, making sure key information is captured upfront.