.png?width=1391&height=437&name=SCALIS%20Logo%20(1).png)
JOB SETUP
Ensure branding consistency by creating shared, reusable content for your job descriptions, like company overviews, mission statements, and DEI language, and set up general screening questions for all job listings.
3 sections13 steps
Global Listing Statements Setup
1
Step 1
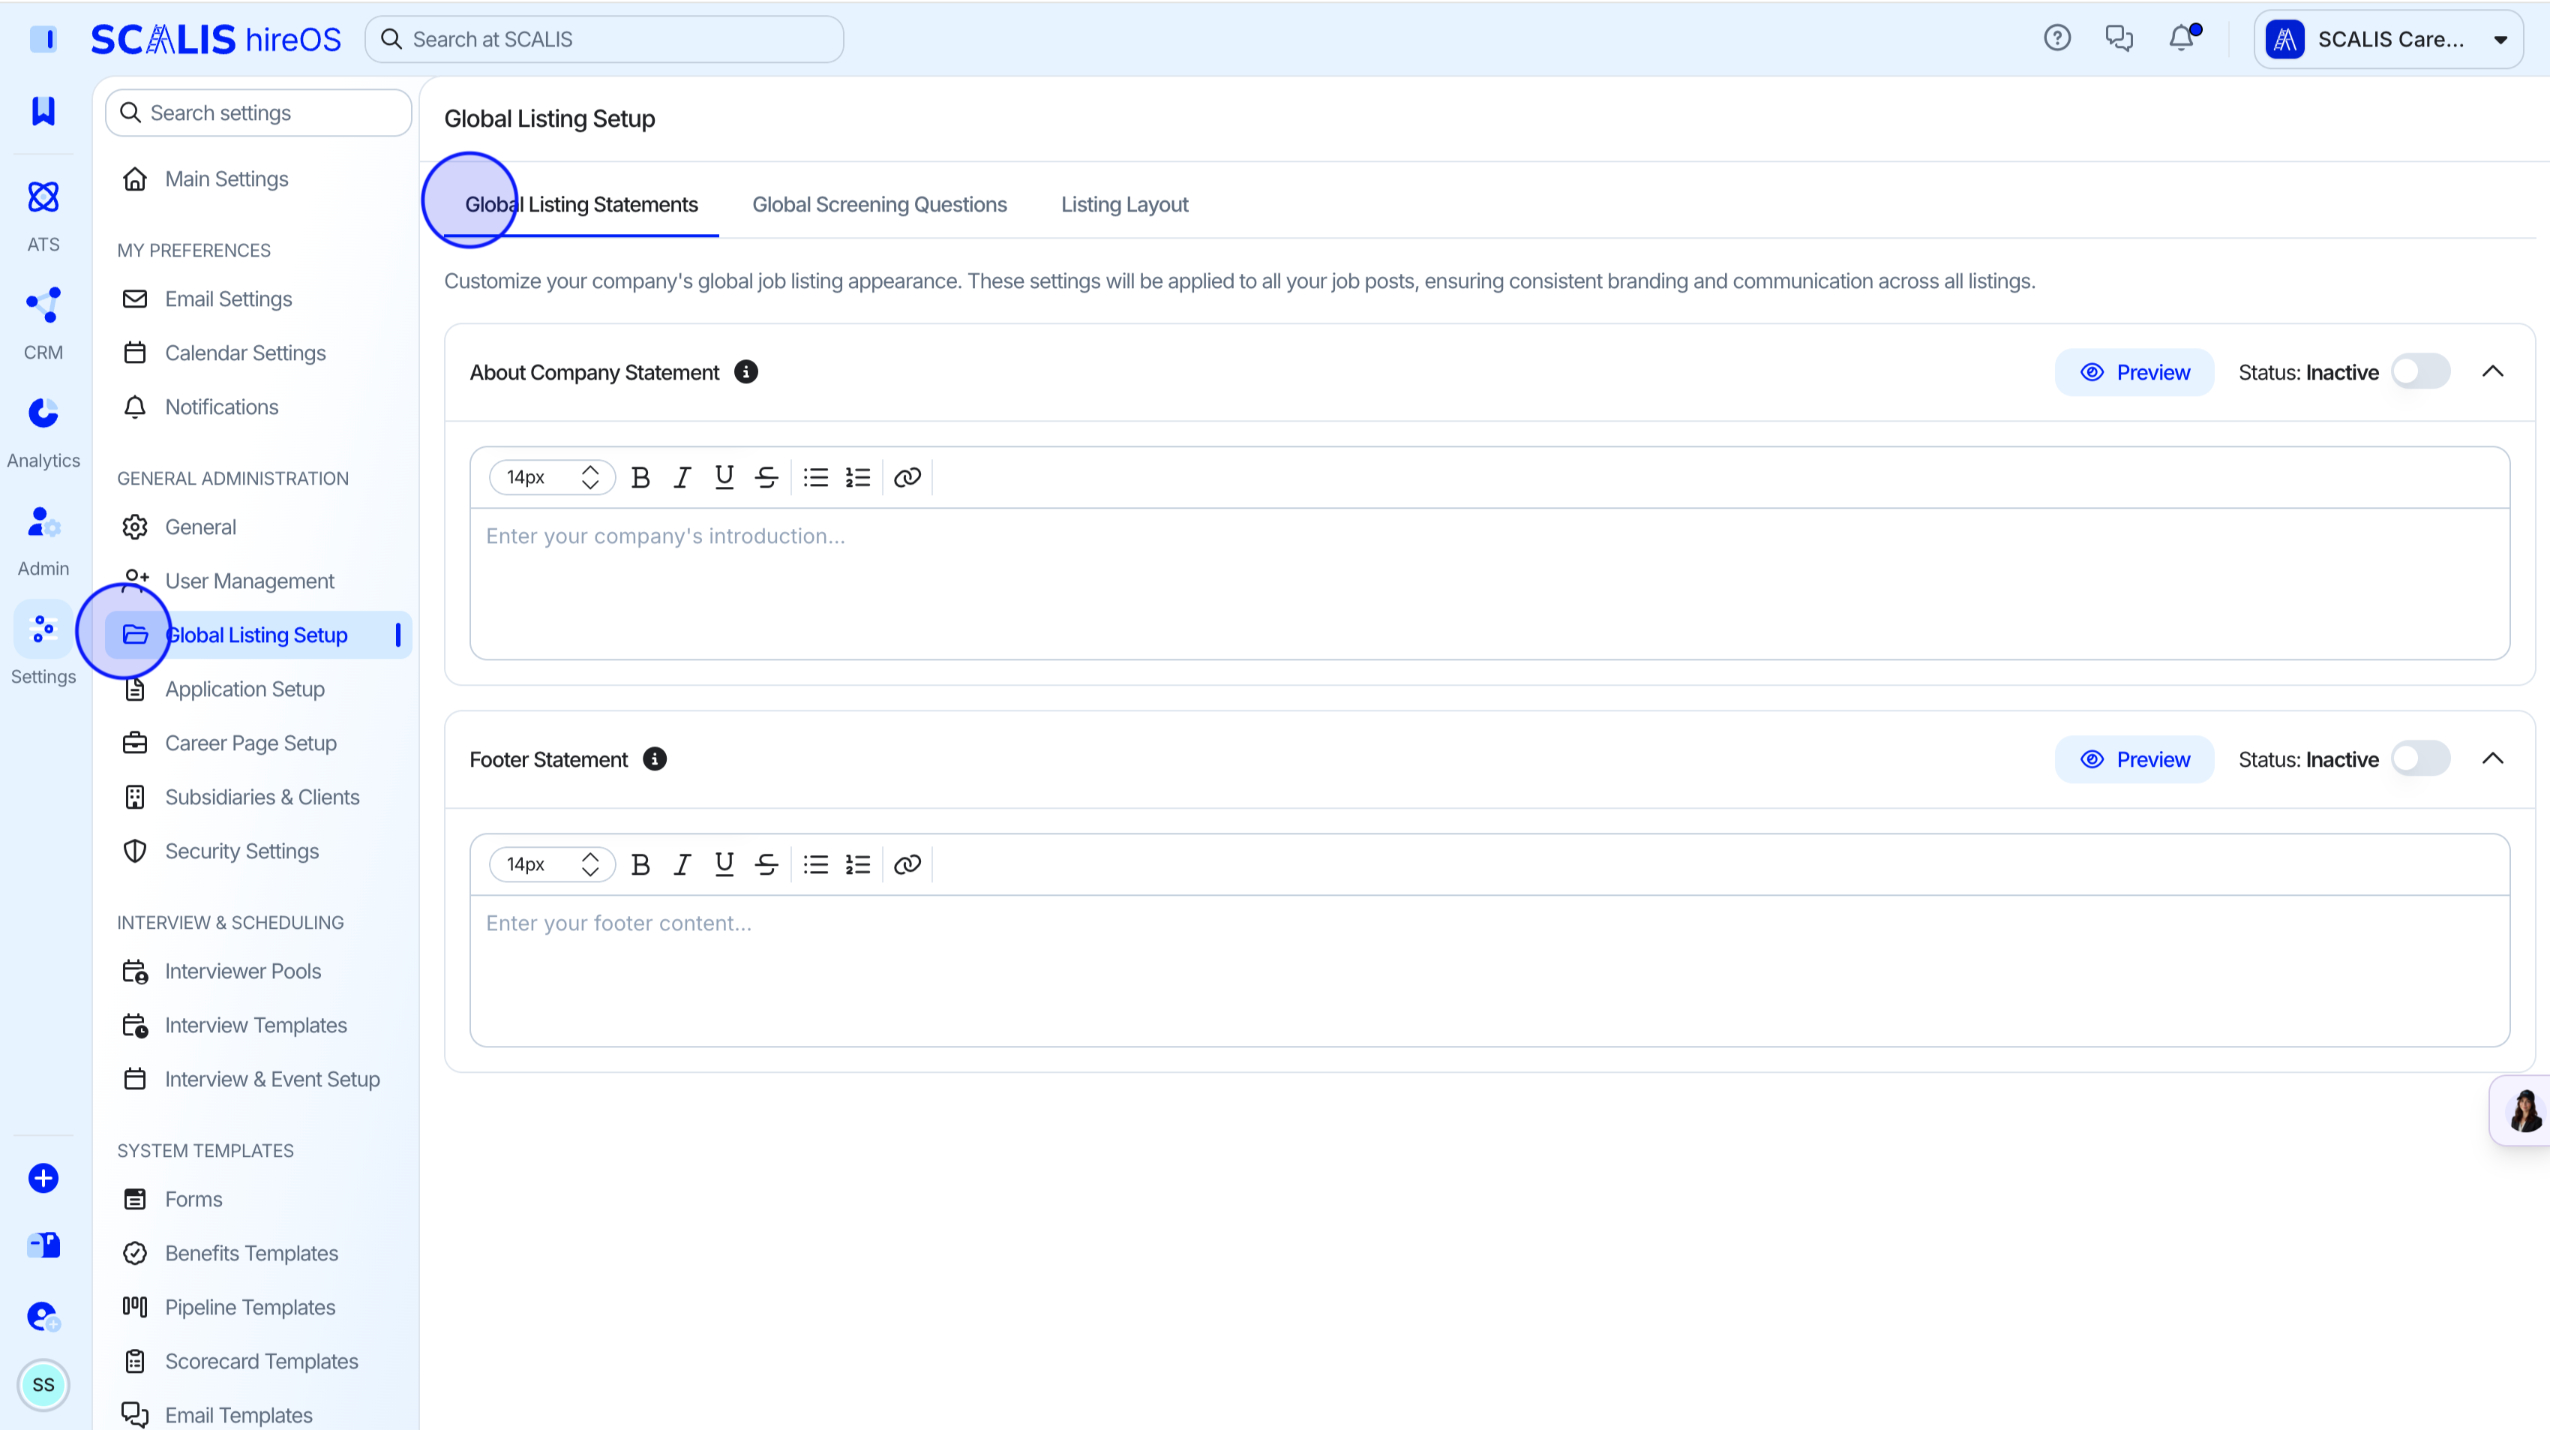
Open Global Listing Setup
From your company settings, click Global Listing Setup. This brings you to the Global Listing Statements tab.
2
Step 2
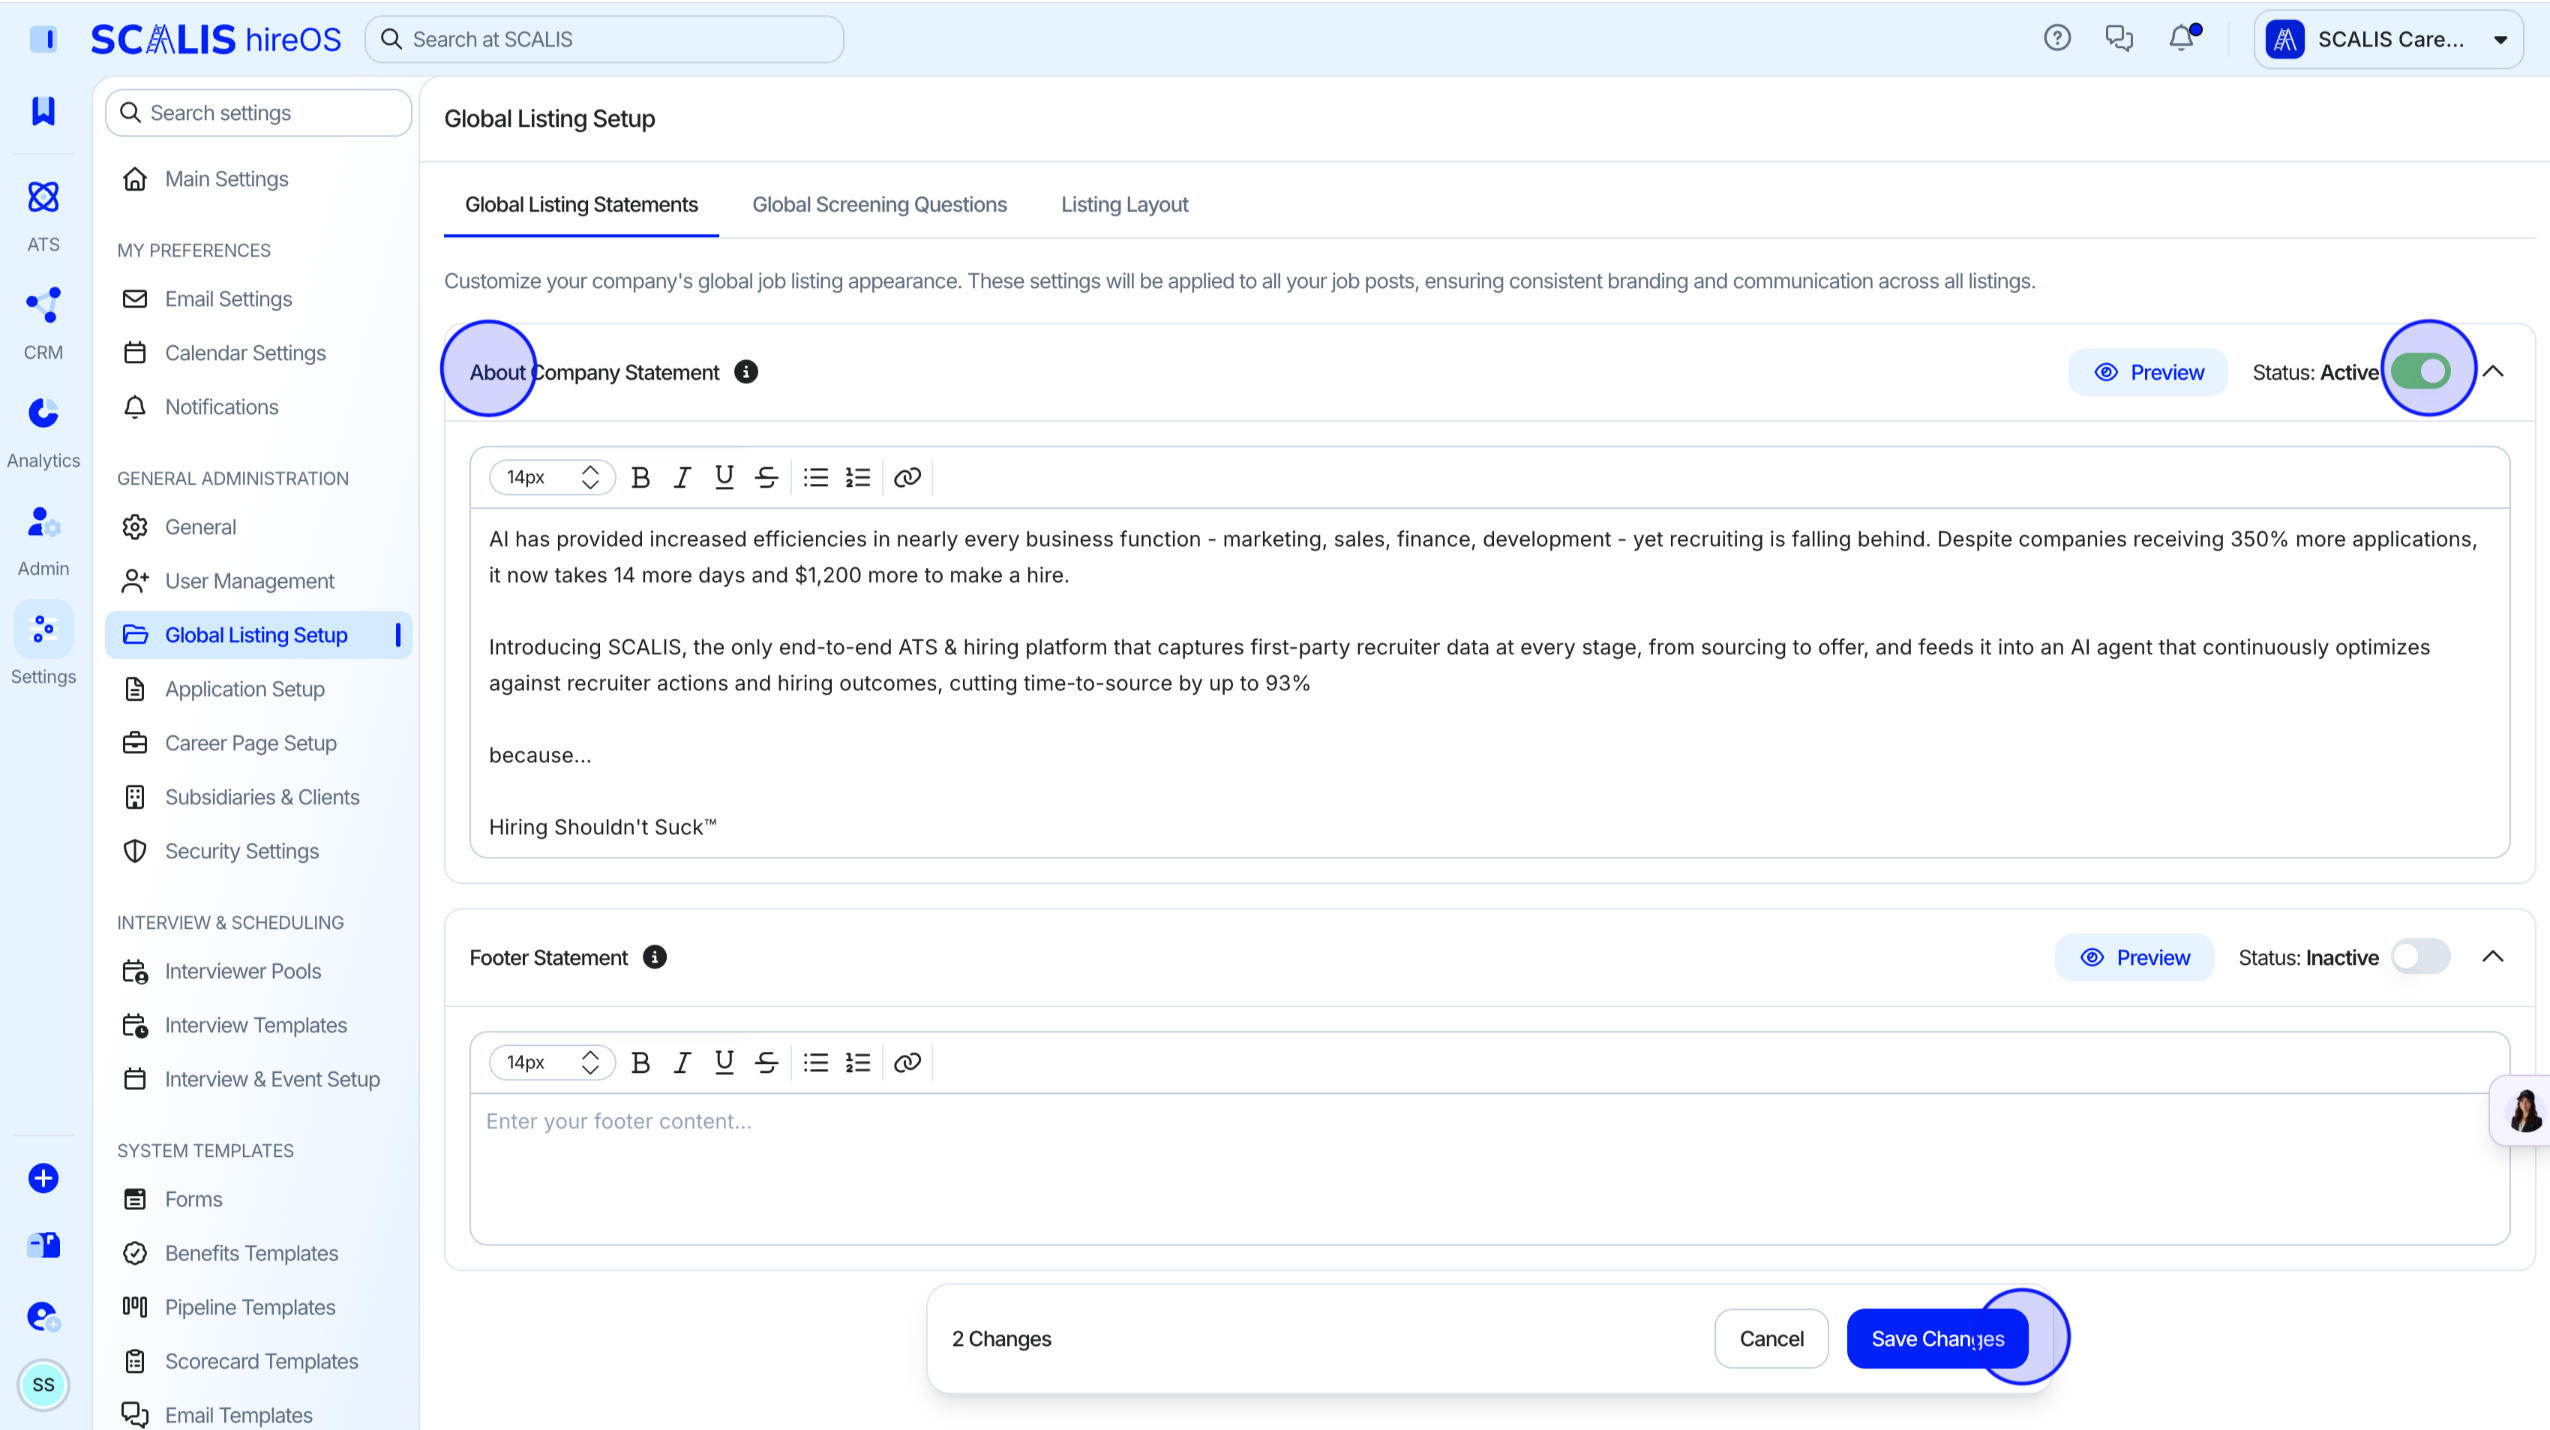
Add an About Company Statement
Enter your About Company Statement in the text box.
Click the status toggle to activate the statement.
3
Step 3
Add a Footer Statement
Enter any details you'd like to remain uniform across all jobs in the Footer Statement.
Click the status toggle to activate the statement.
💡 Note: Companies often use this section to add EEOC statements or DE&I statements.
Global Screening Questions Setup
1
Step 1
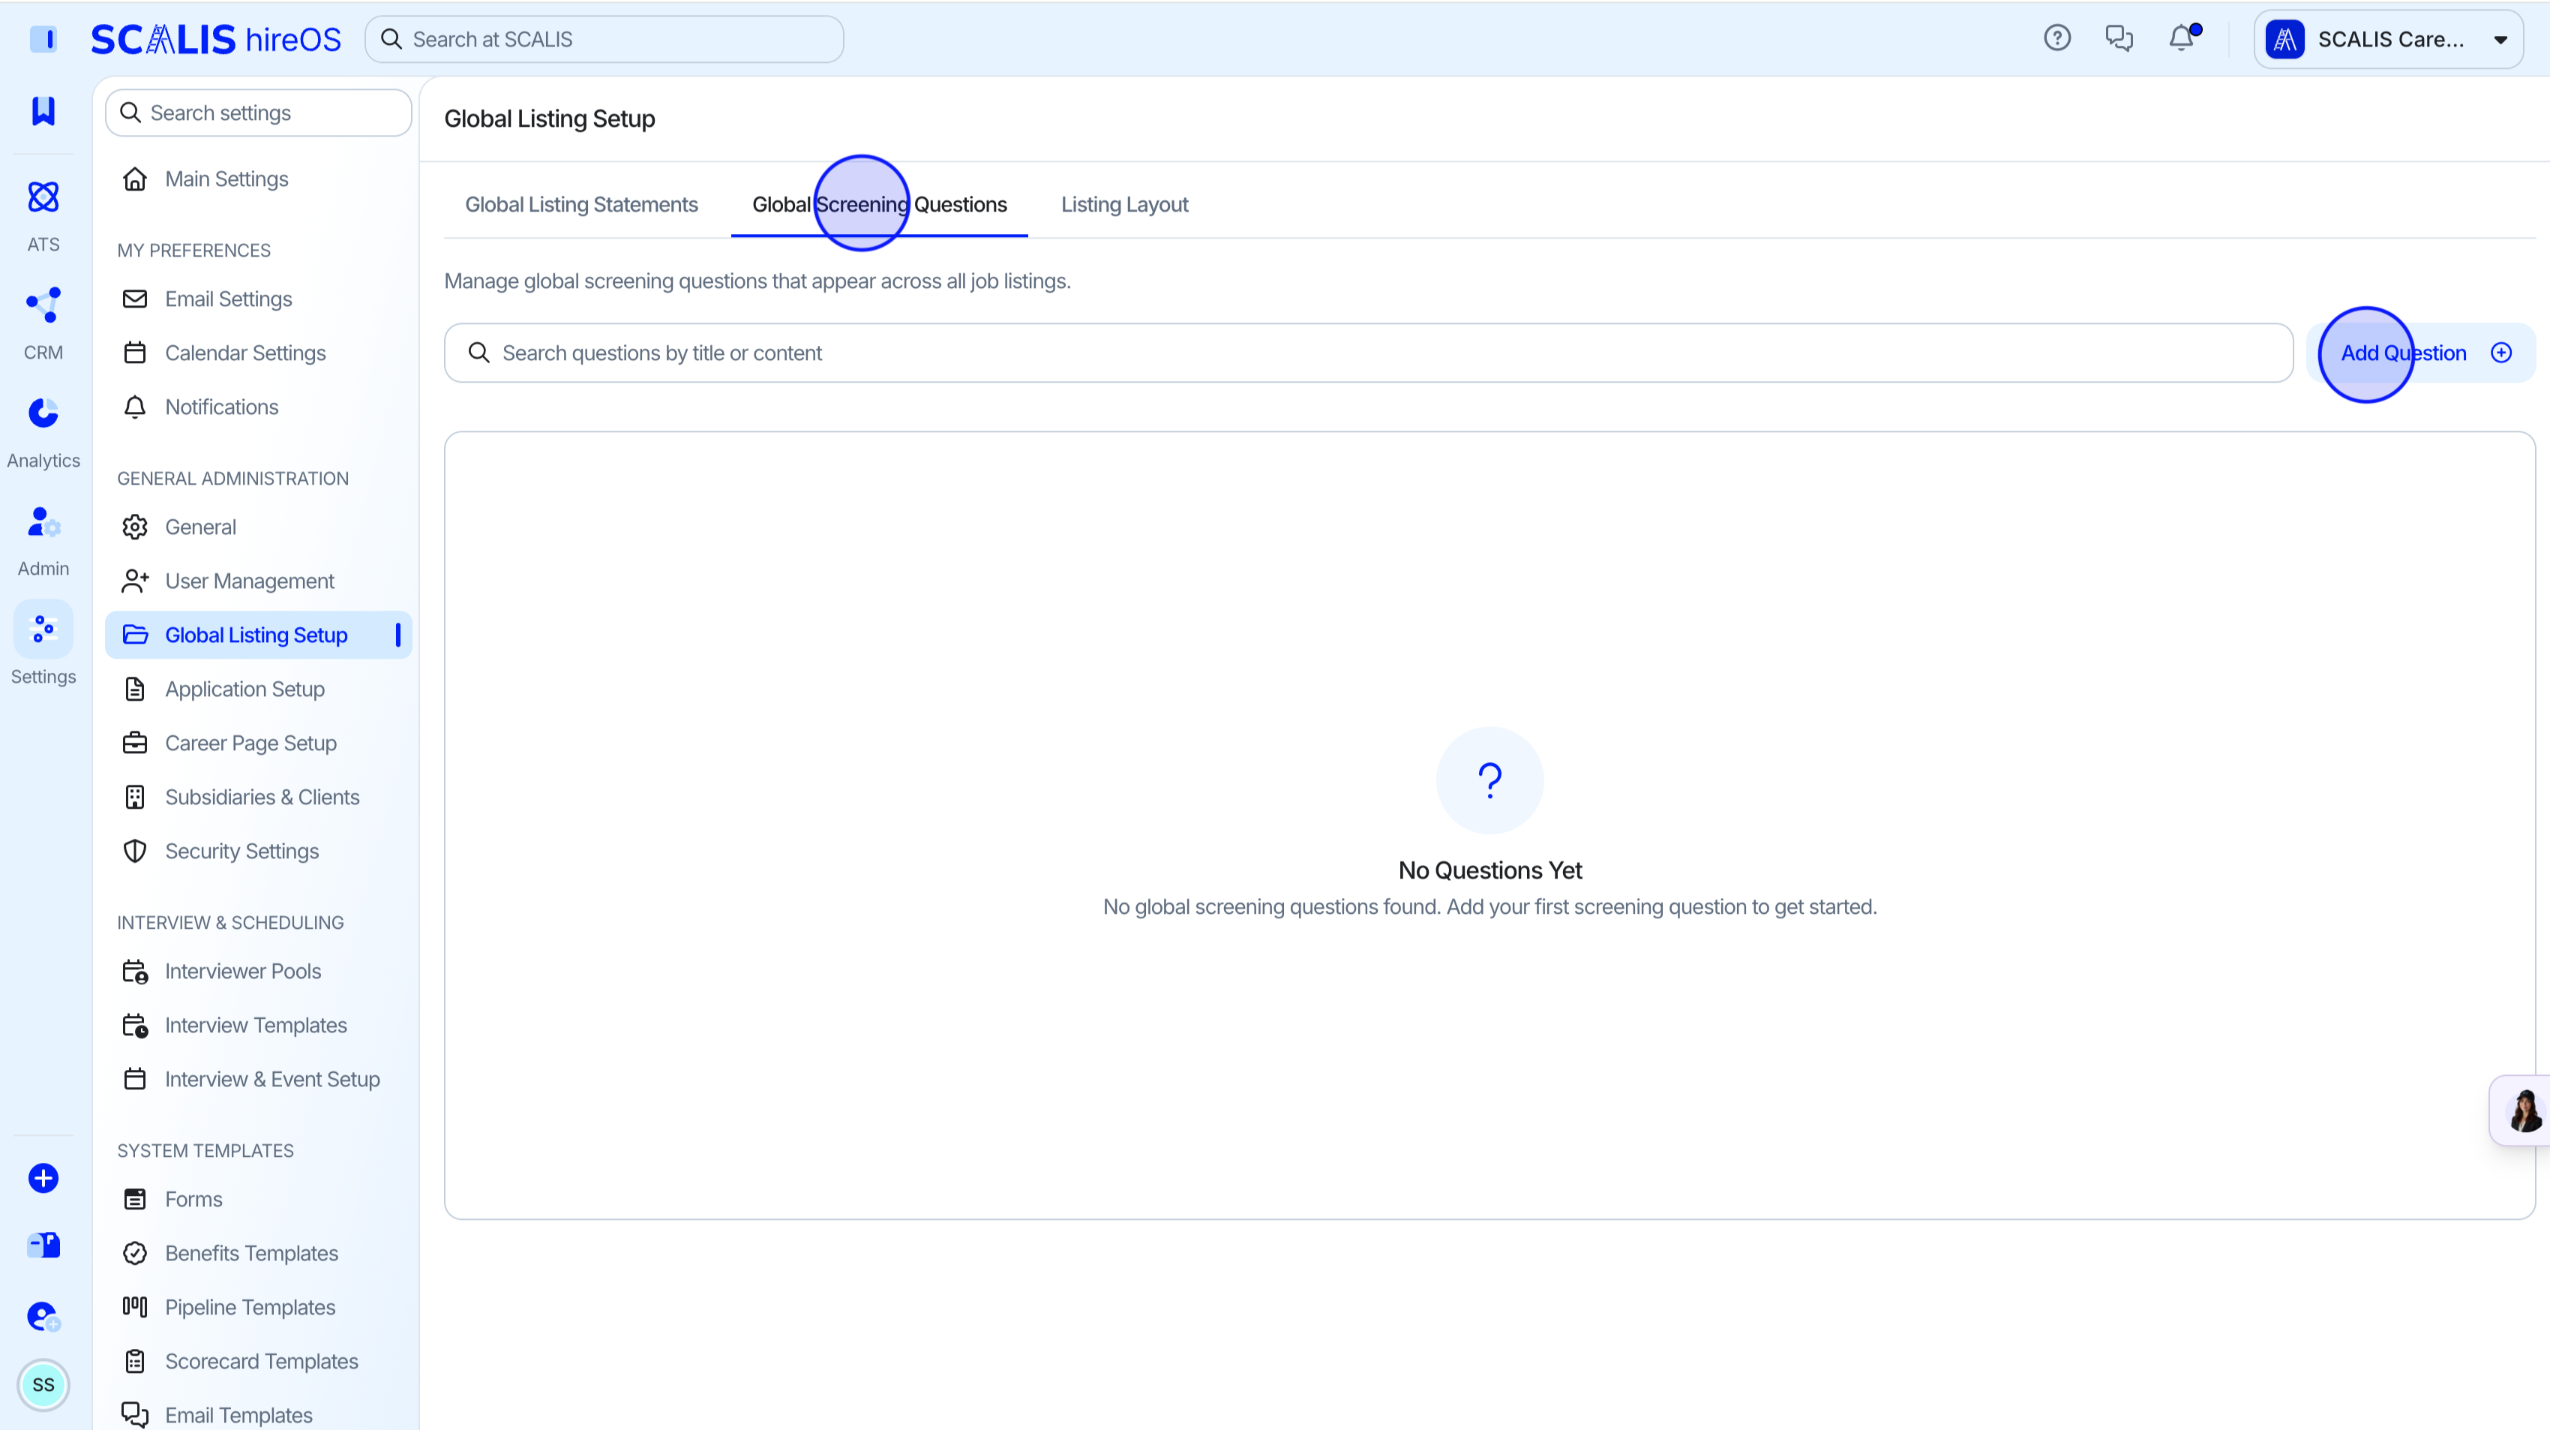
Add a Screening Question
From your company settings, click Global Listing Setup, then click Add Screening Question.
Common screening questions include work authorization, compensation expectations, location, and remote work availability.
💡 Note: Global screening questions appear across all job listings.
2
Step 2
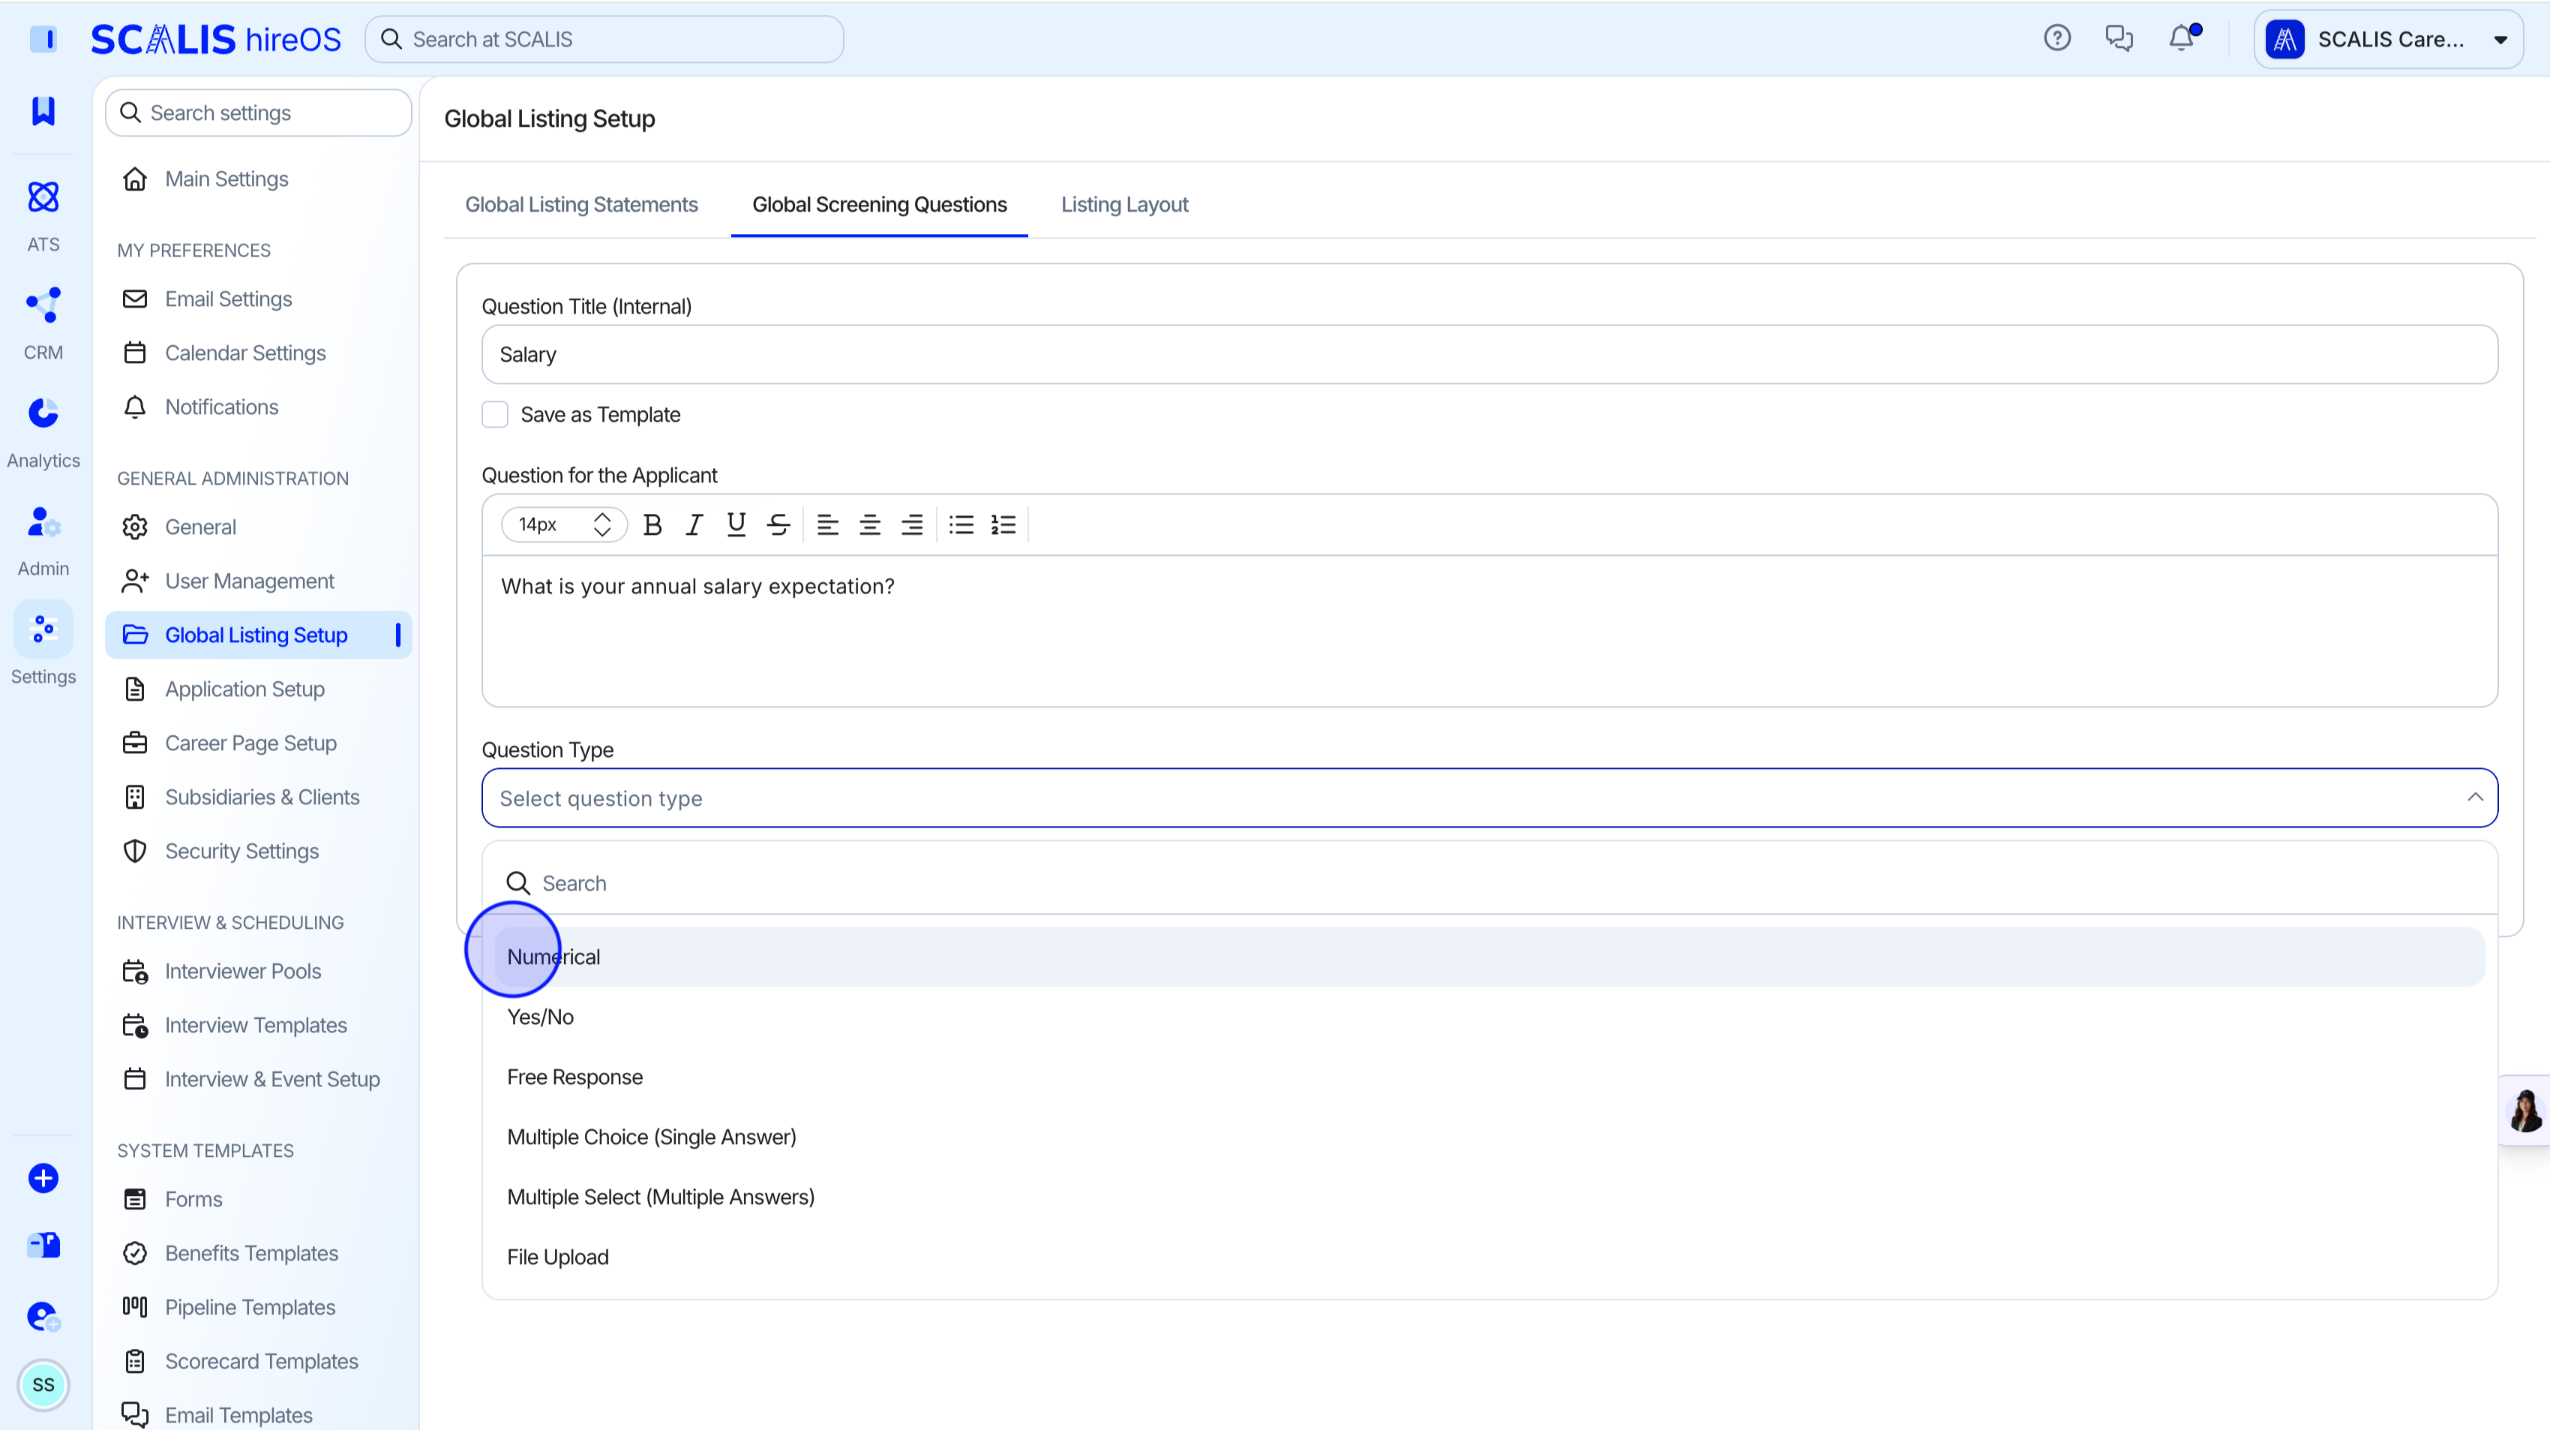
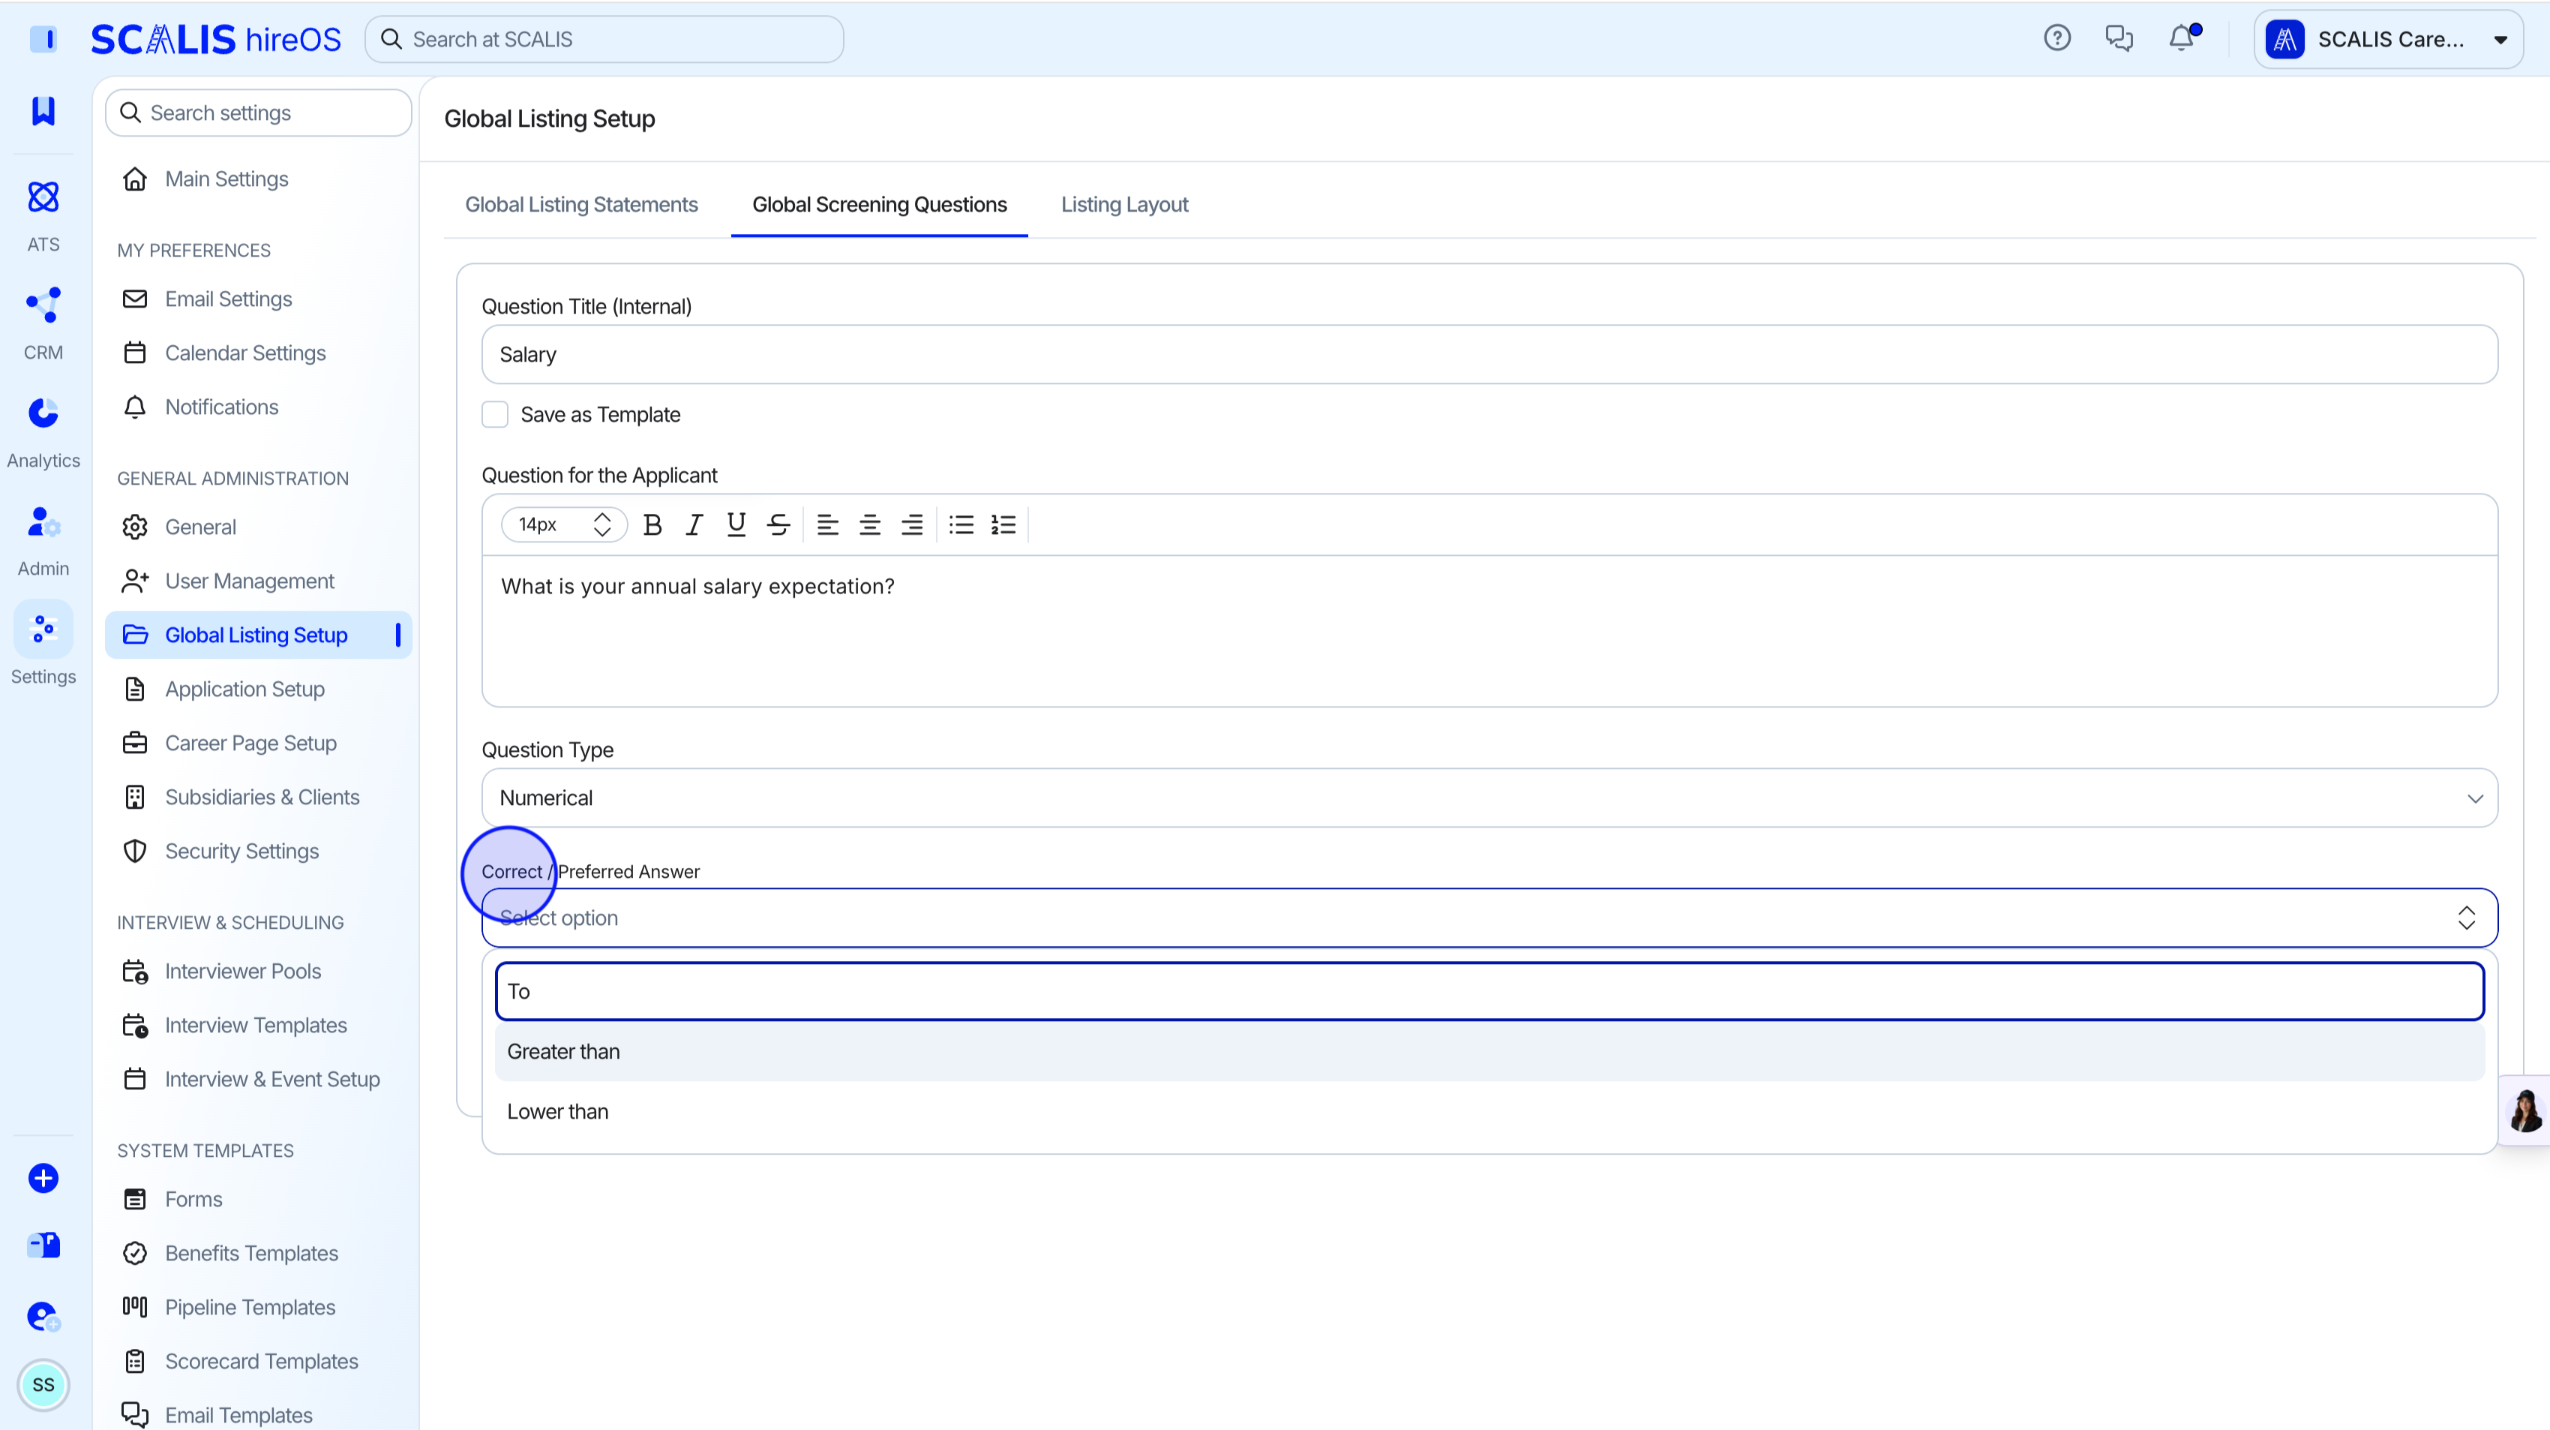
Configure the Question
Name your question for easy reference.
Type the question you want applicants to see.
Choose the question type.
3
Step 3
Enable Auto Rejection on Global Screening Questions
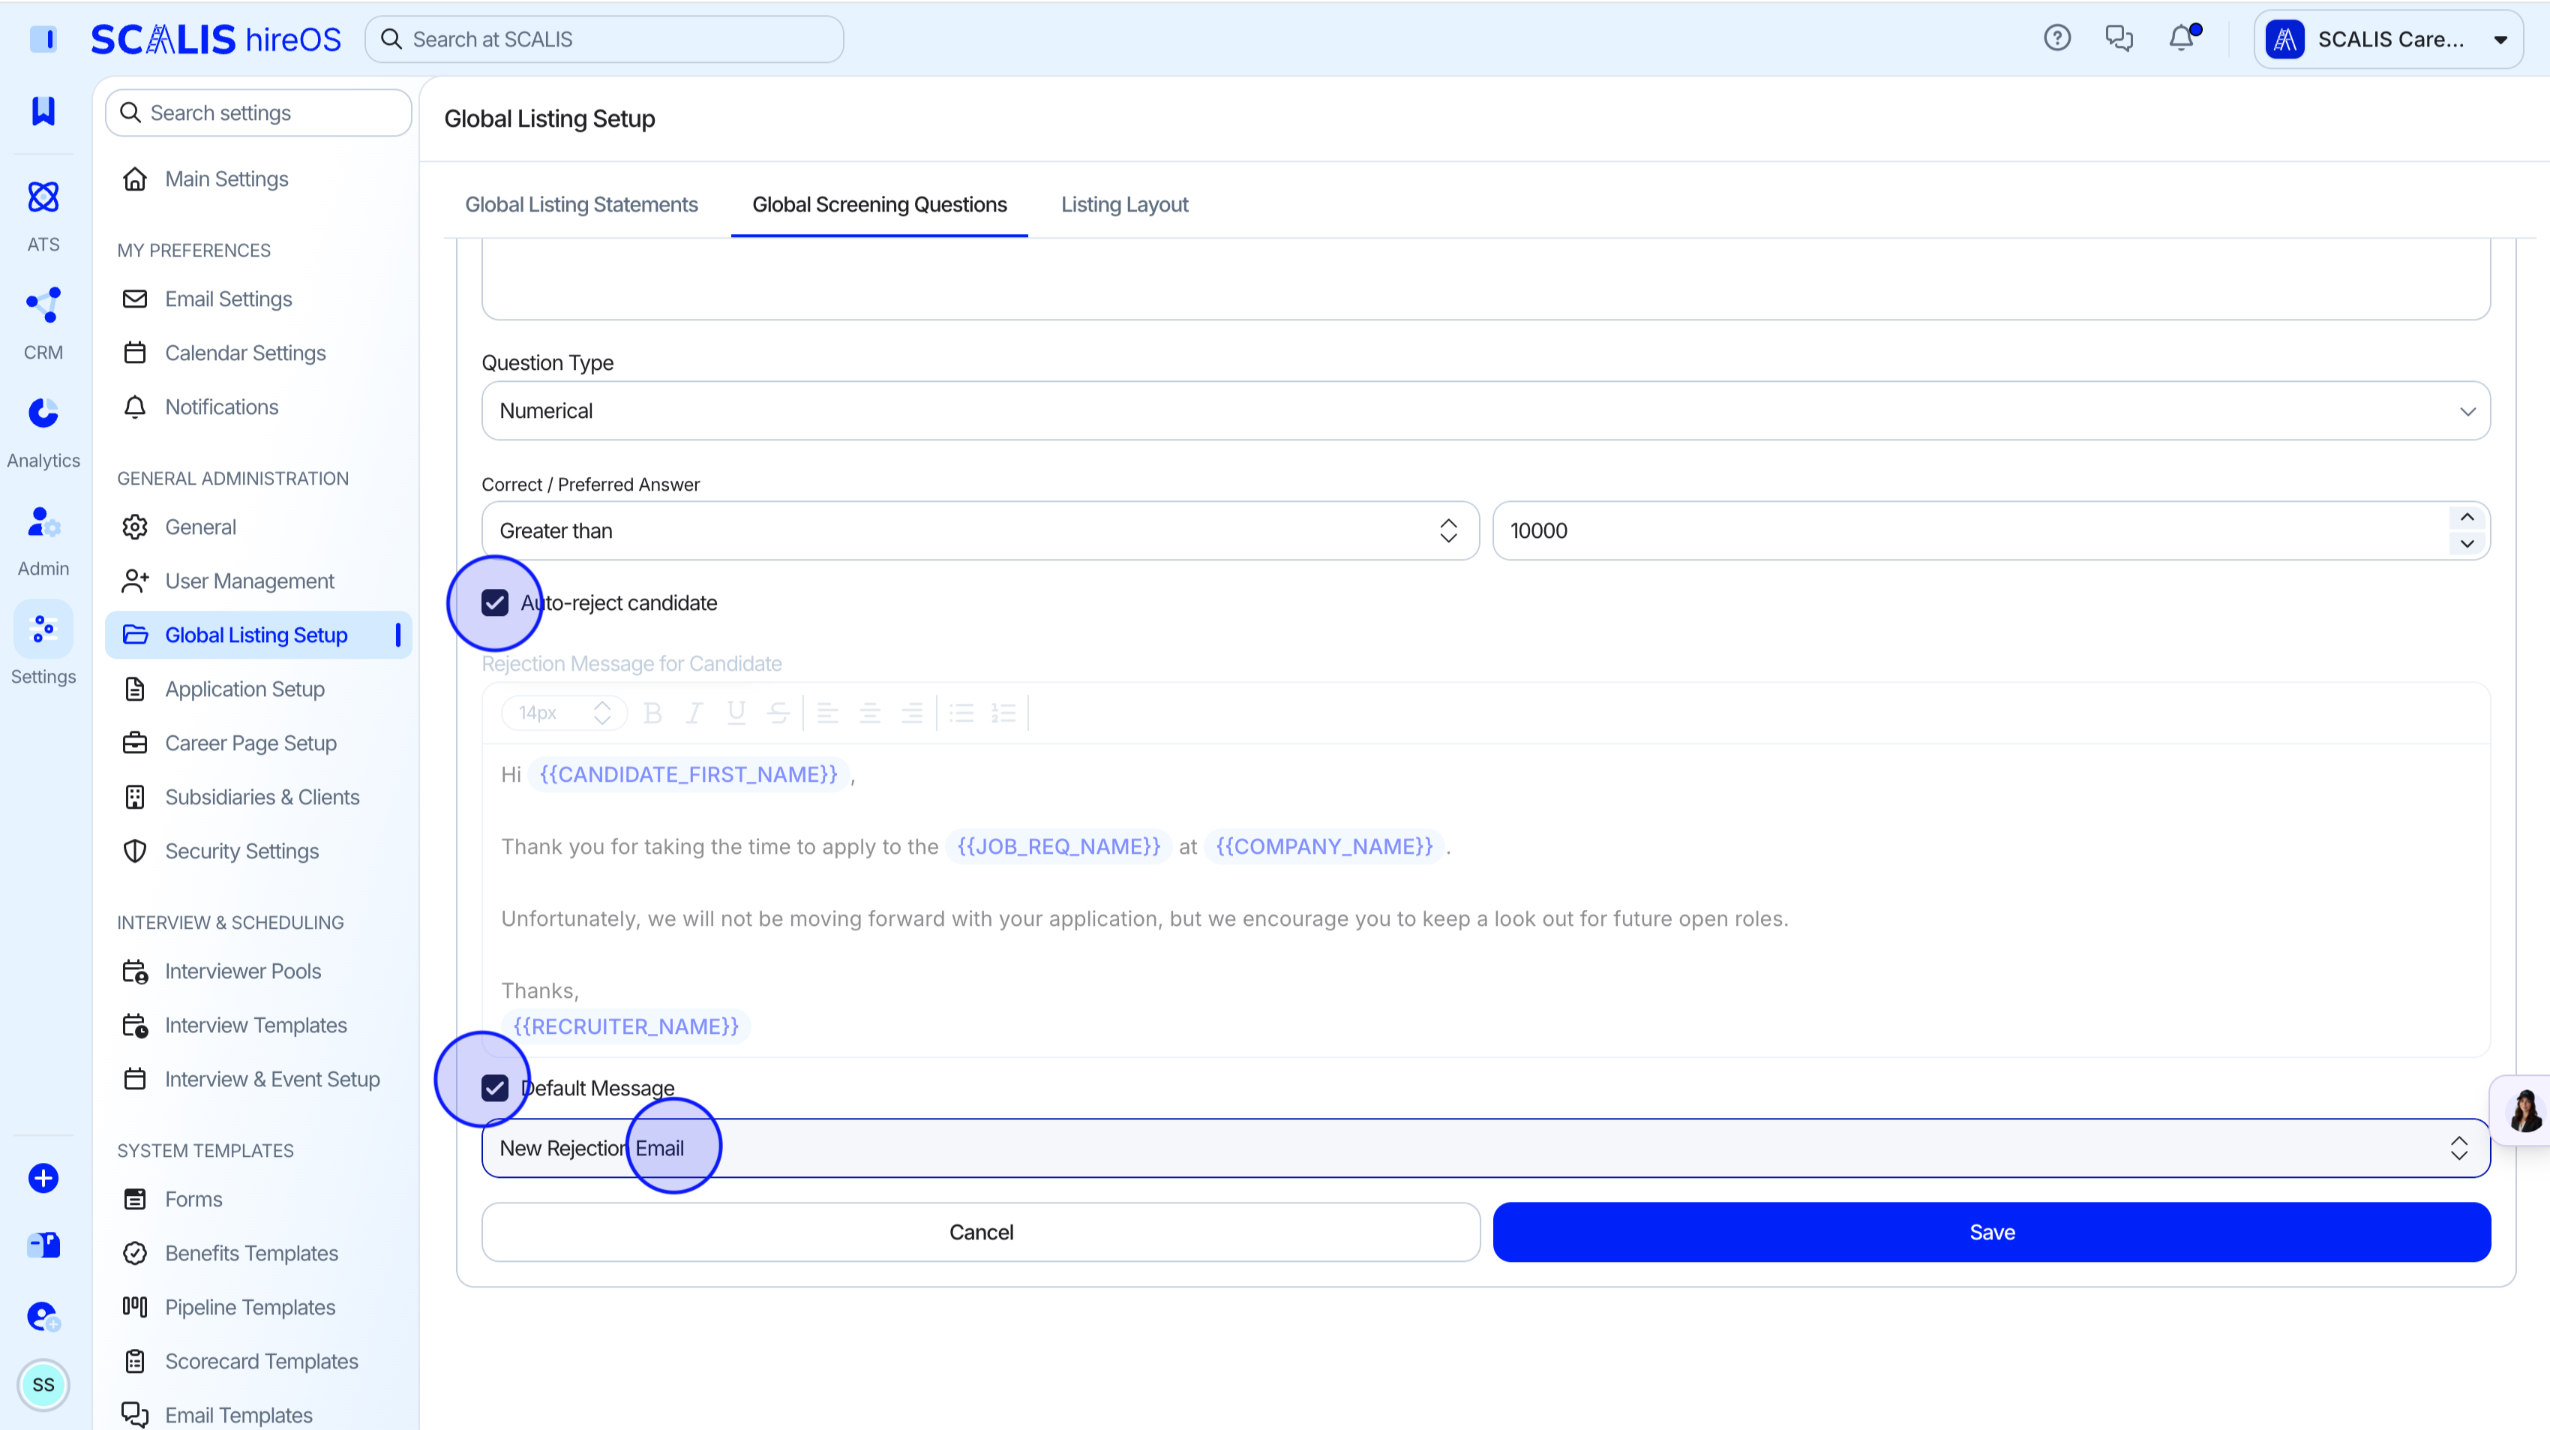
Click Select preferred answer to enable auto-reject. This is available only for Numerical, Yes/No, and Multiple Choice question types.
Check the Auto-reject candidate checkbox and add your rejection email template, then click Save.
4
Step 4
Activate the Question
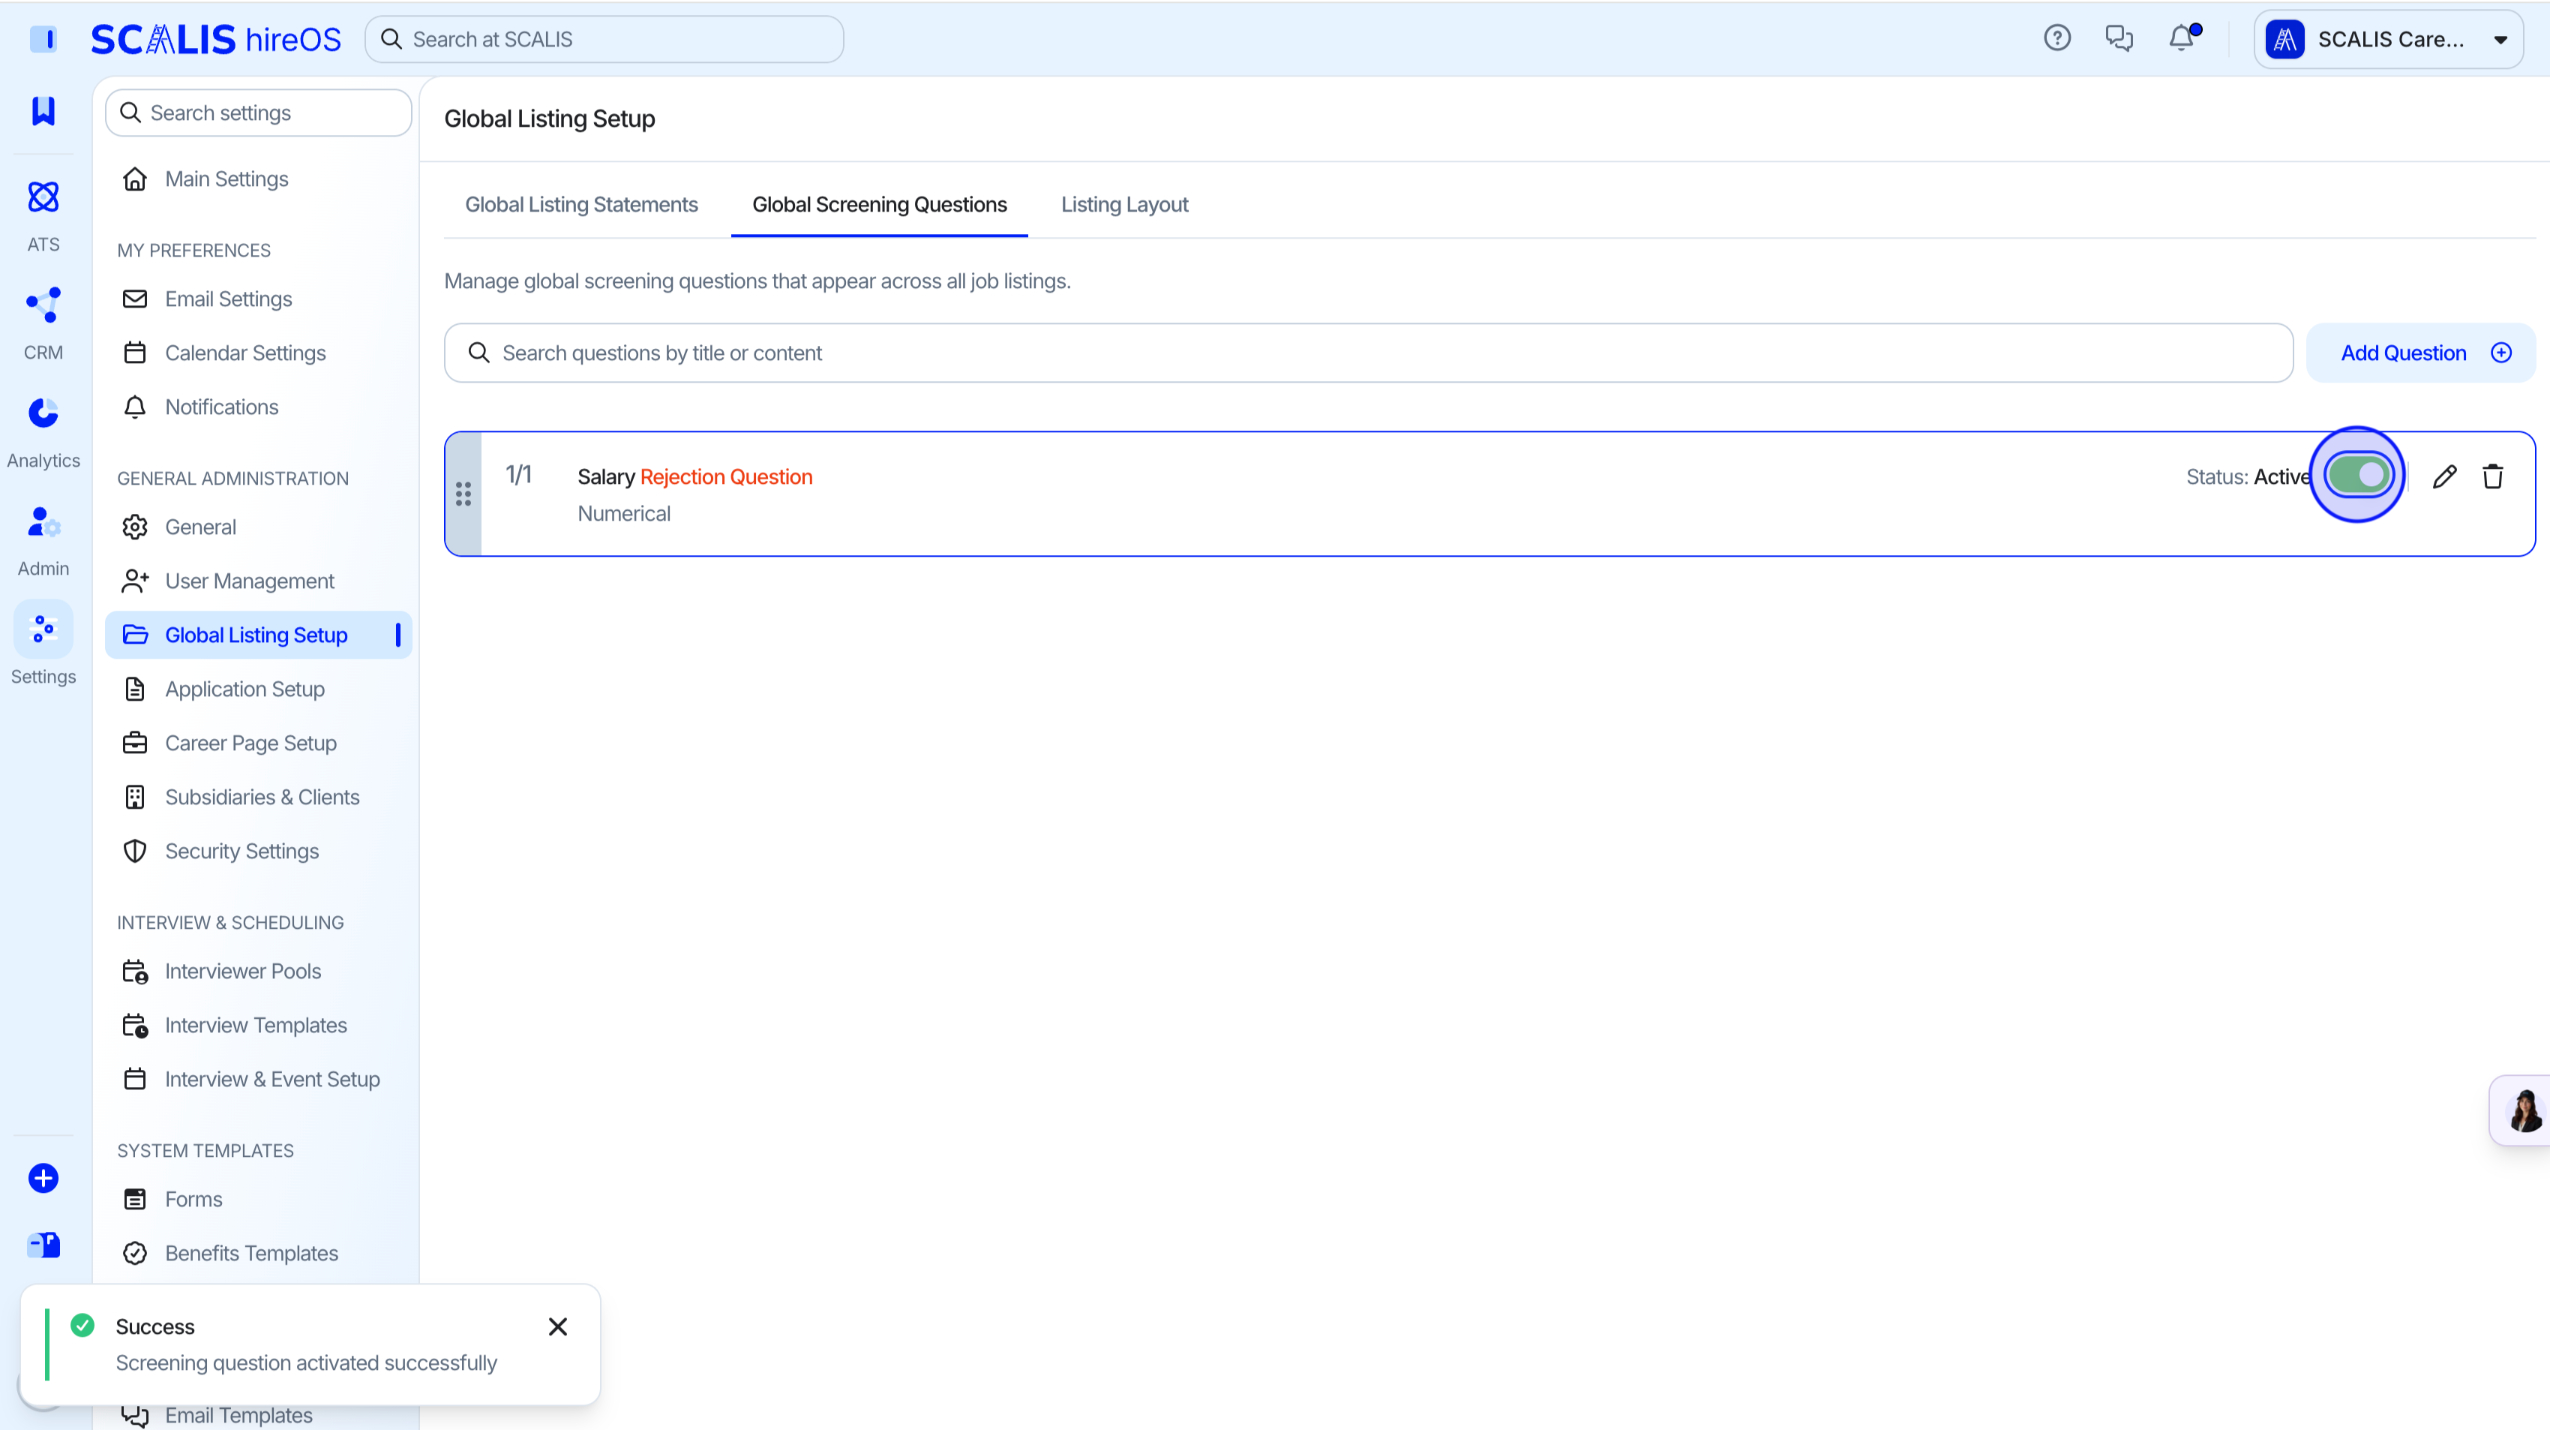
Once your screening question is saved, toggle the status to Active for it to appear across all your listings.
You can also edit, re-order, and delete your global screening questions from this page. Global screening questions do not need to be added within the job application questions, they're applied automatically.
Listing Layout
1
Step 1
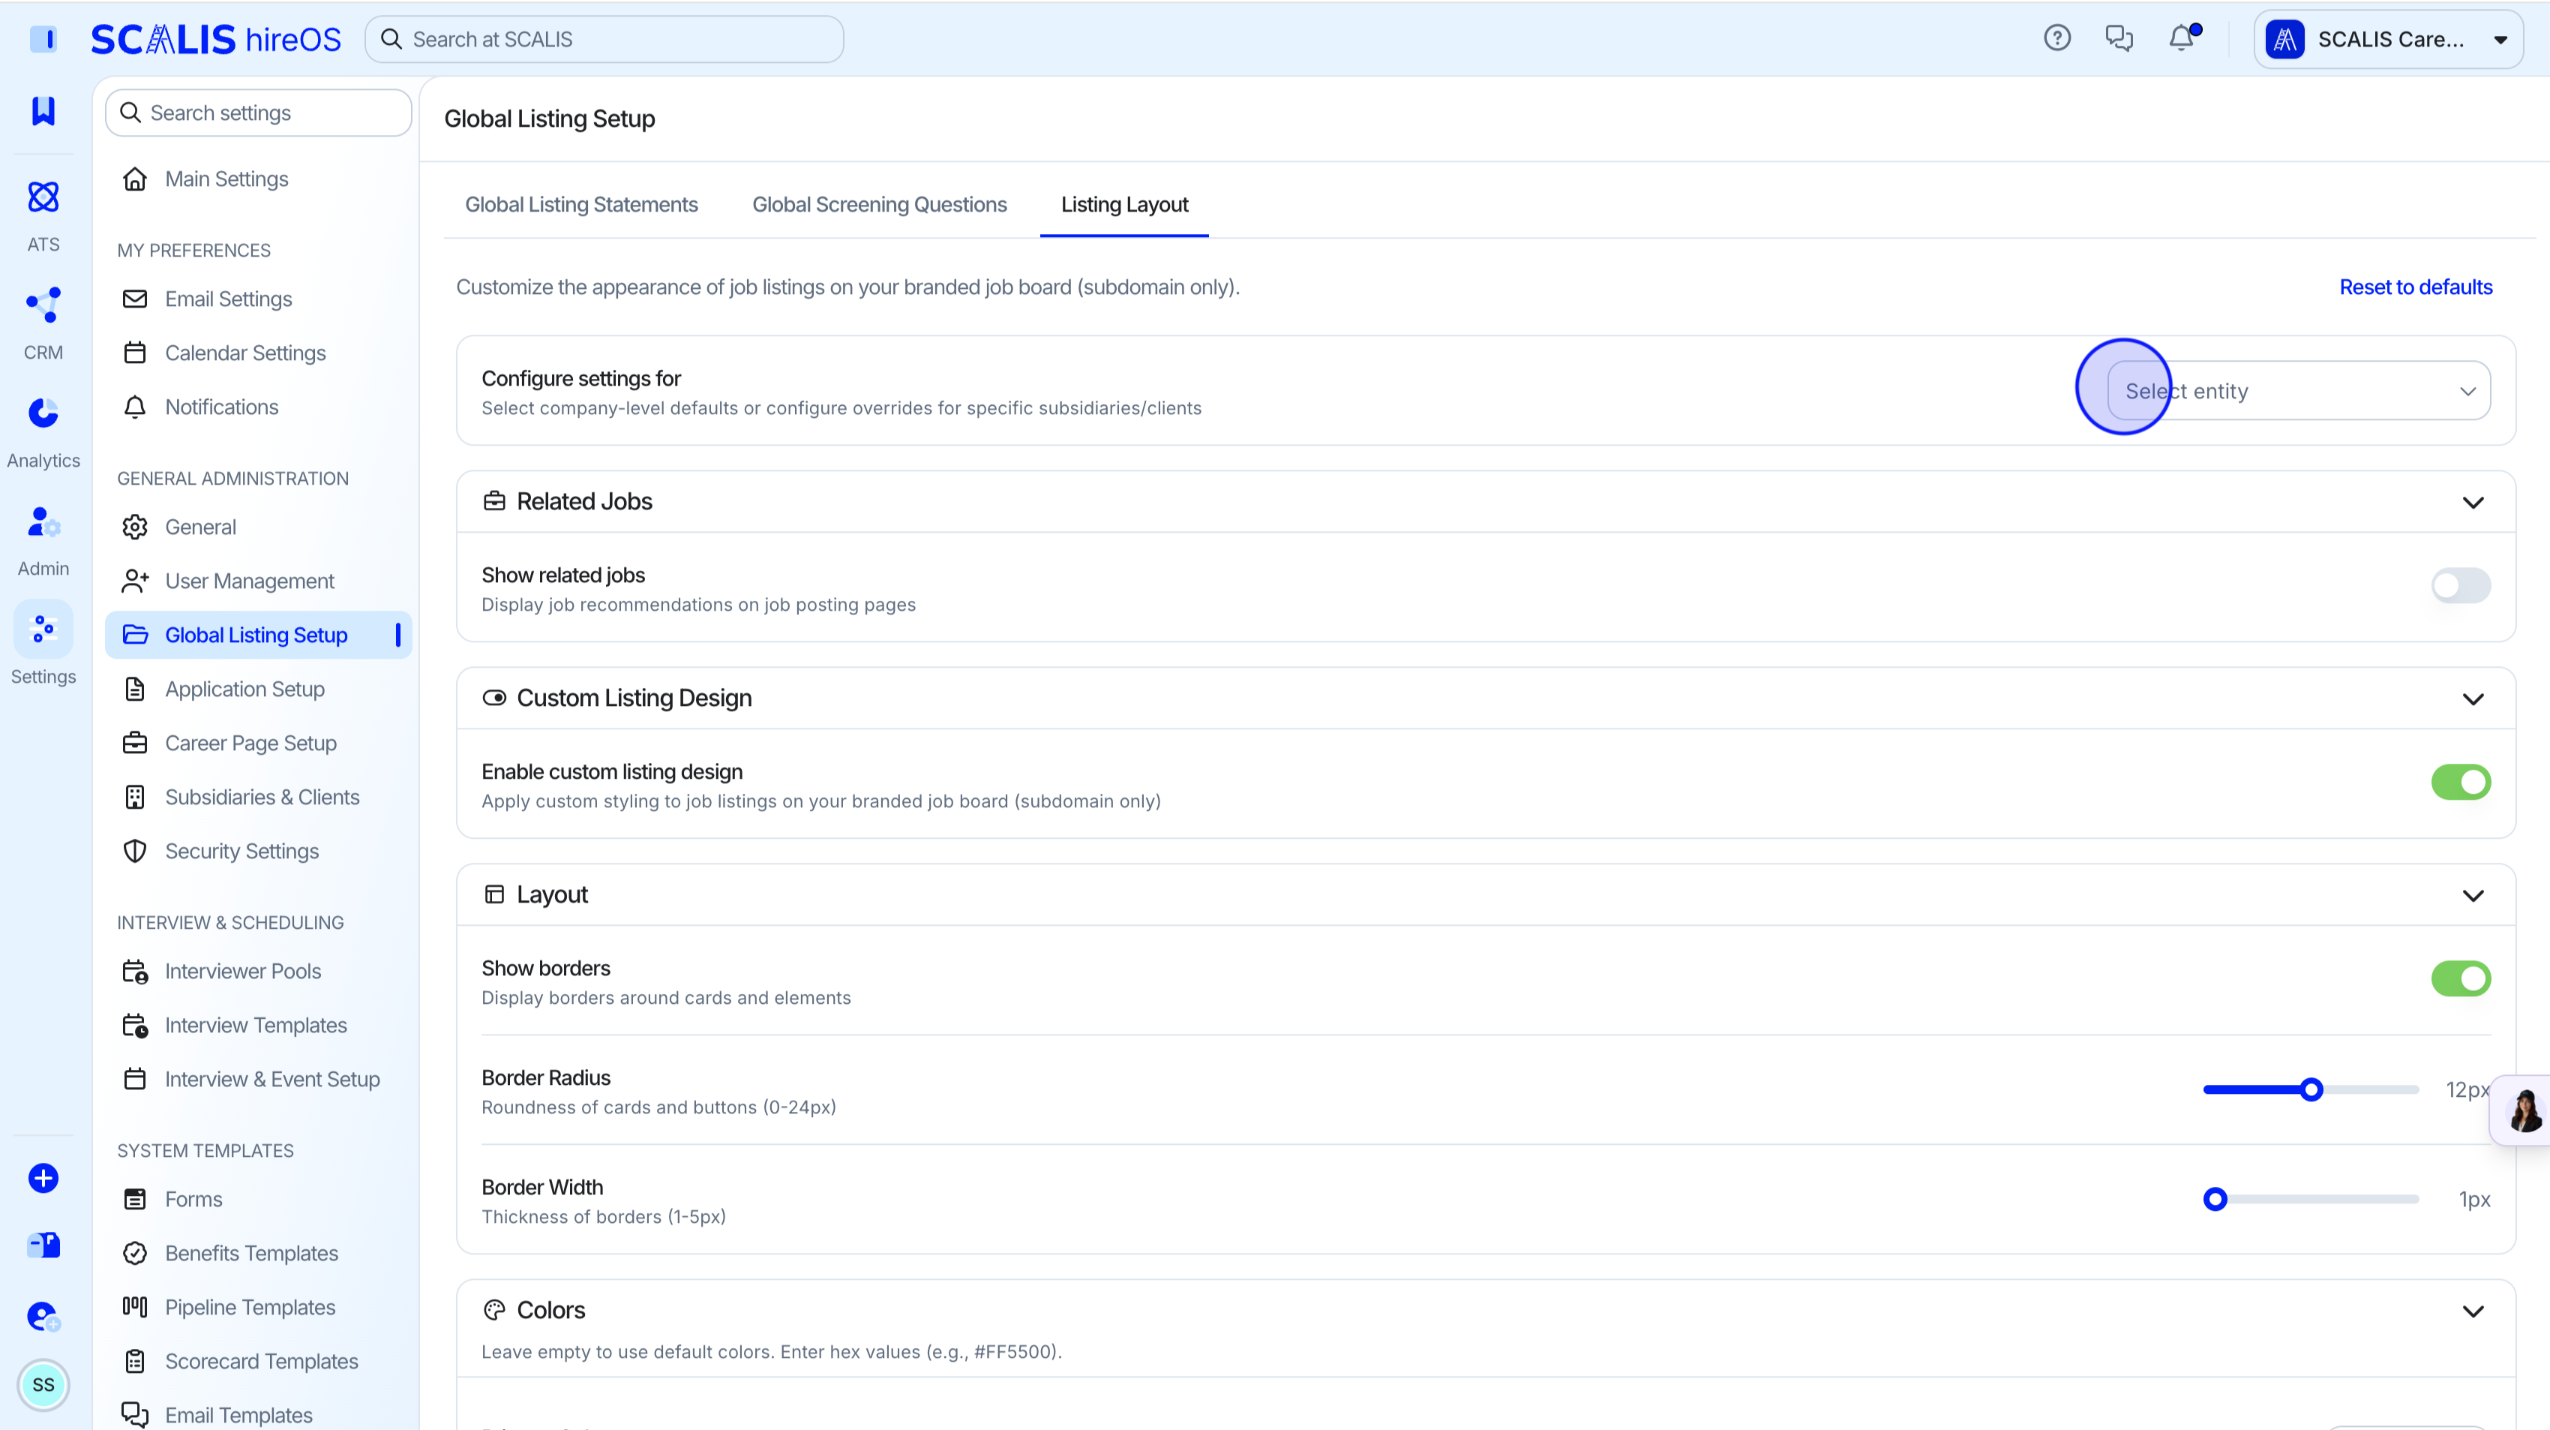
Choose the Entity
Configure the listing layout settings for a specific entity.
If you have a single entity, you can leave this as is.
If you have subsidiaries or clients that you separate things by, set and configure the layout for each one individually.
2
Step 2
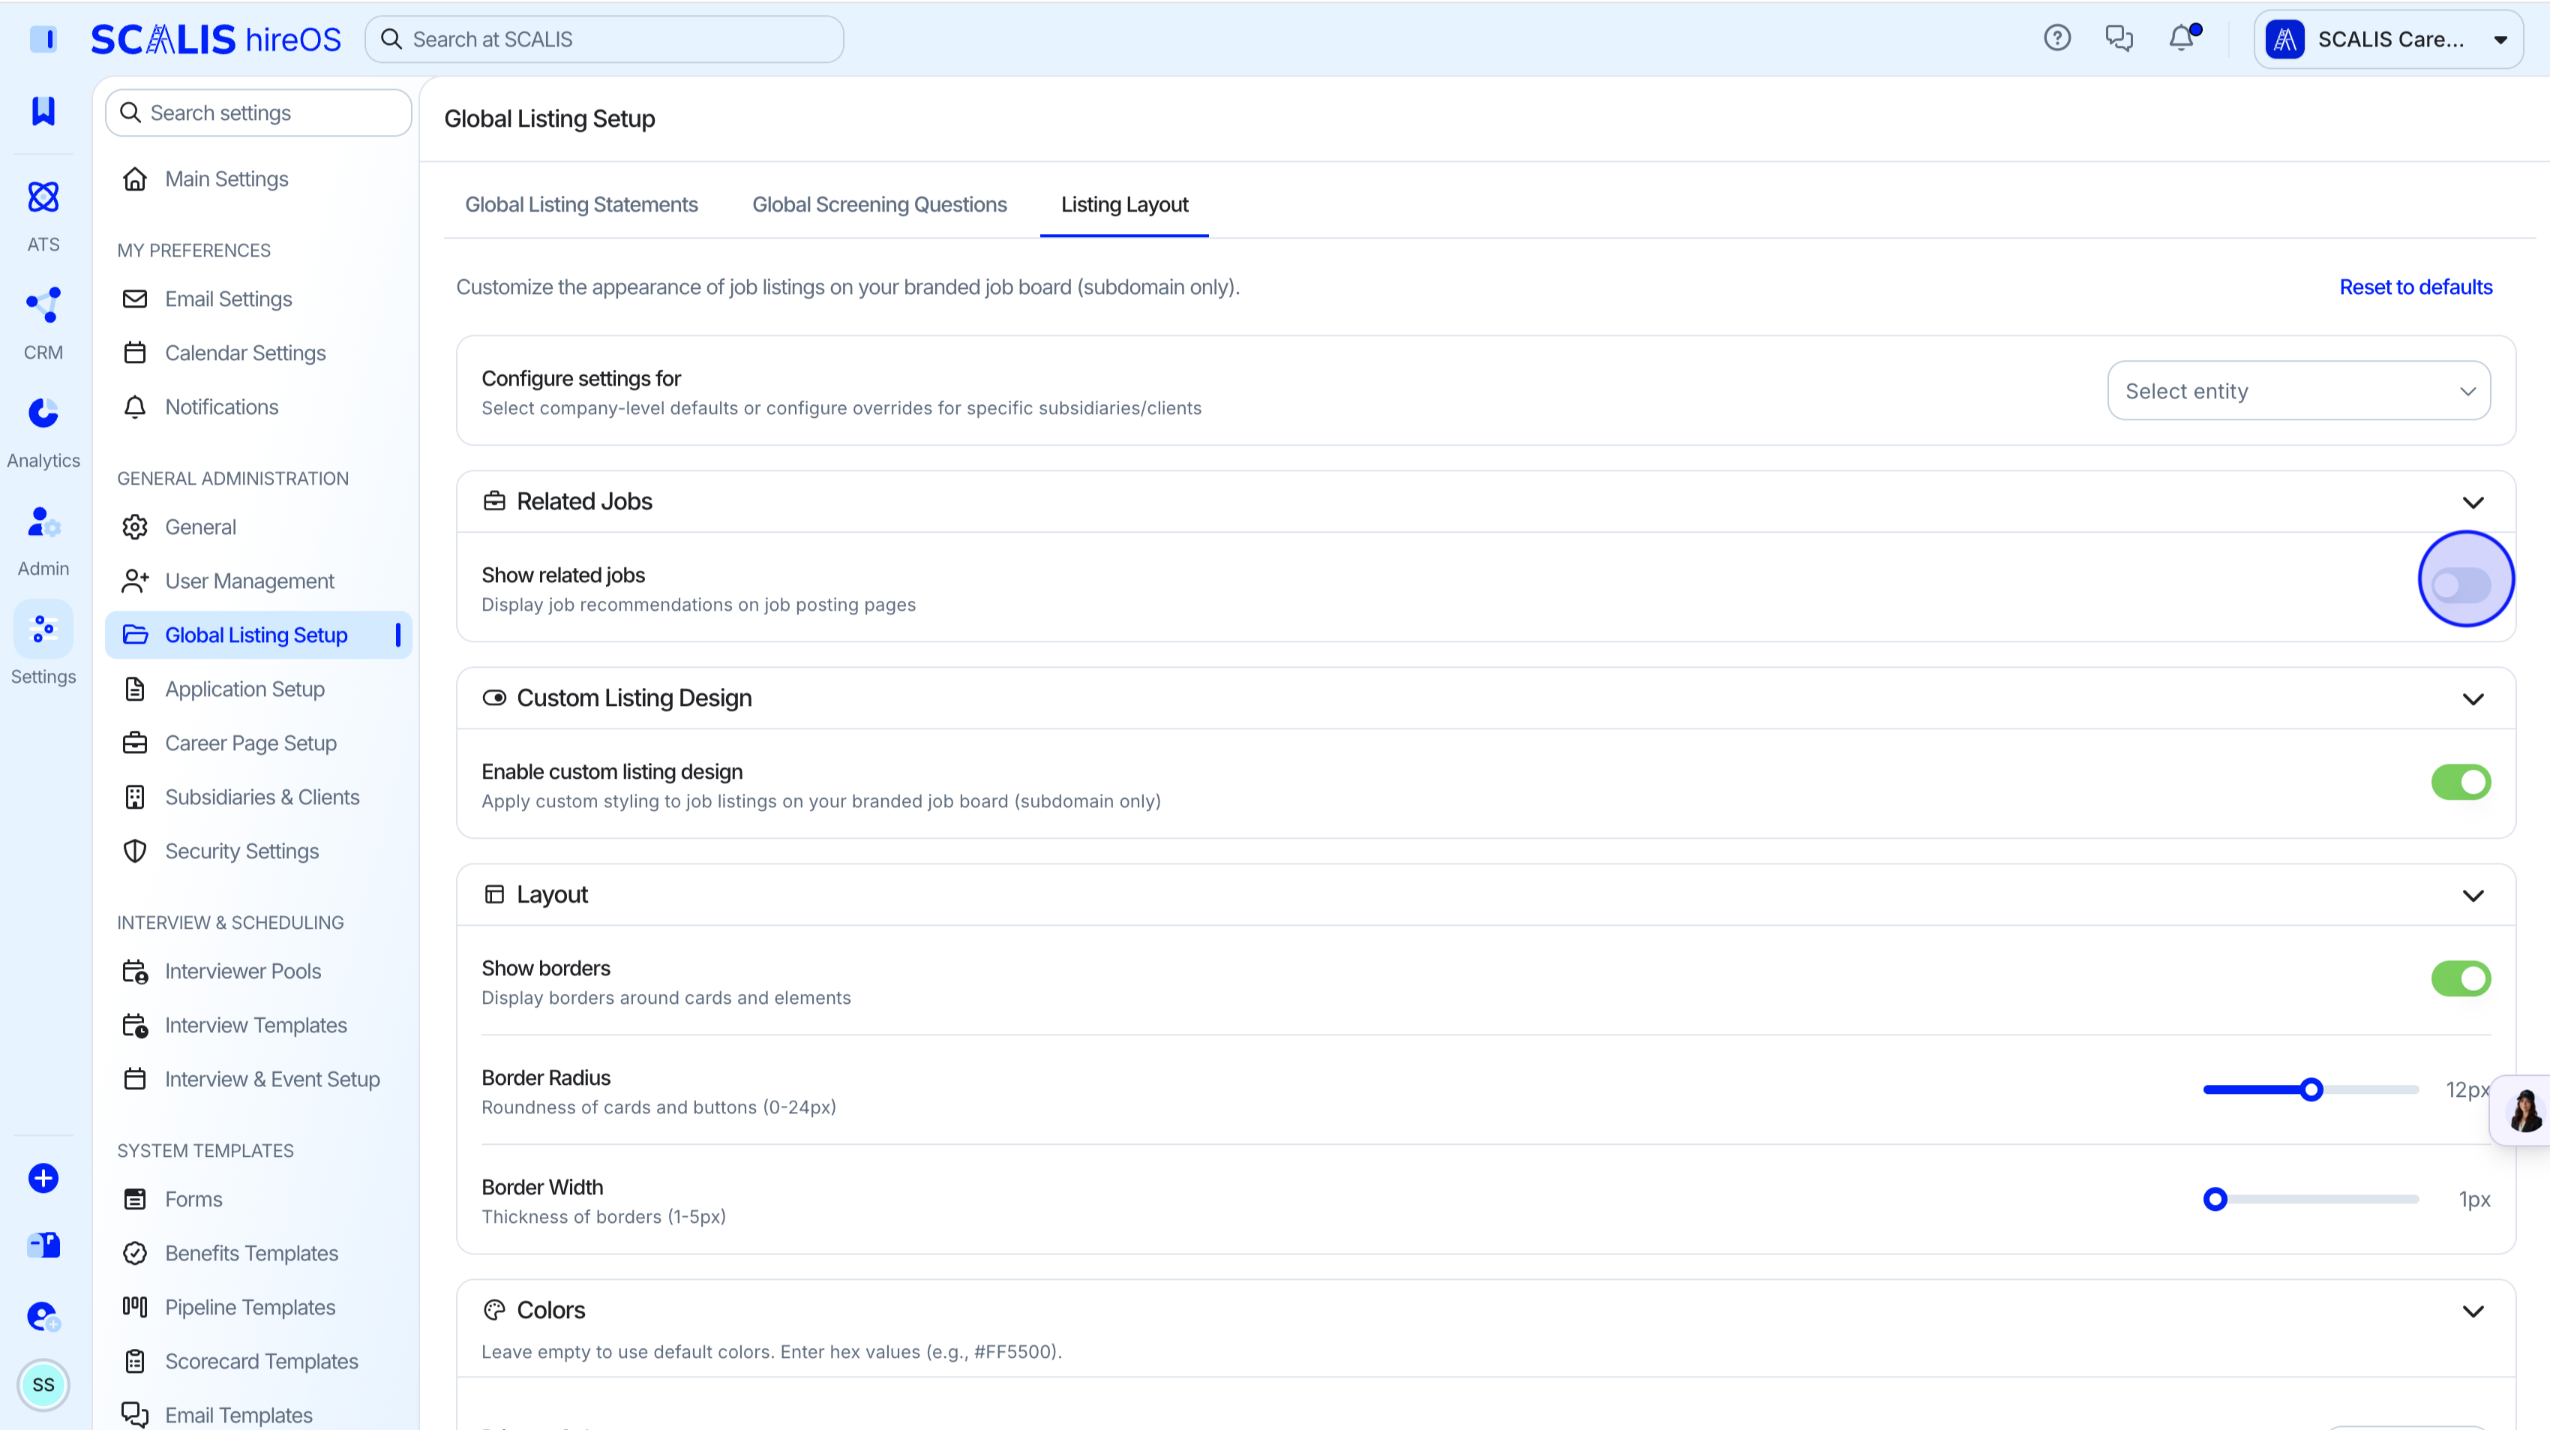
Show Related Jobs
Toggle on Show Related Jobs. This is required, not optional, in order for related openings to display on the listing.
3
Step 3
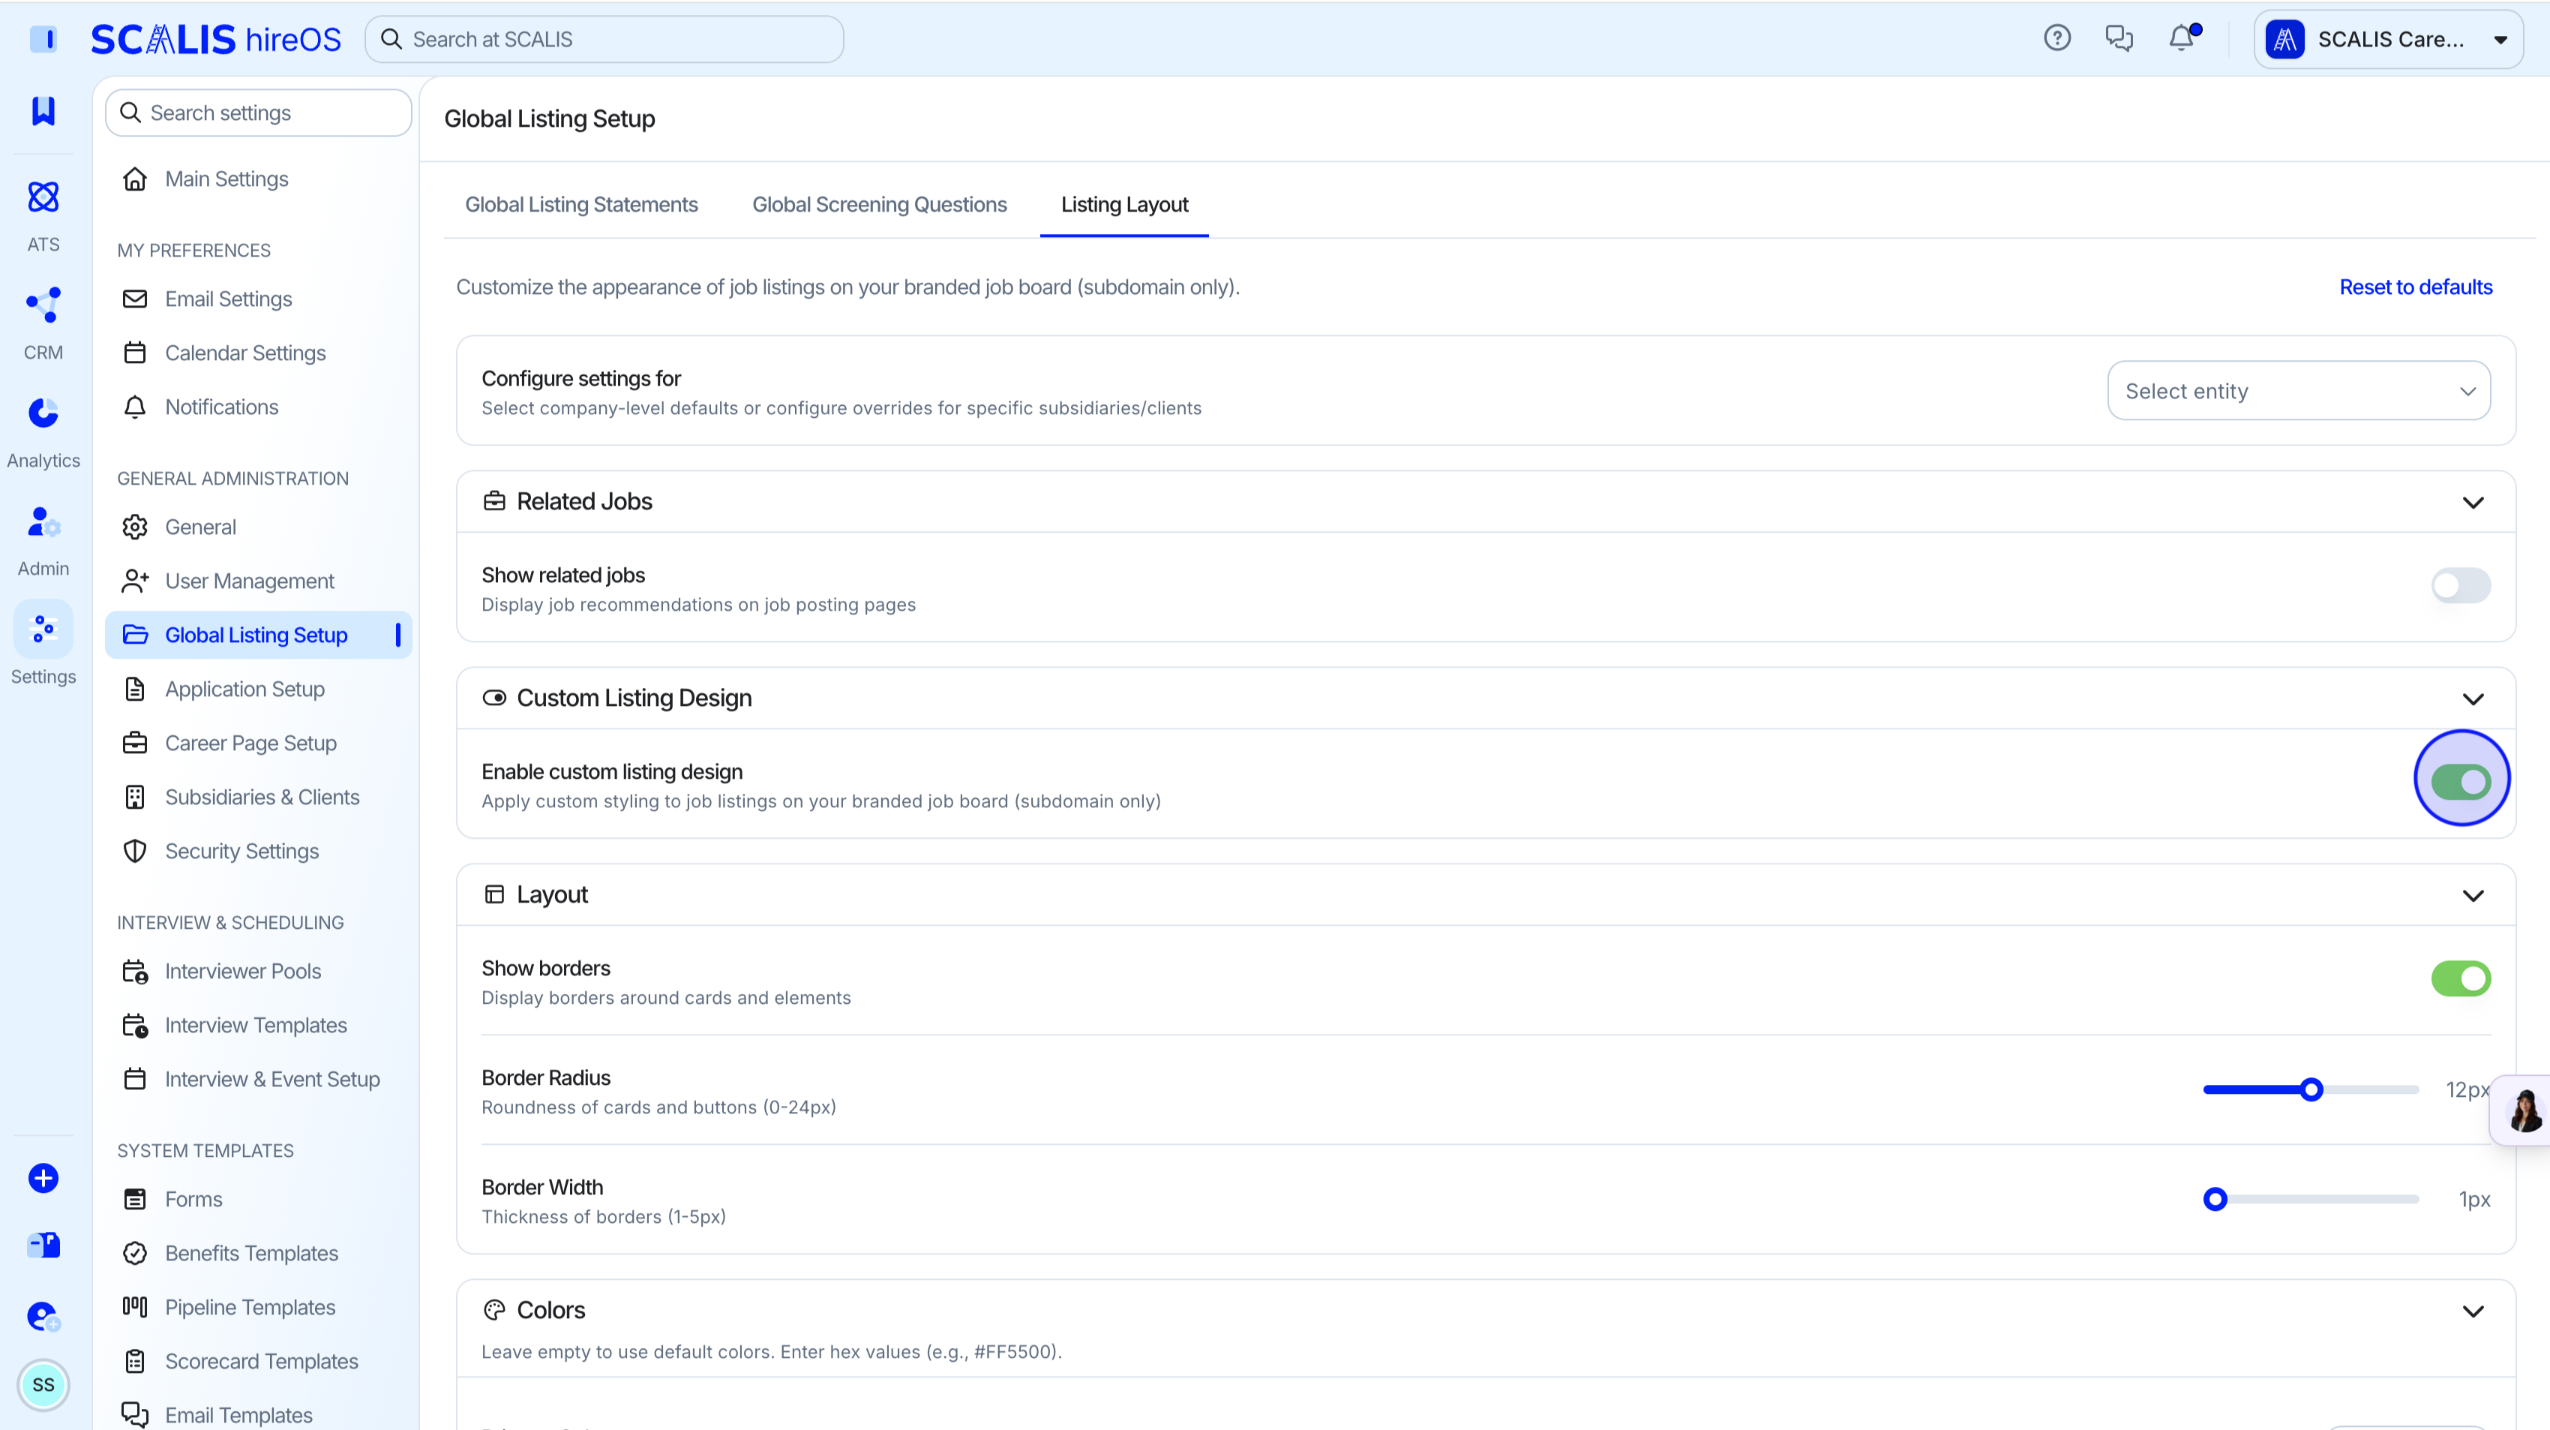
Customize the Listing Design
Toggle on Customize Listing Design to apply your own layout settings.
If you turn this off, the listing uses the default design.
4
Step 4
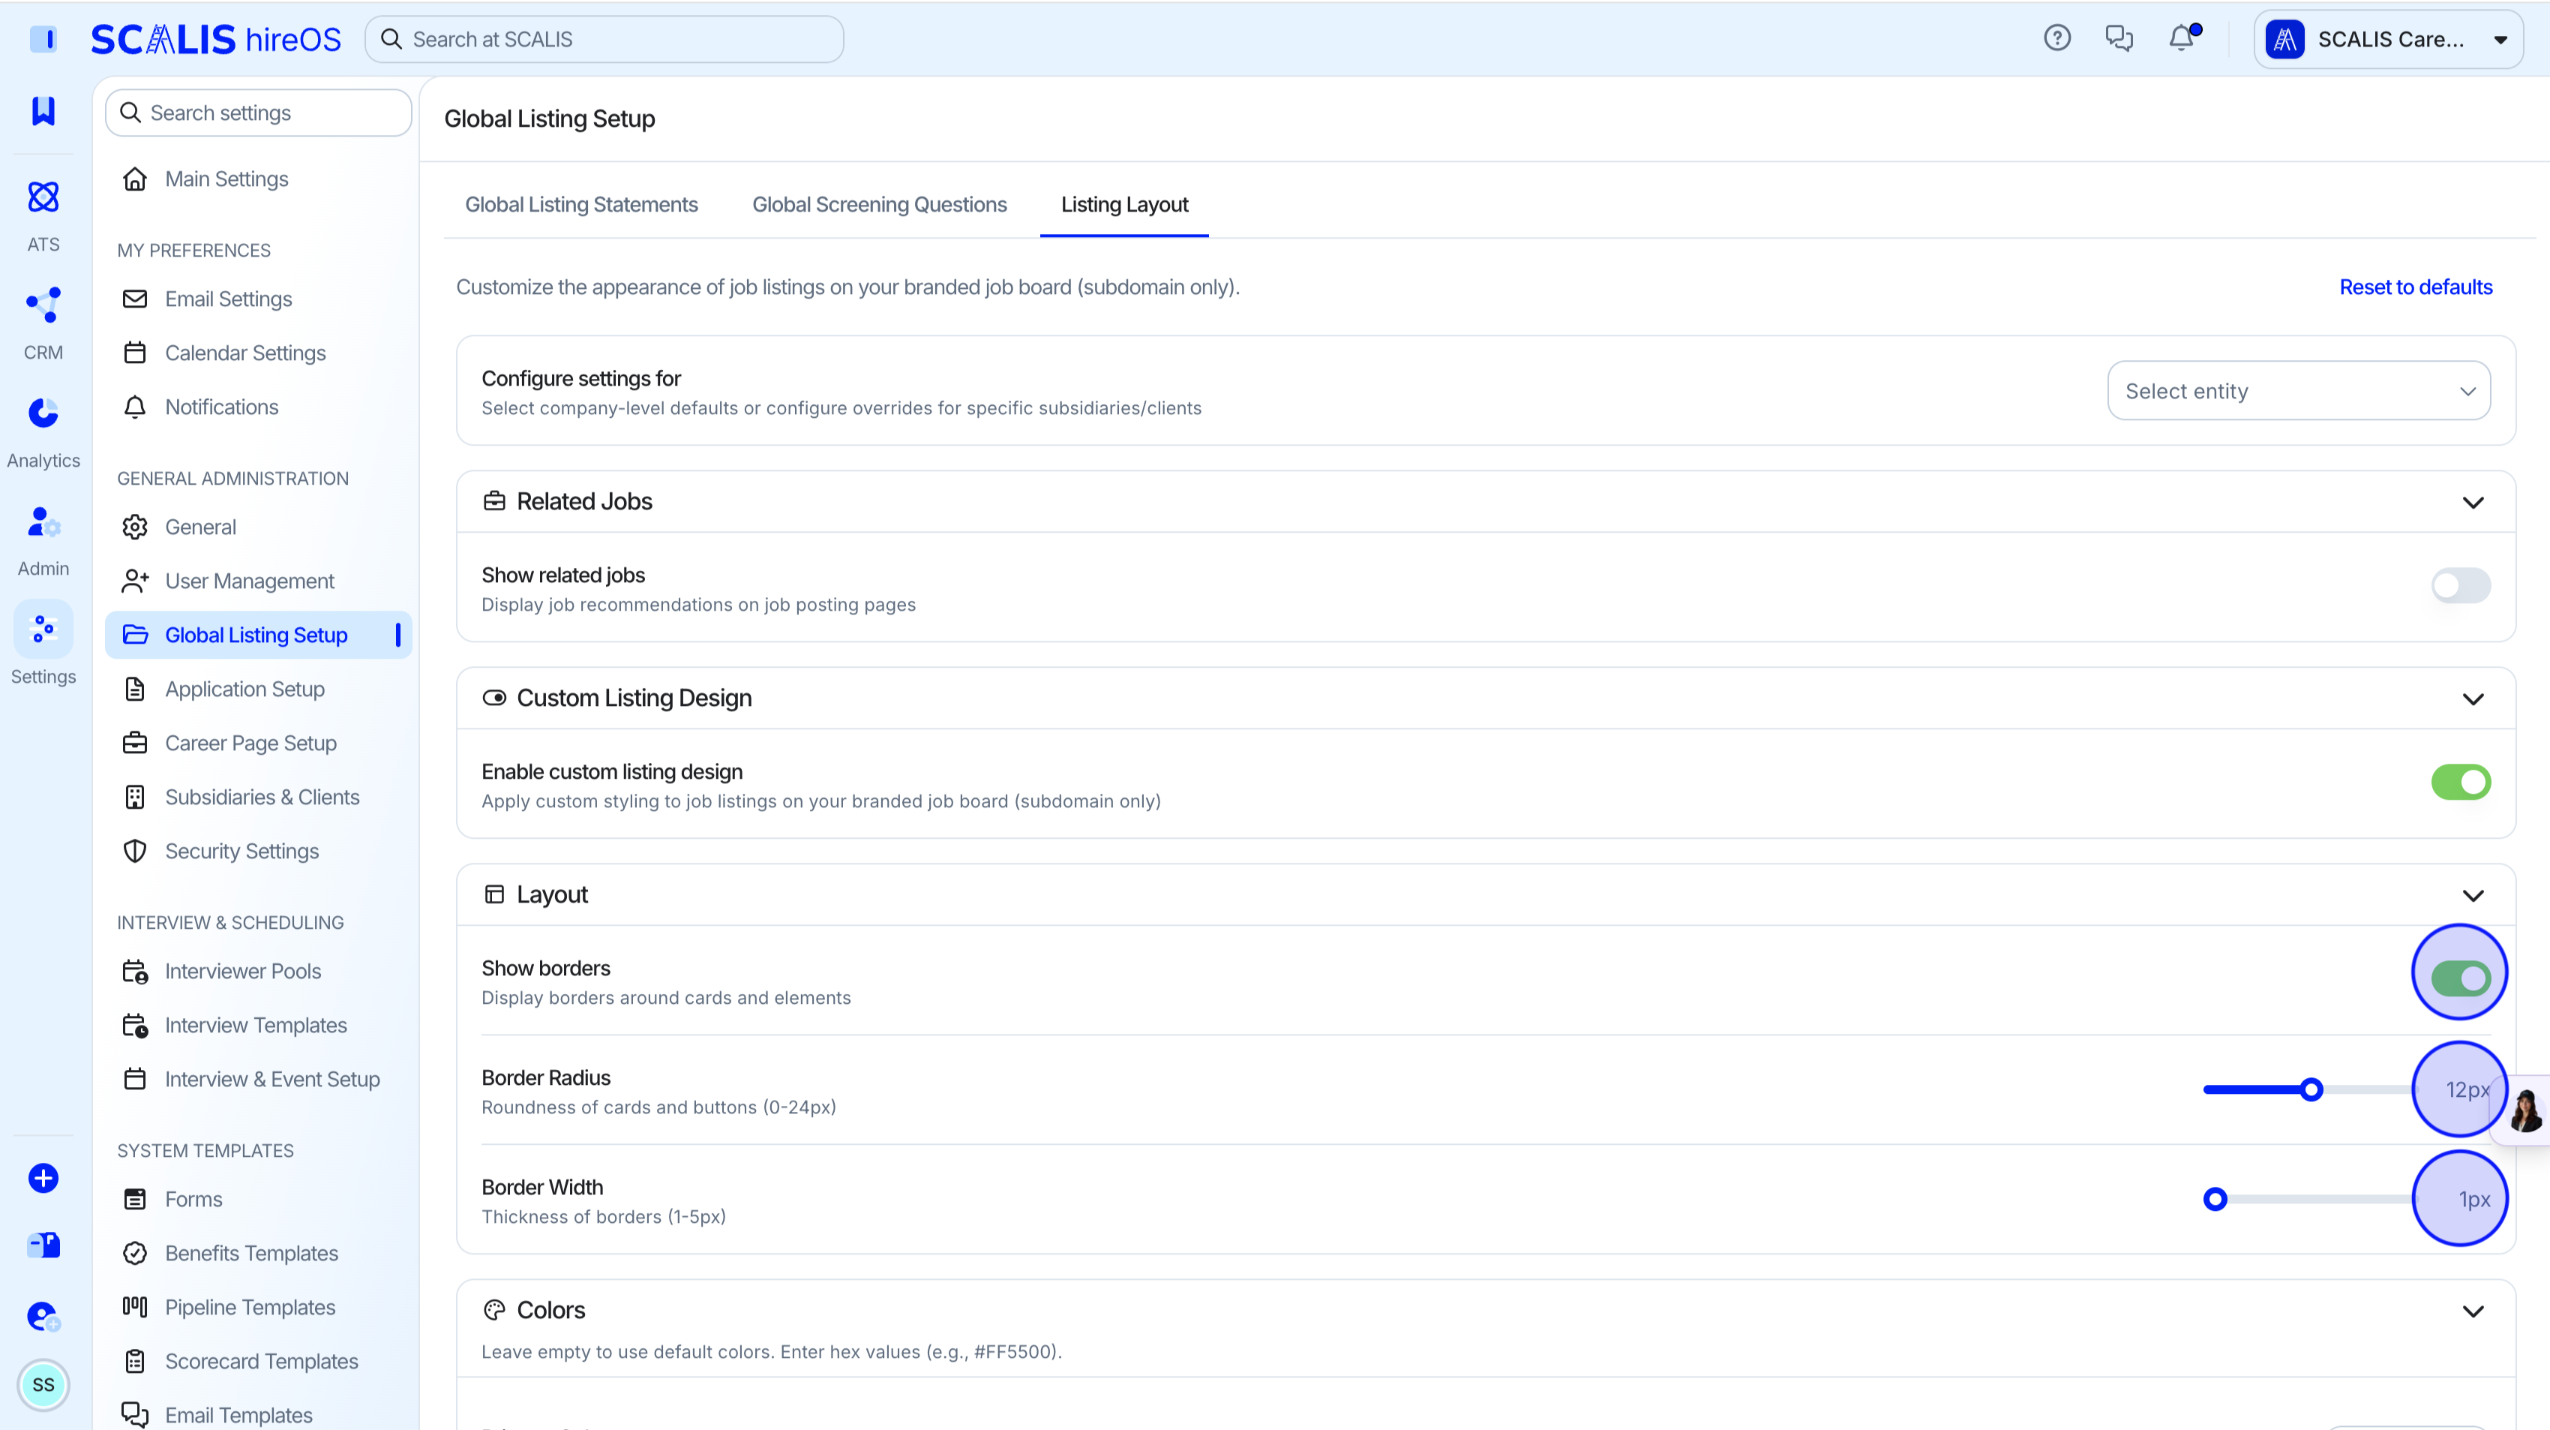
Set the Layout
Choose whether to show borders on cards and buttons.
Set the roundness of cards and buttons.
Set the thickness of borders.
5
Step 5
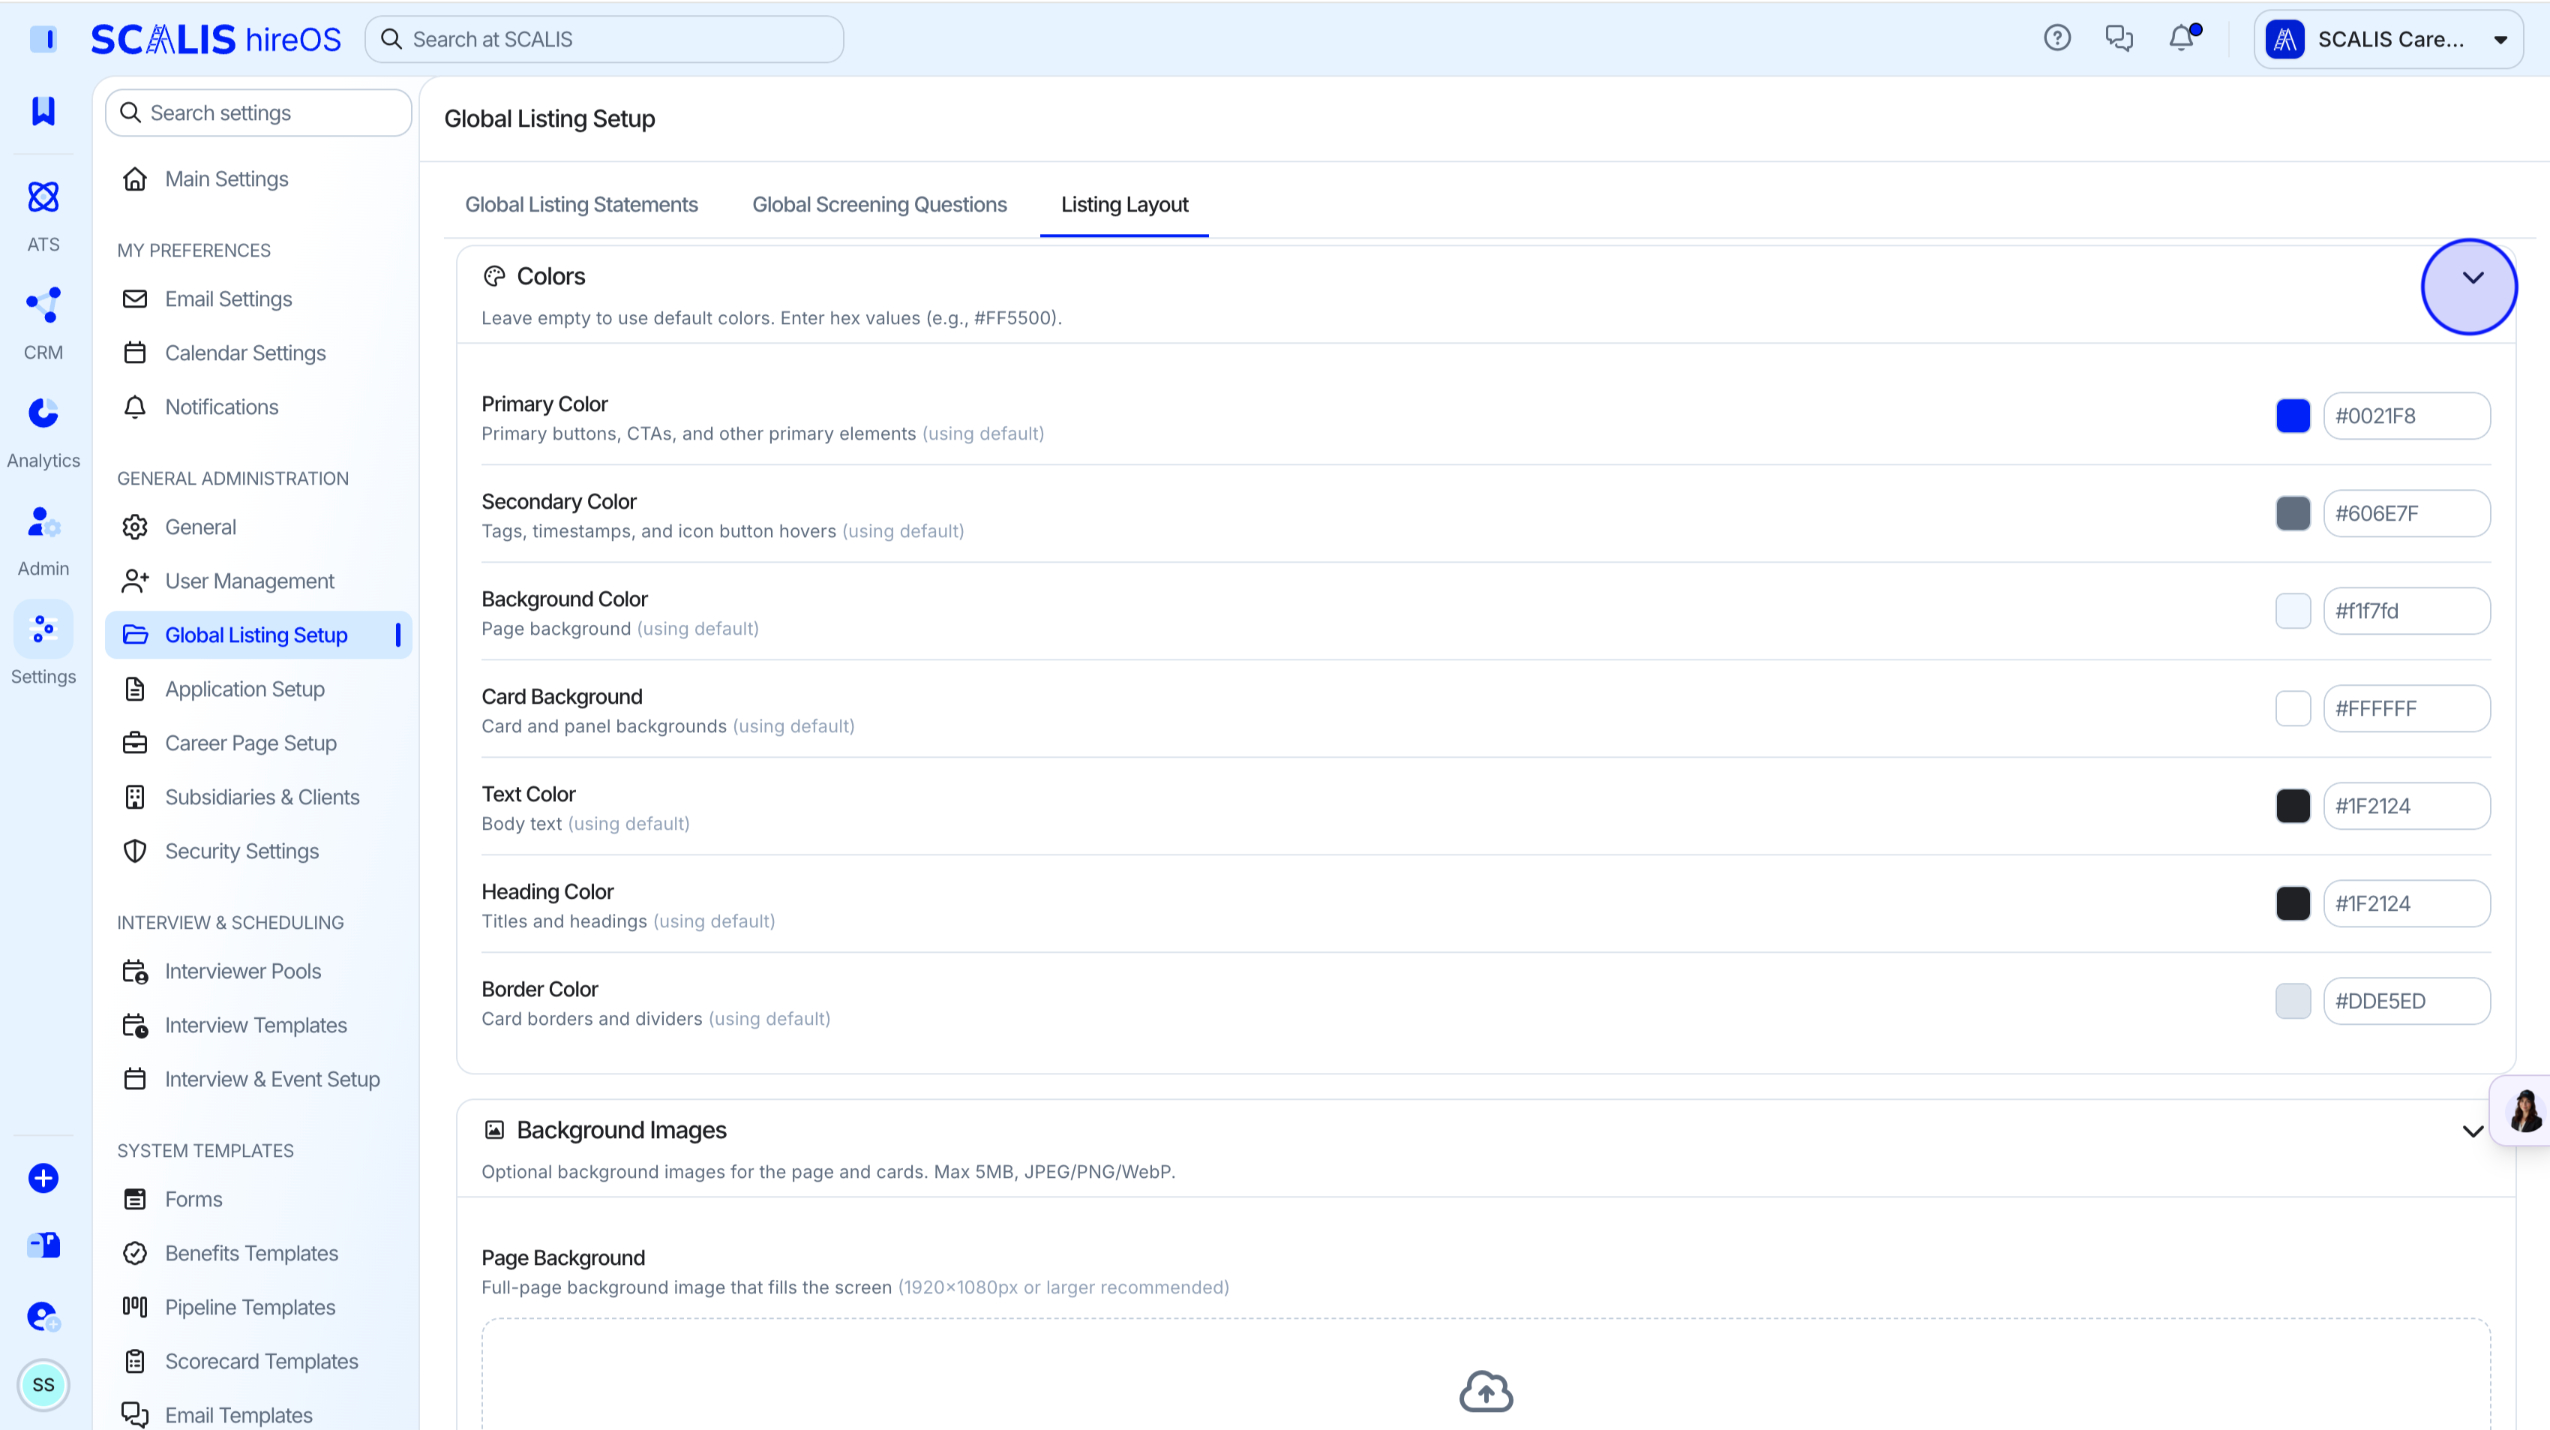
Choose Colors
Select colors using your specific color codes.
💡 Note: This is a great opportunity to connect with your marketing team to match brand colors exactly.
✓
Final Step
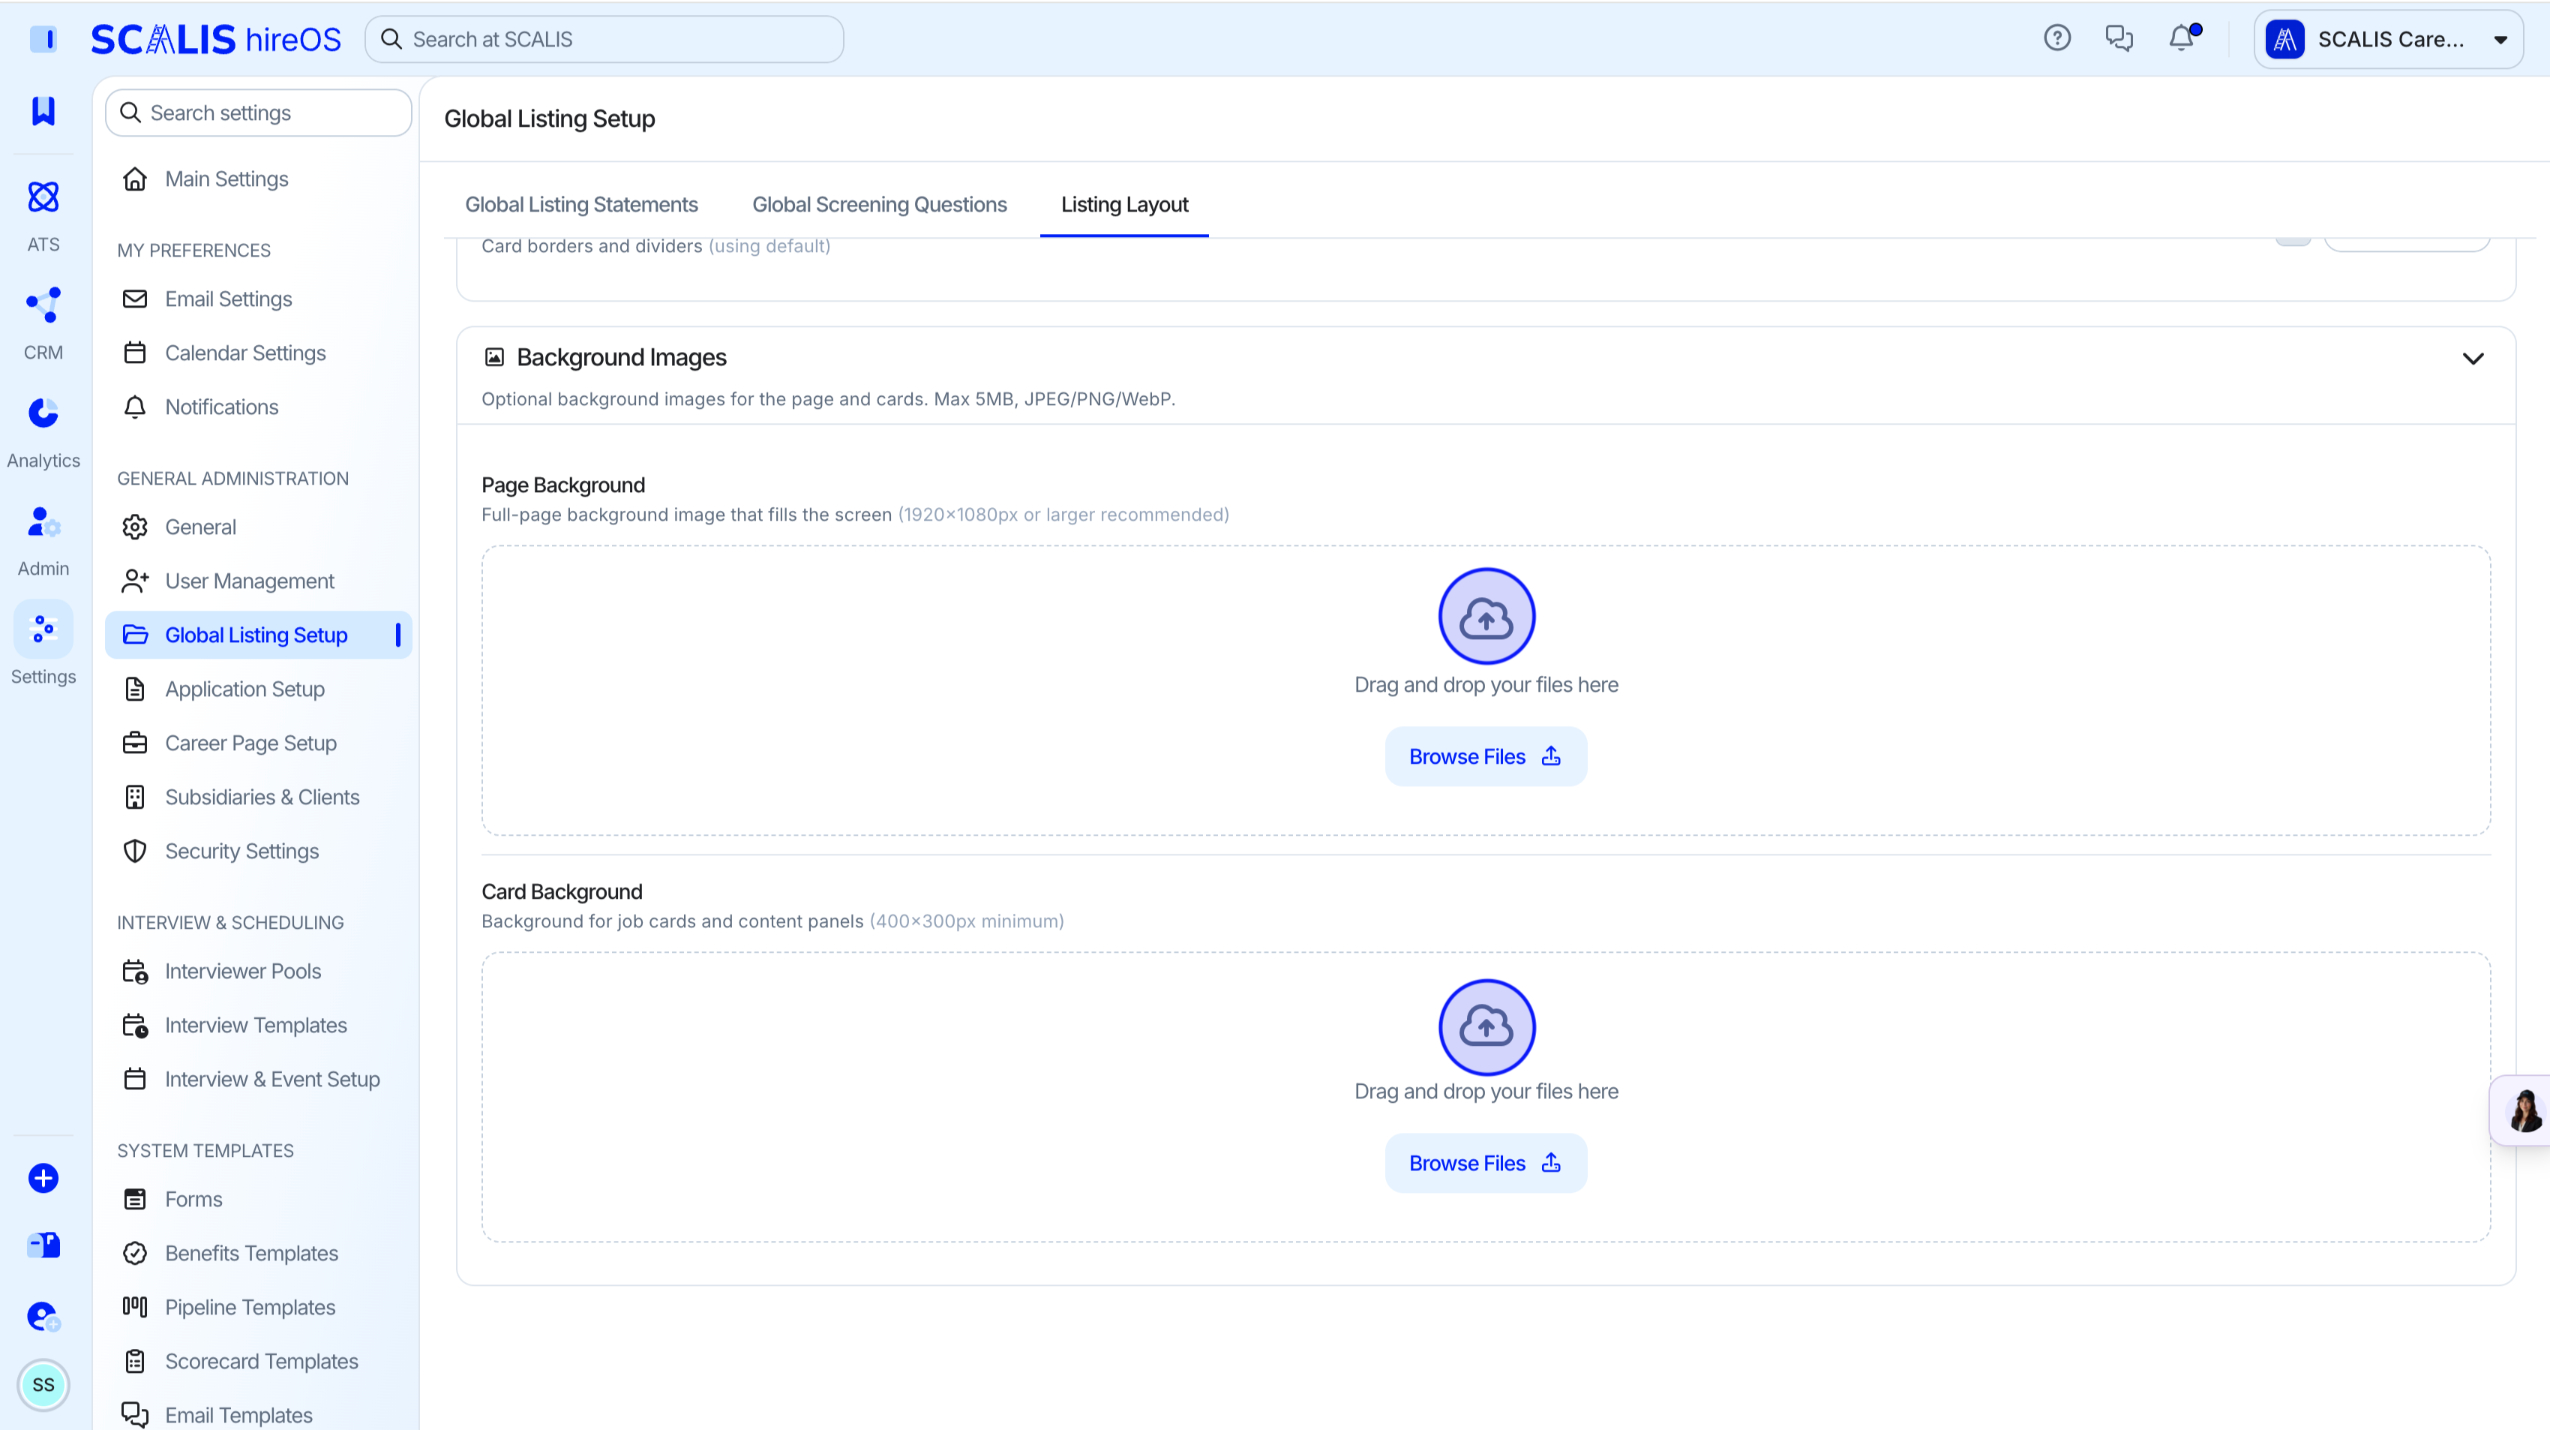
Add Background Images
Add a background image for the page background.
Add a background image for the card background.
Your global listing setup is complete! Reach out to your CSM any time you need a hand.