.png?width=1391&height=437&name=SCALIS%20Logo%20(1).png)
JOB SETUP
Configure, organize, and set up your pipeline templates to maintain a consistent hiring process across job requisitions.
8 steps6 min read
Build a New Pipeline Template
1
Step 1
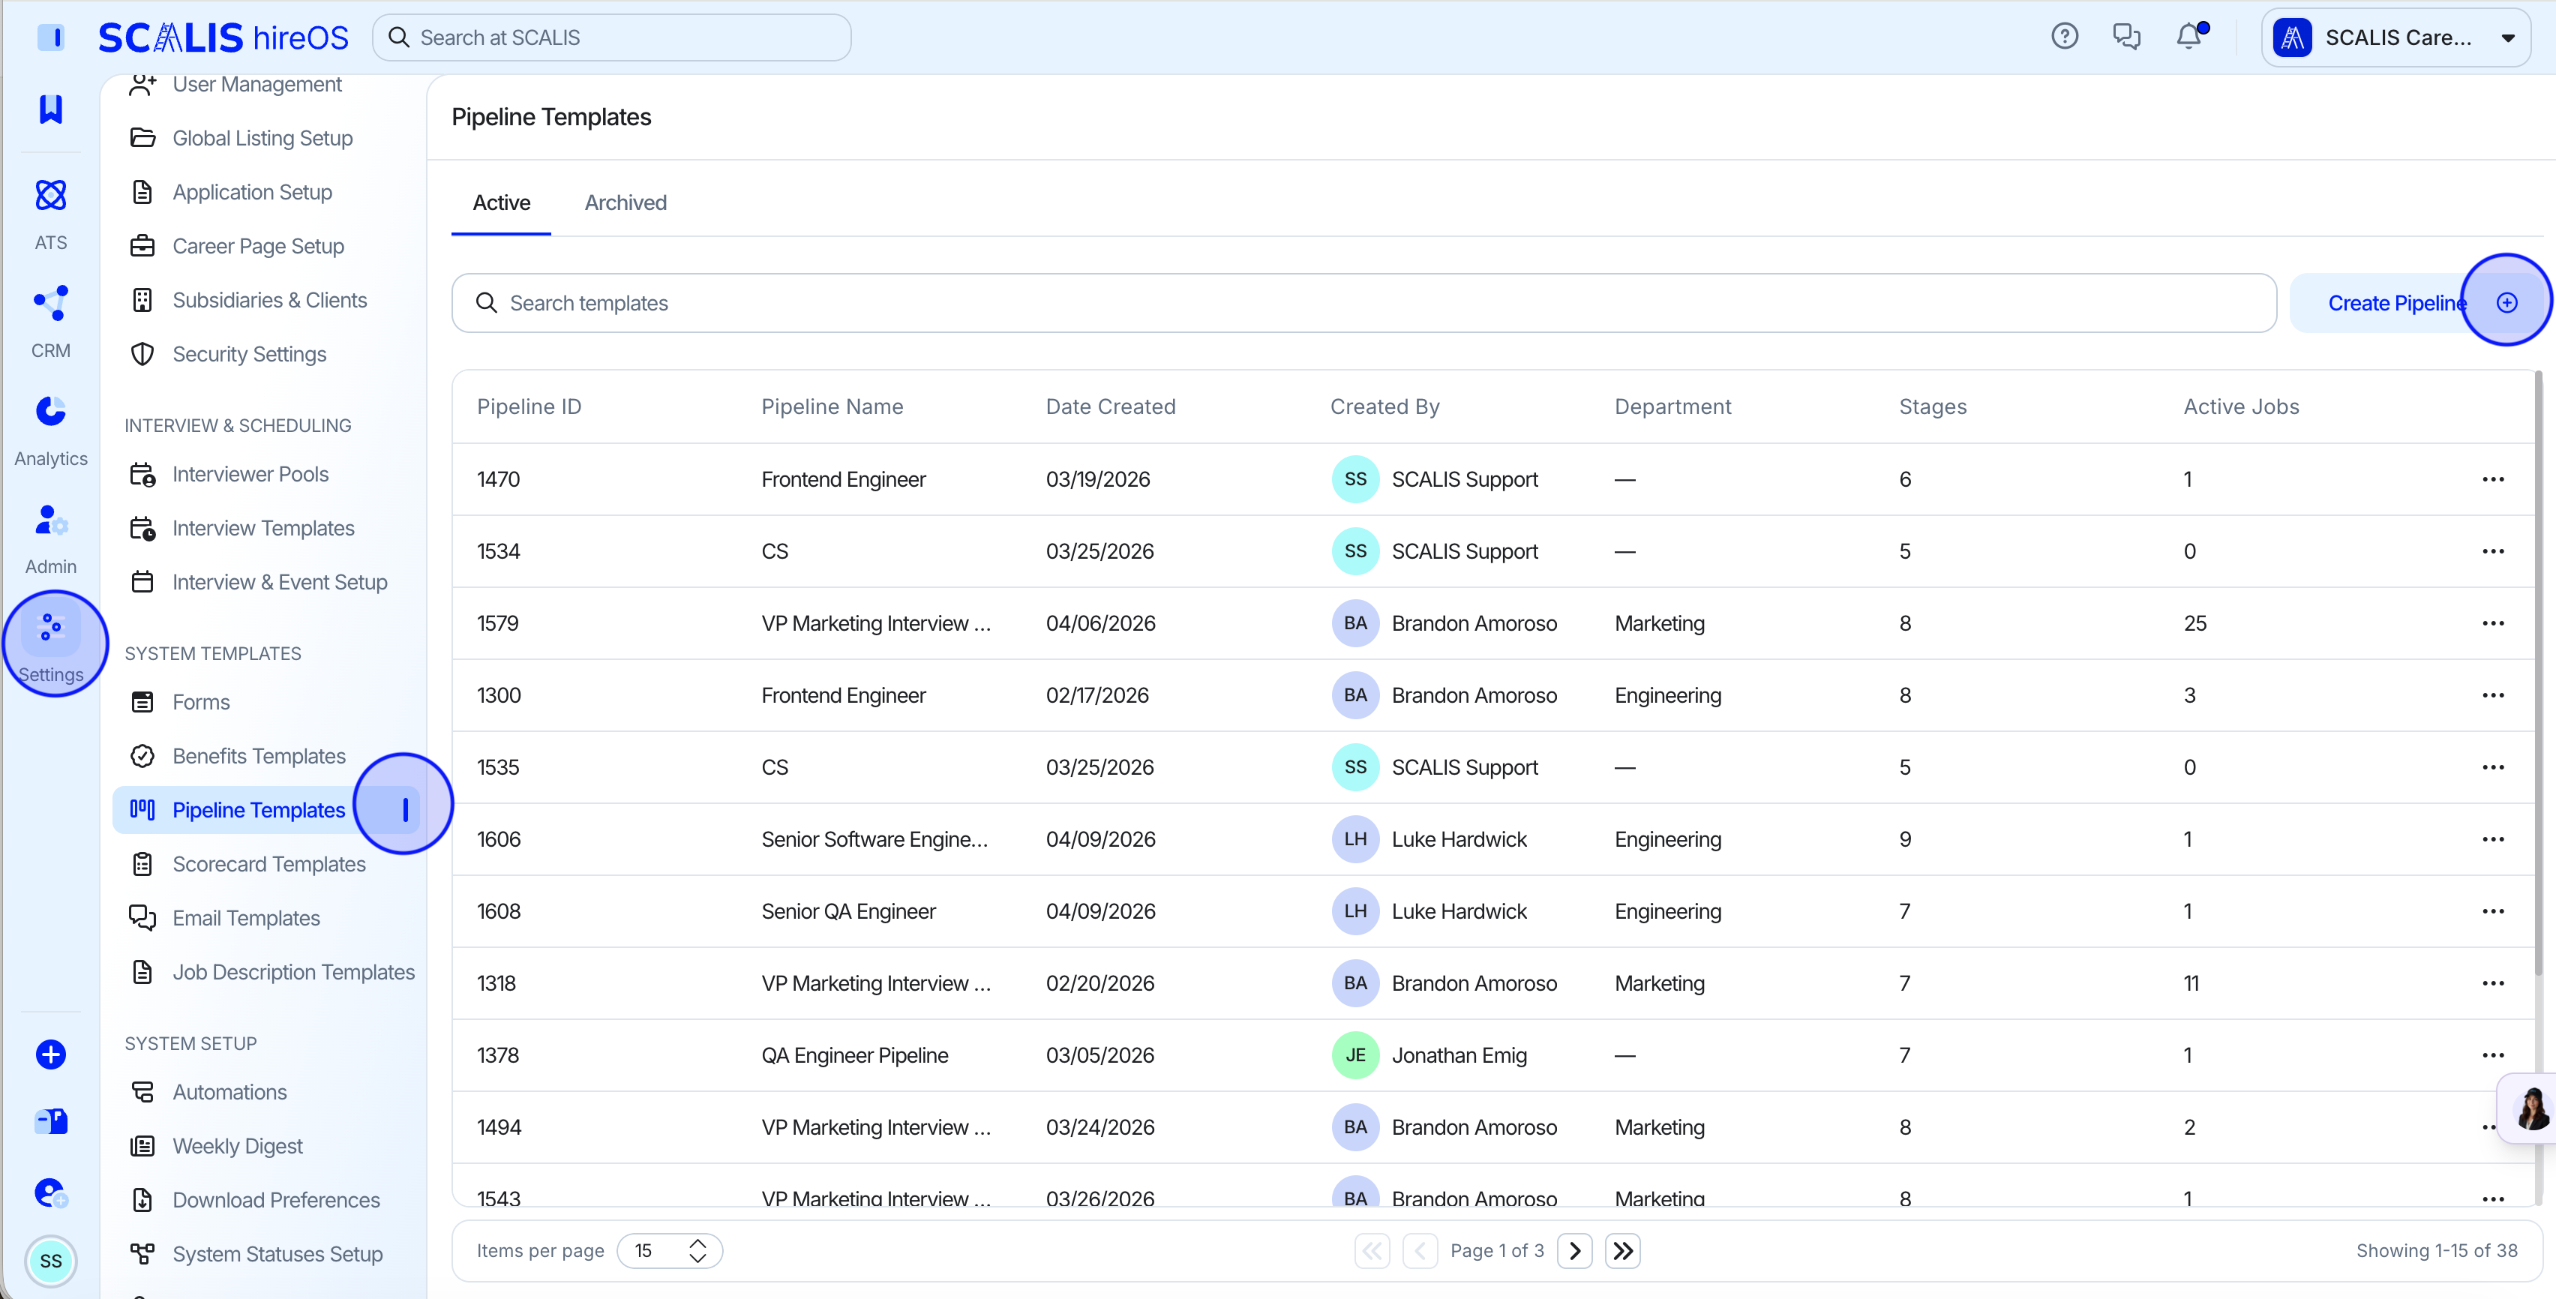
Open Pipeline Templates and Start a New Pipeline
Navigate to your Company Settings and click Pipeline Templates.
Click Create Pipeline in the top right corner.
2
Step 2
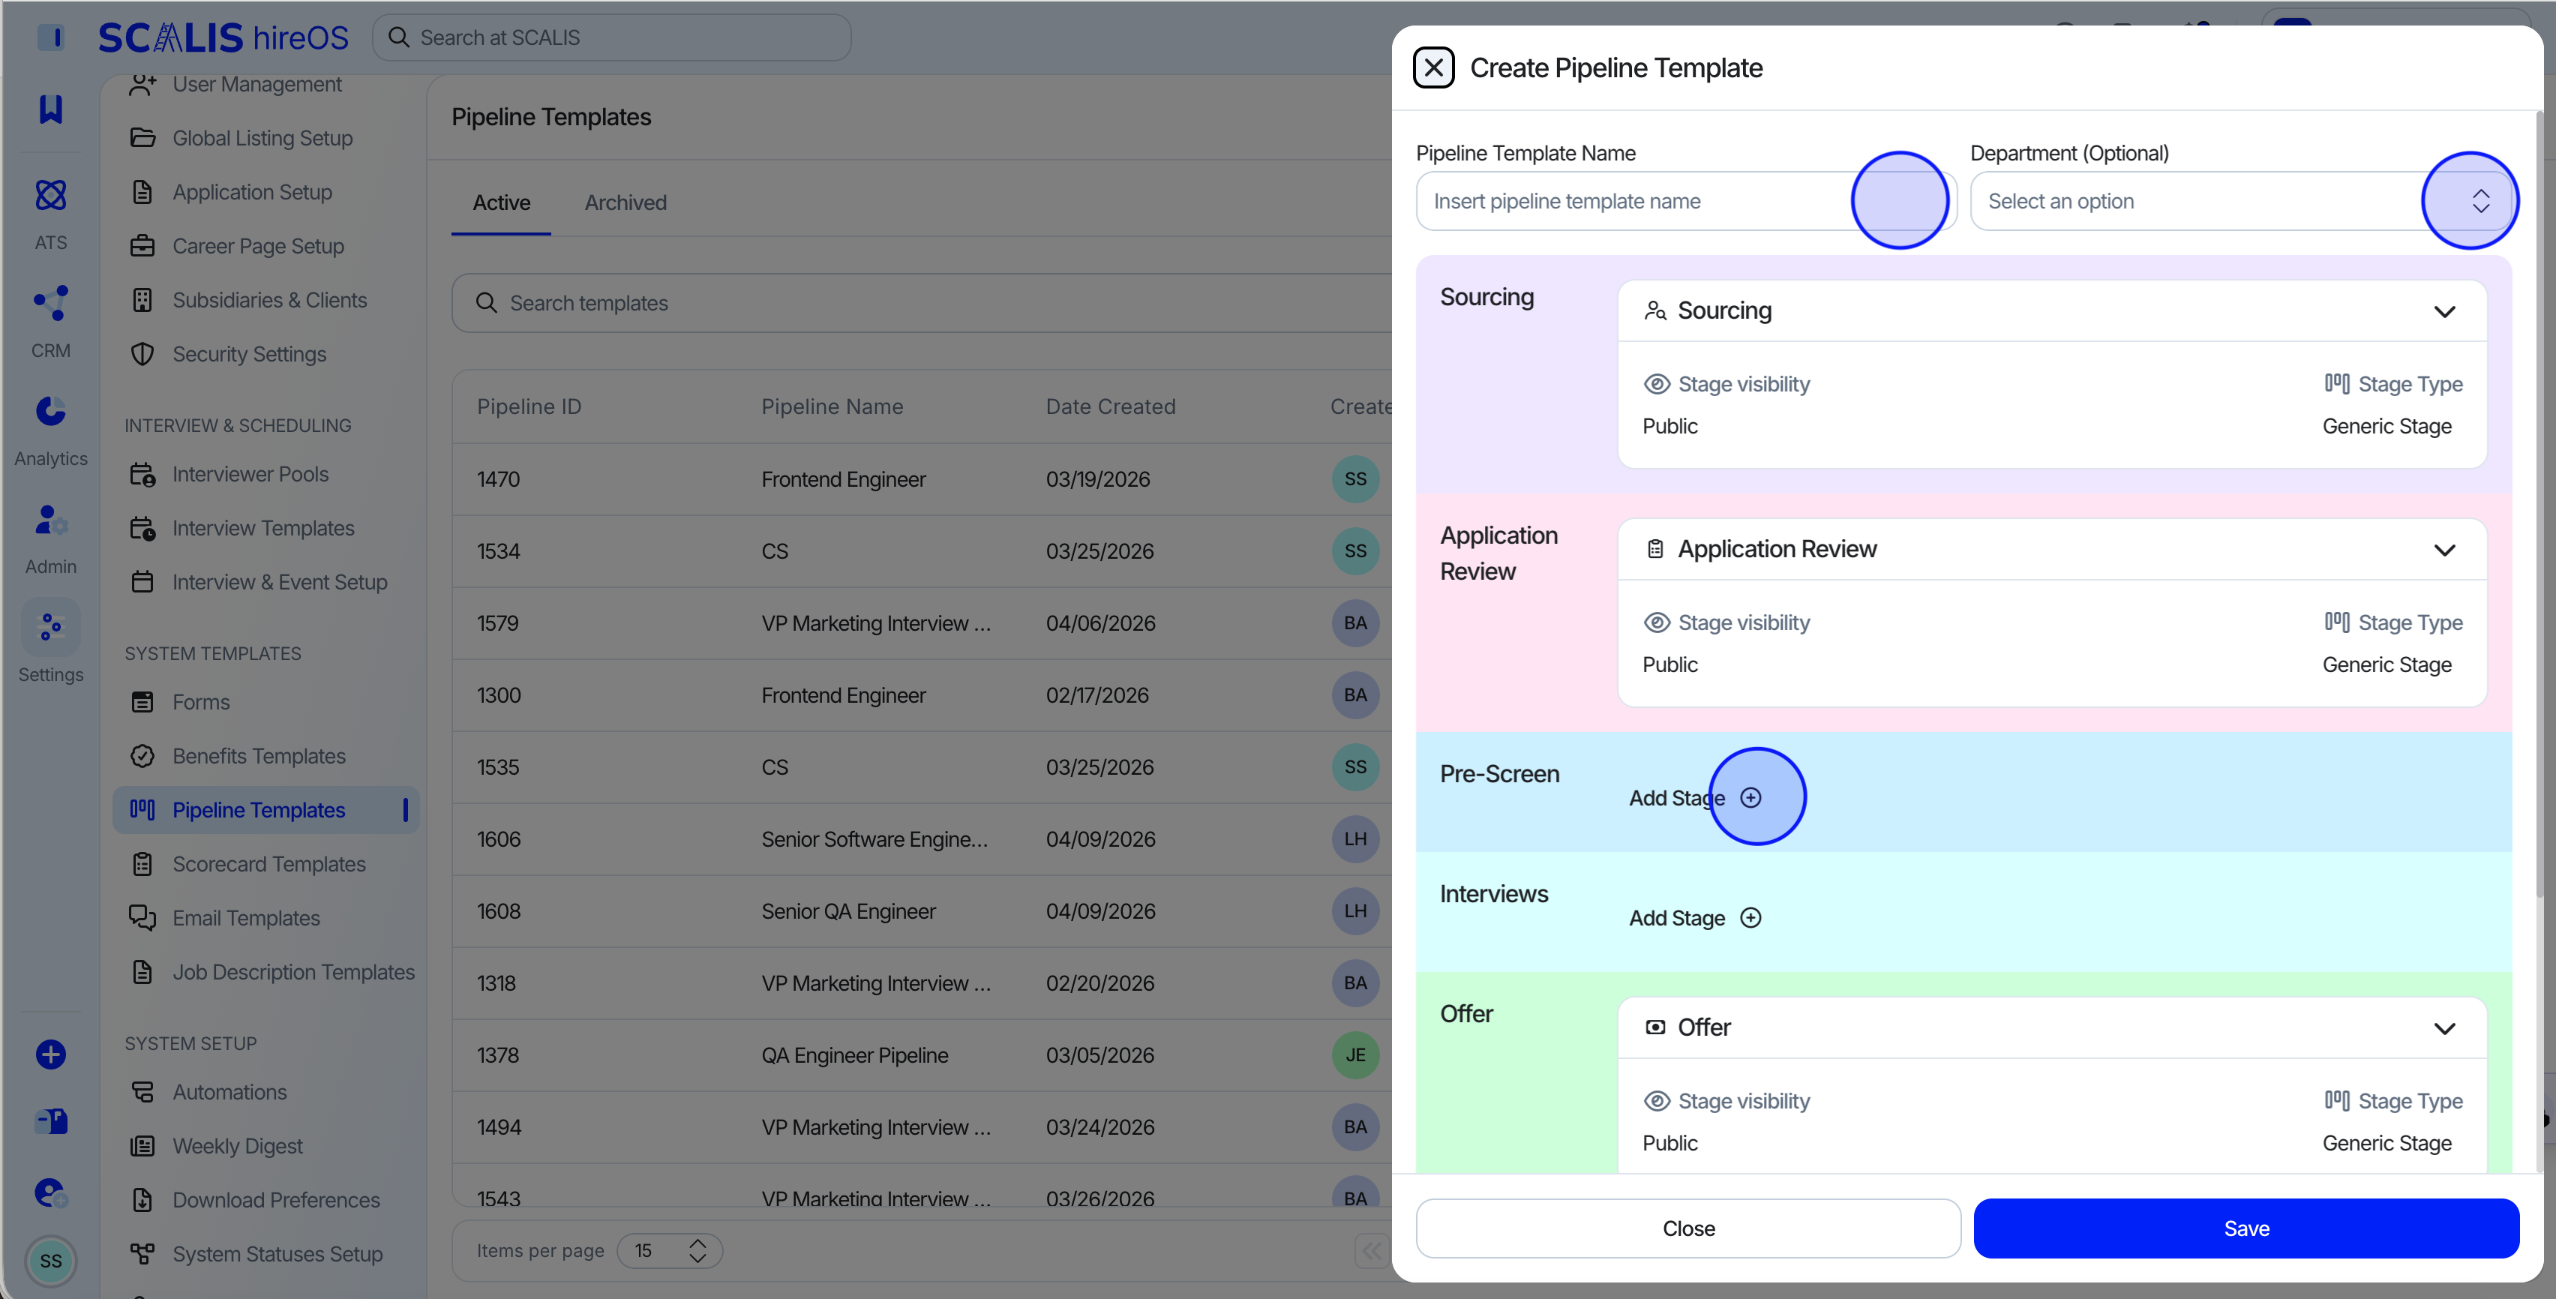
Name the Template and Choose a Department
Create a Template Name and choose the Department this template will be for.
Example: for Marketing hiring, title it "Marketing Pipeline Template" so it's easy to reuse across all Marketing requisitions.
3
Step 3
Set Up Stage Types
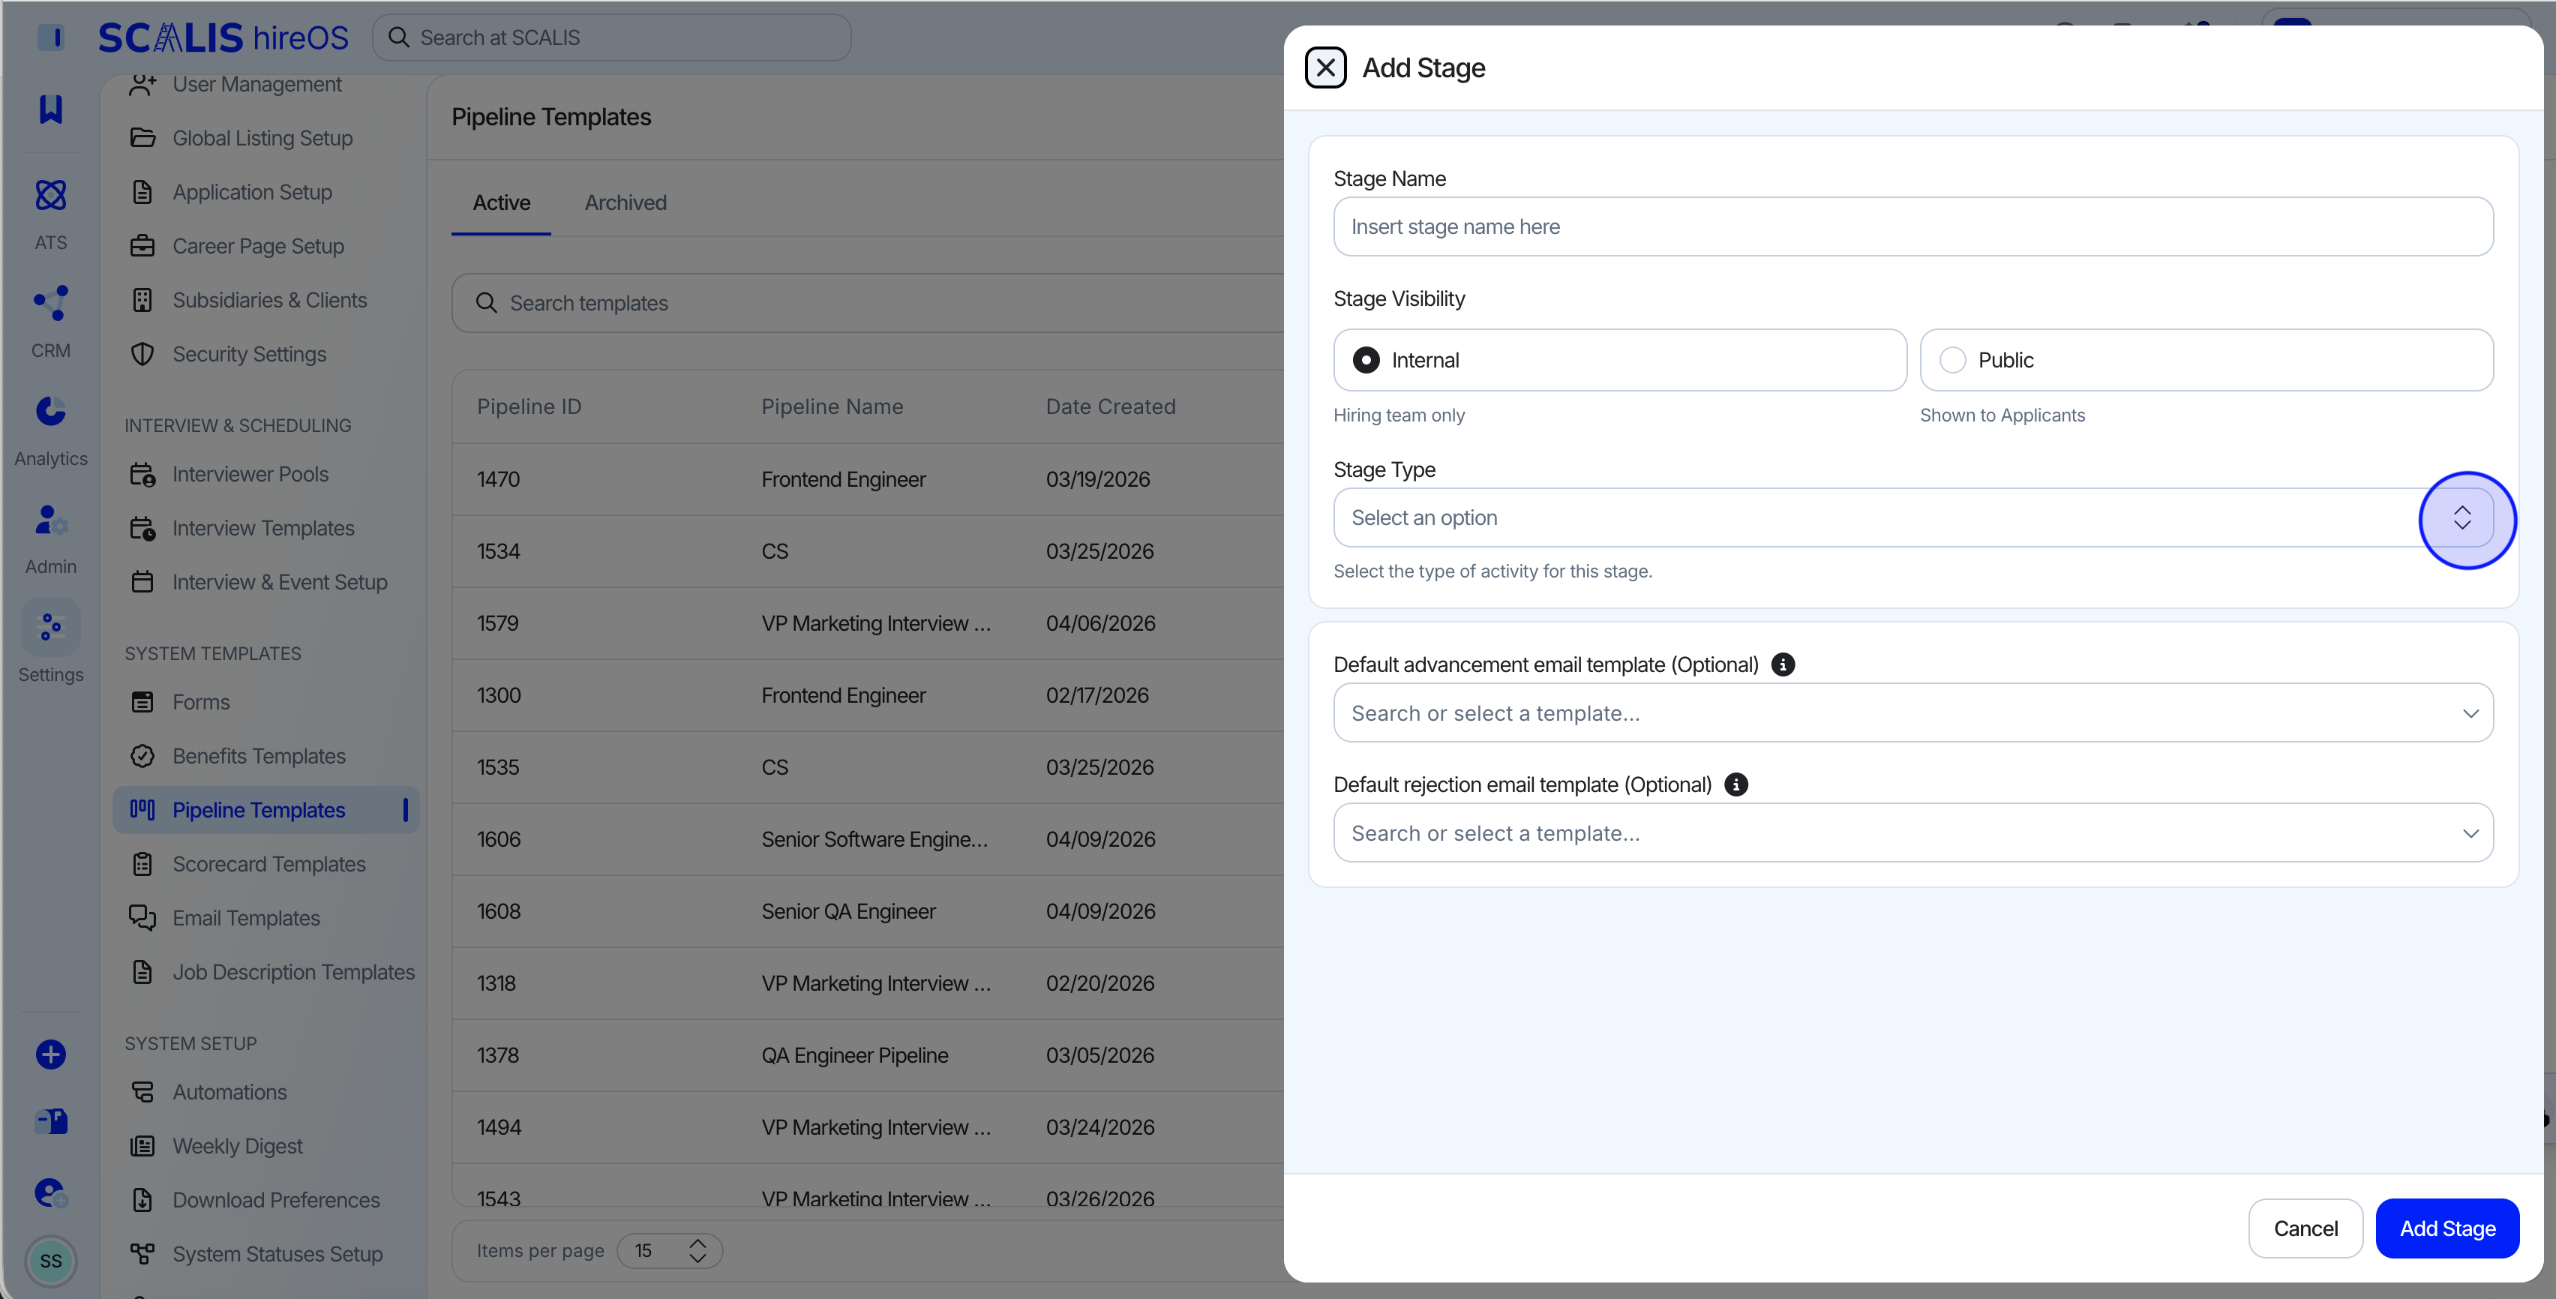
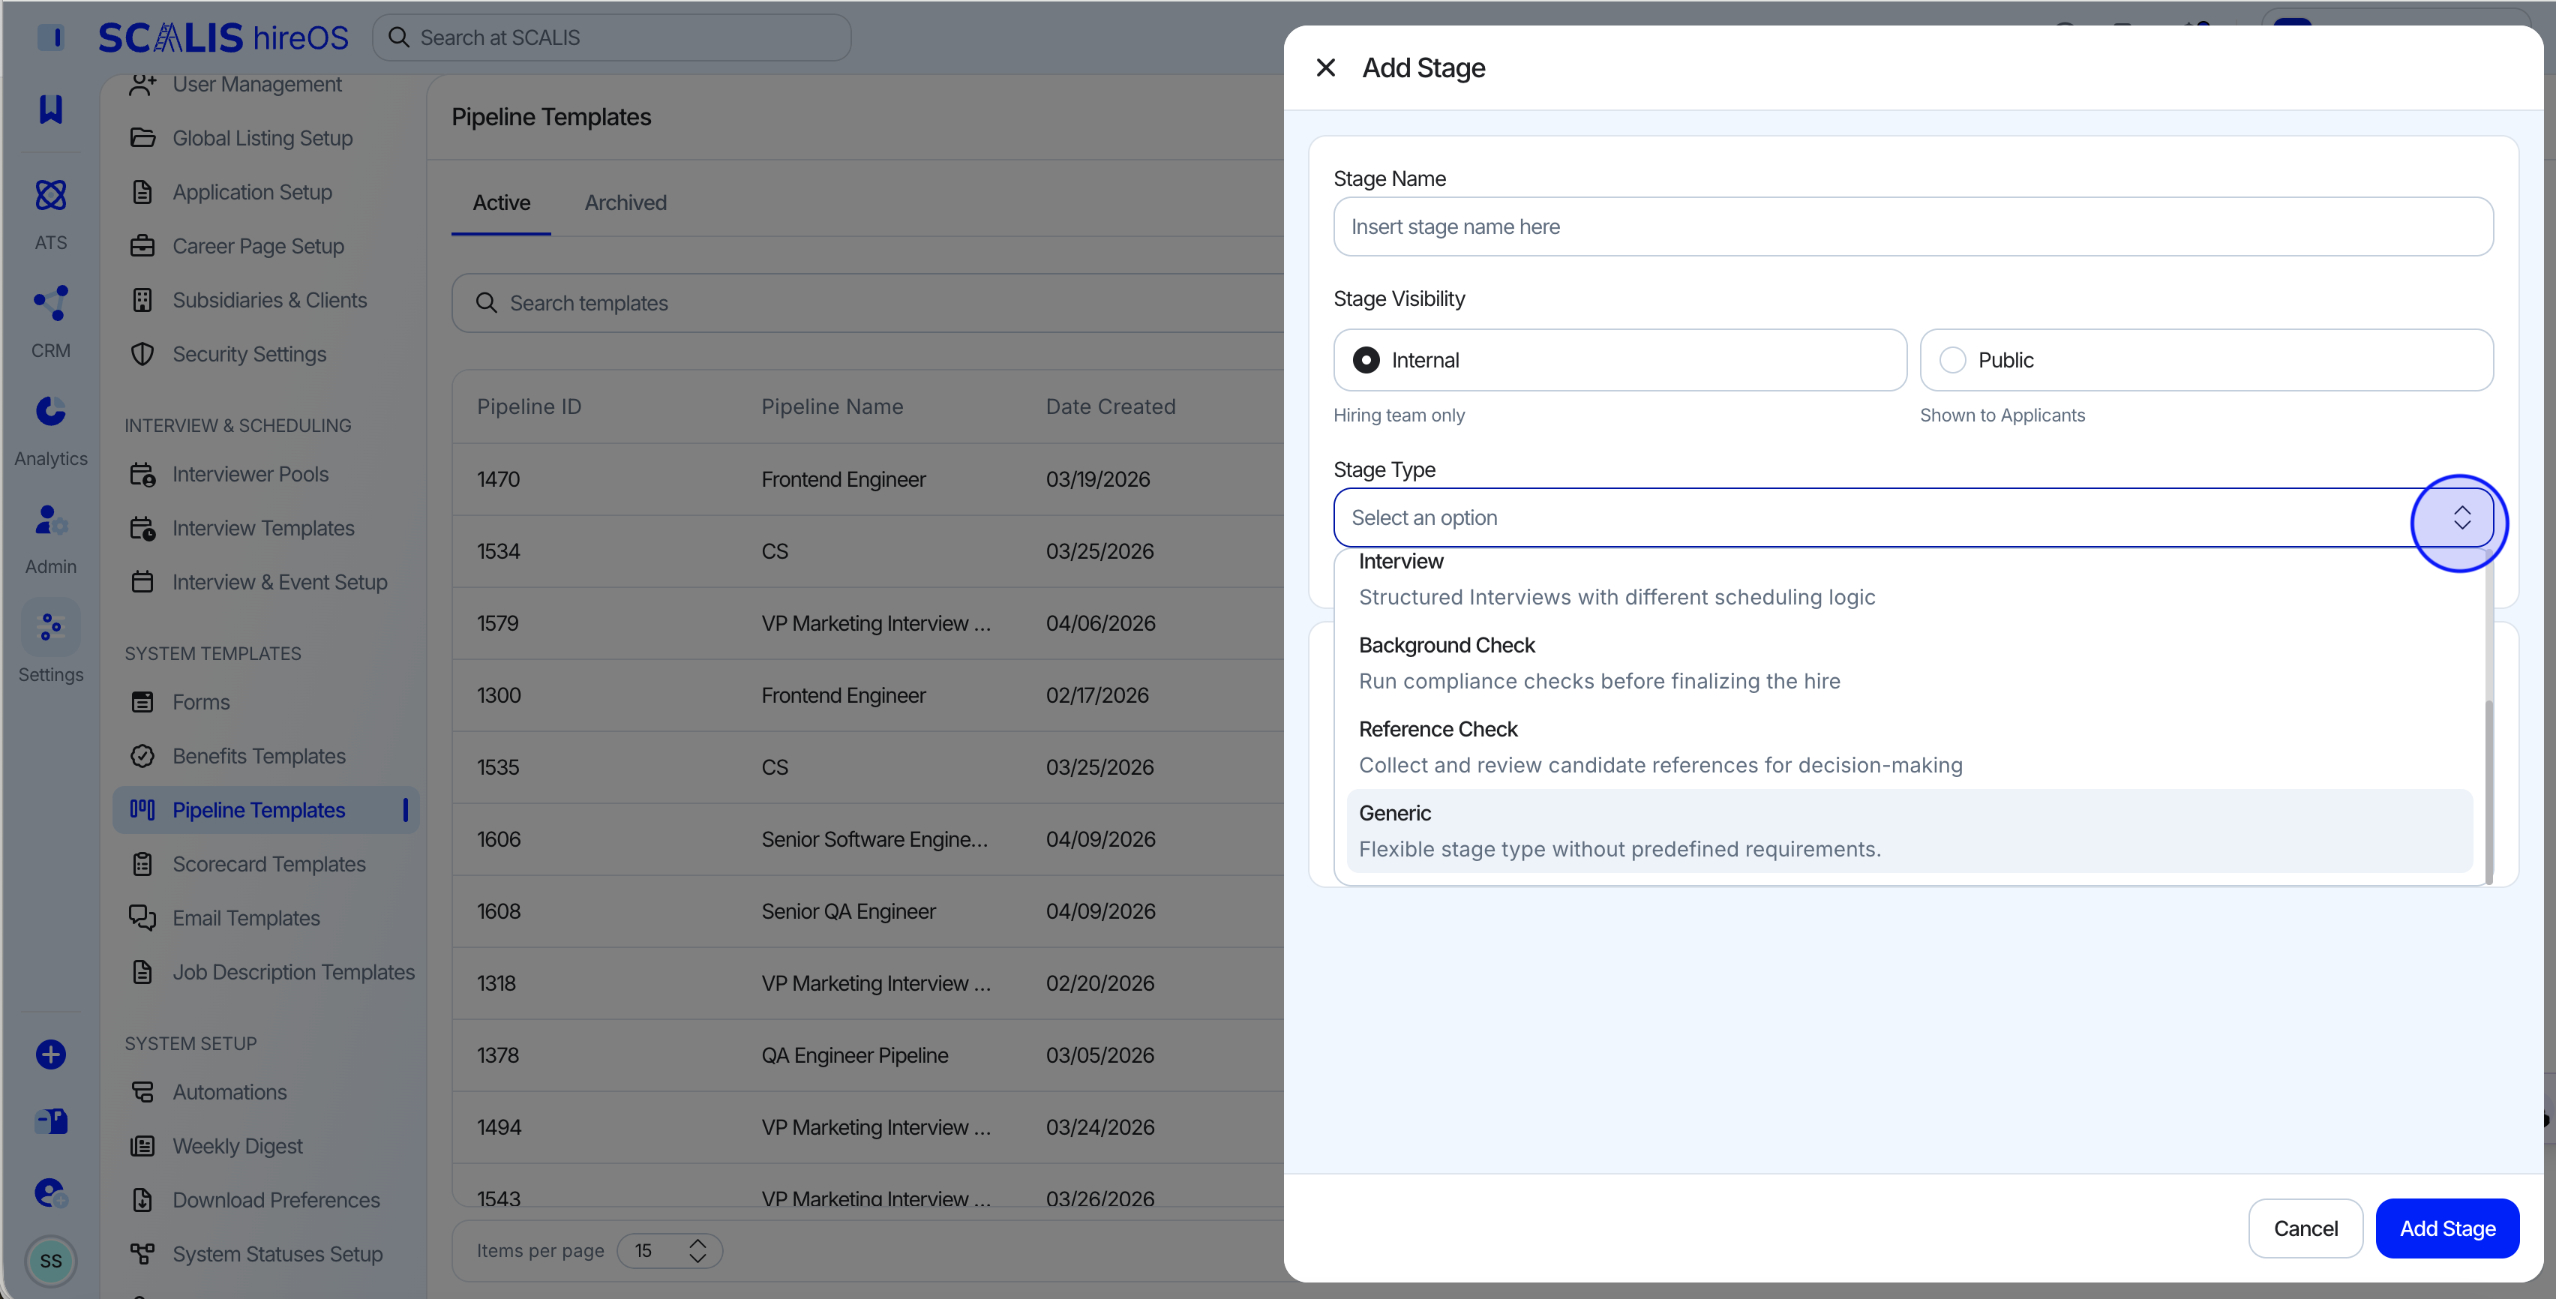
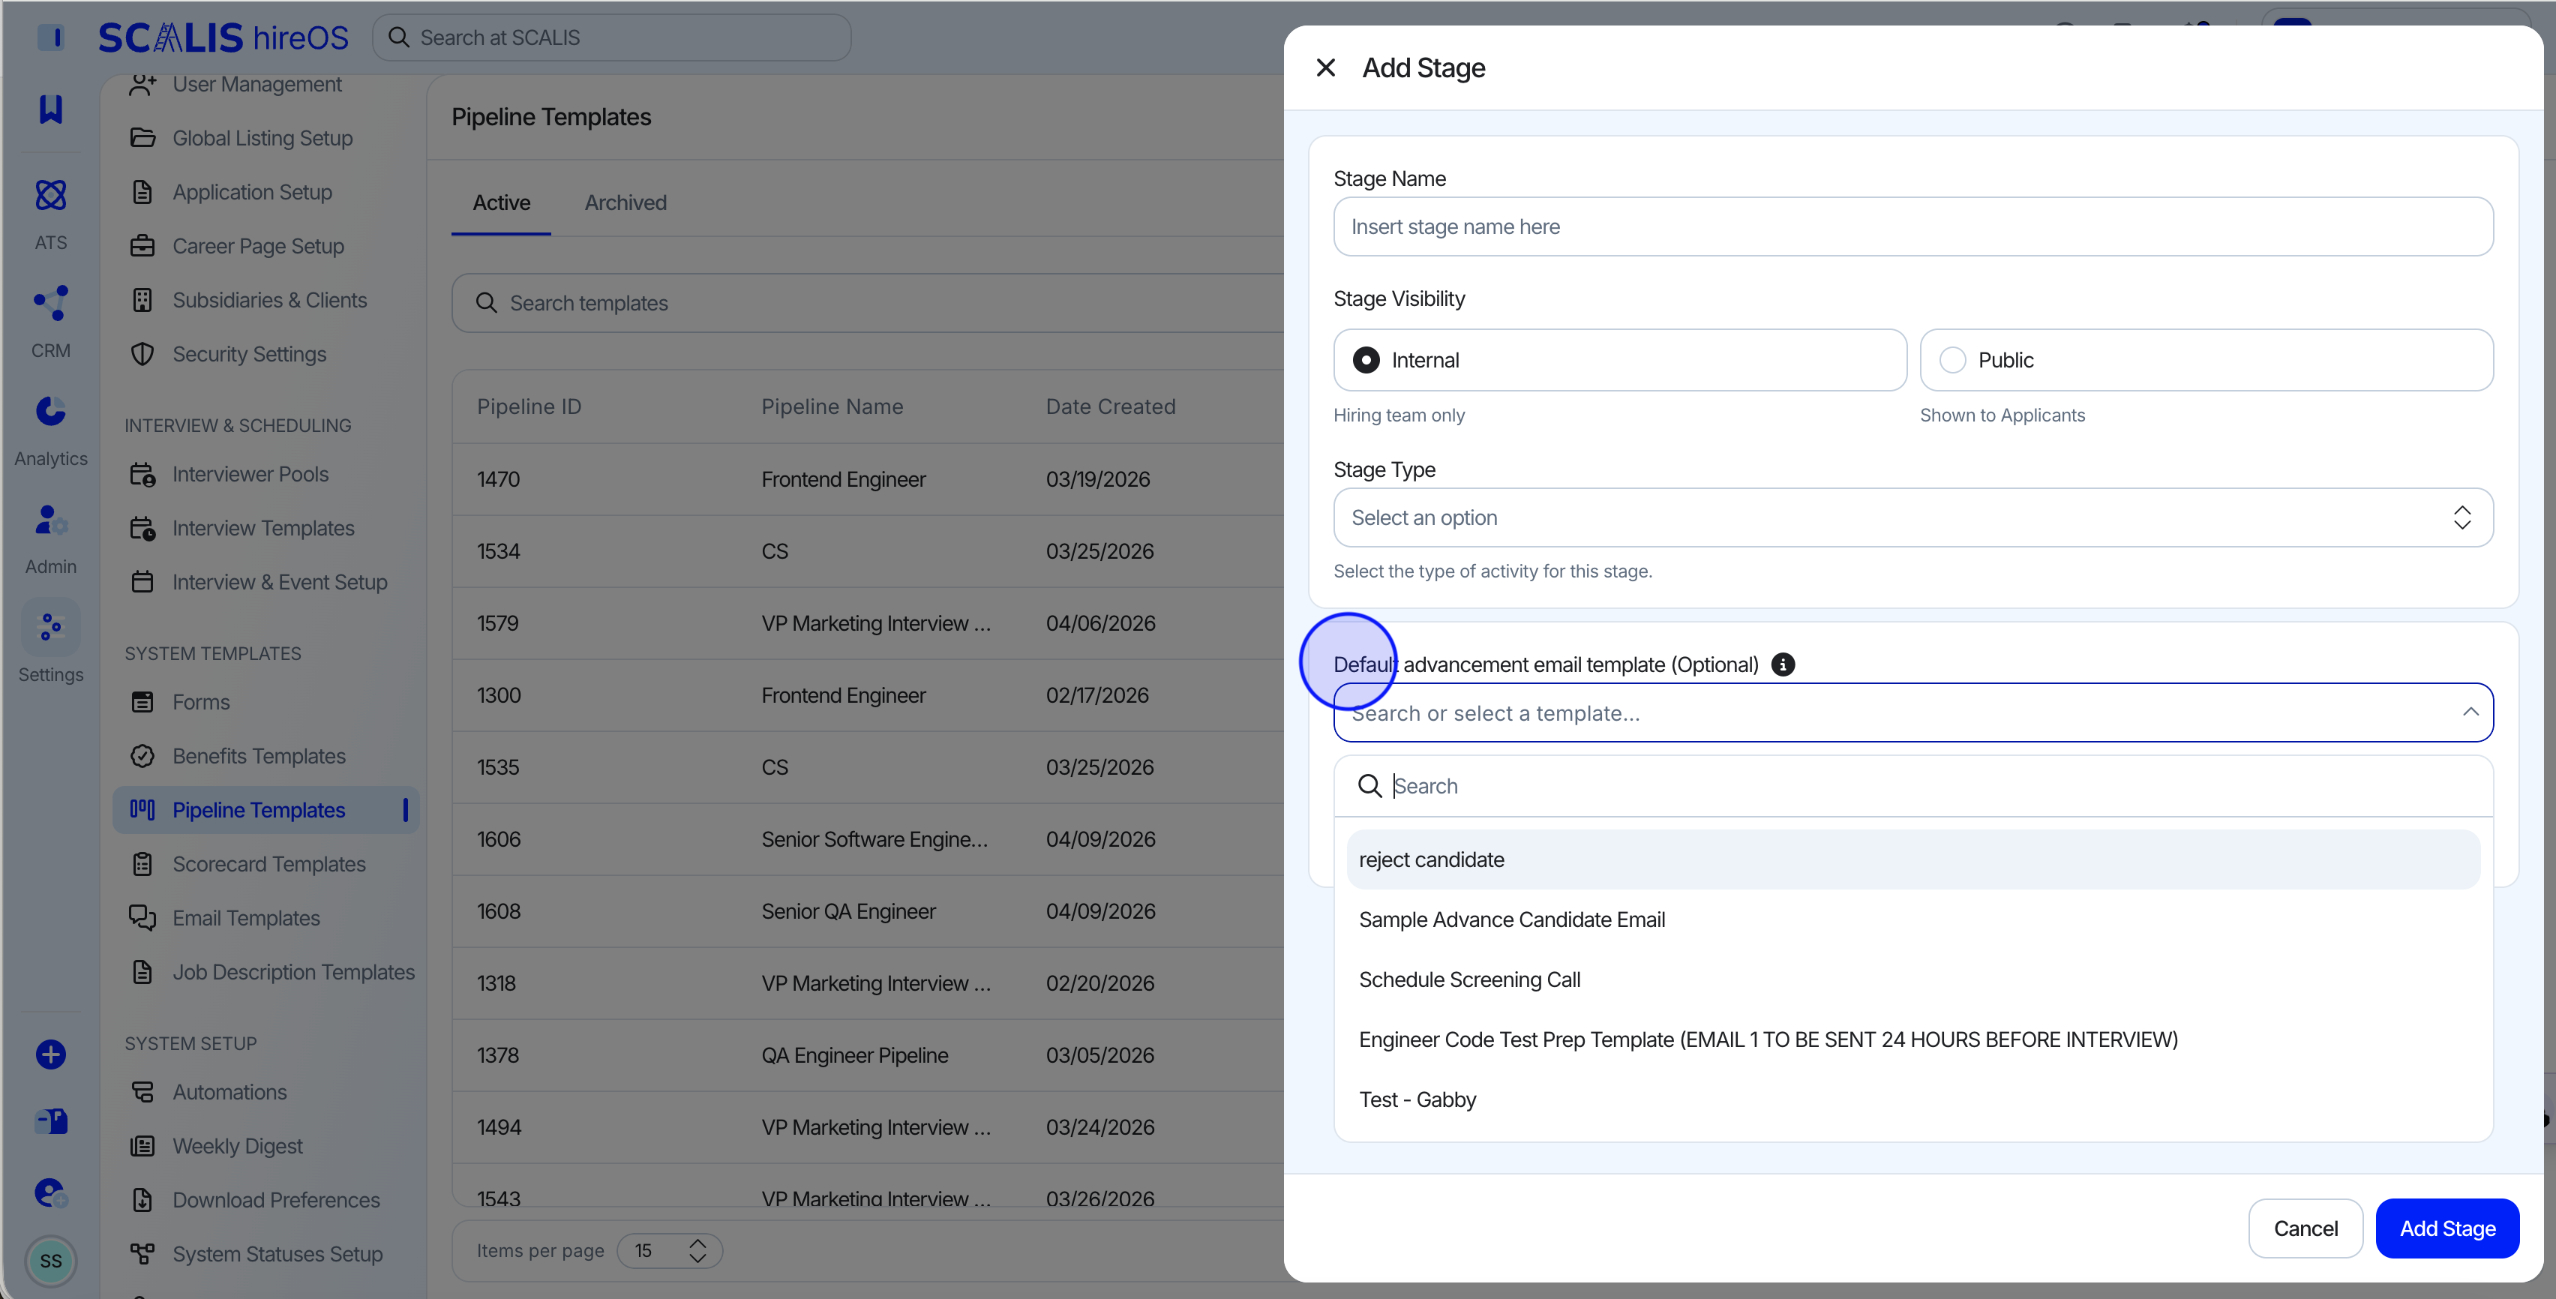
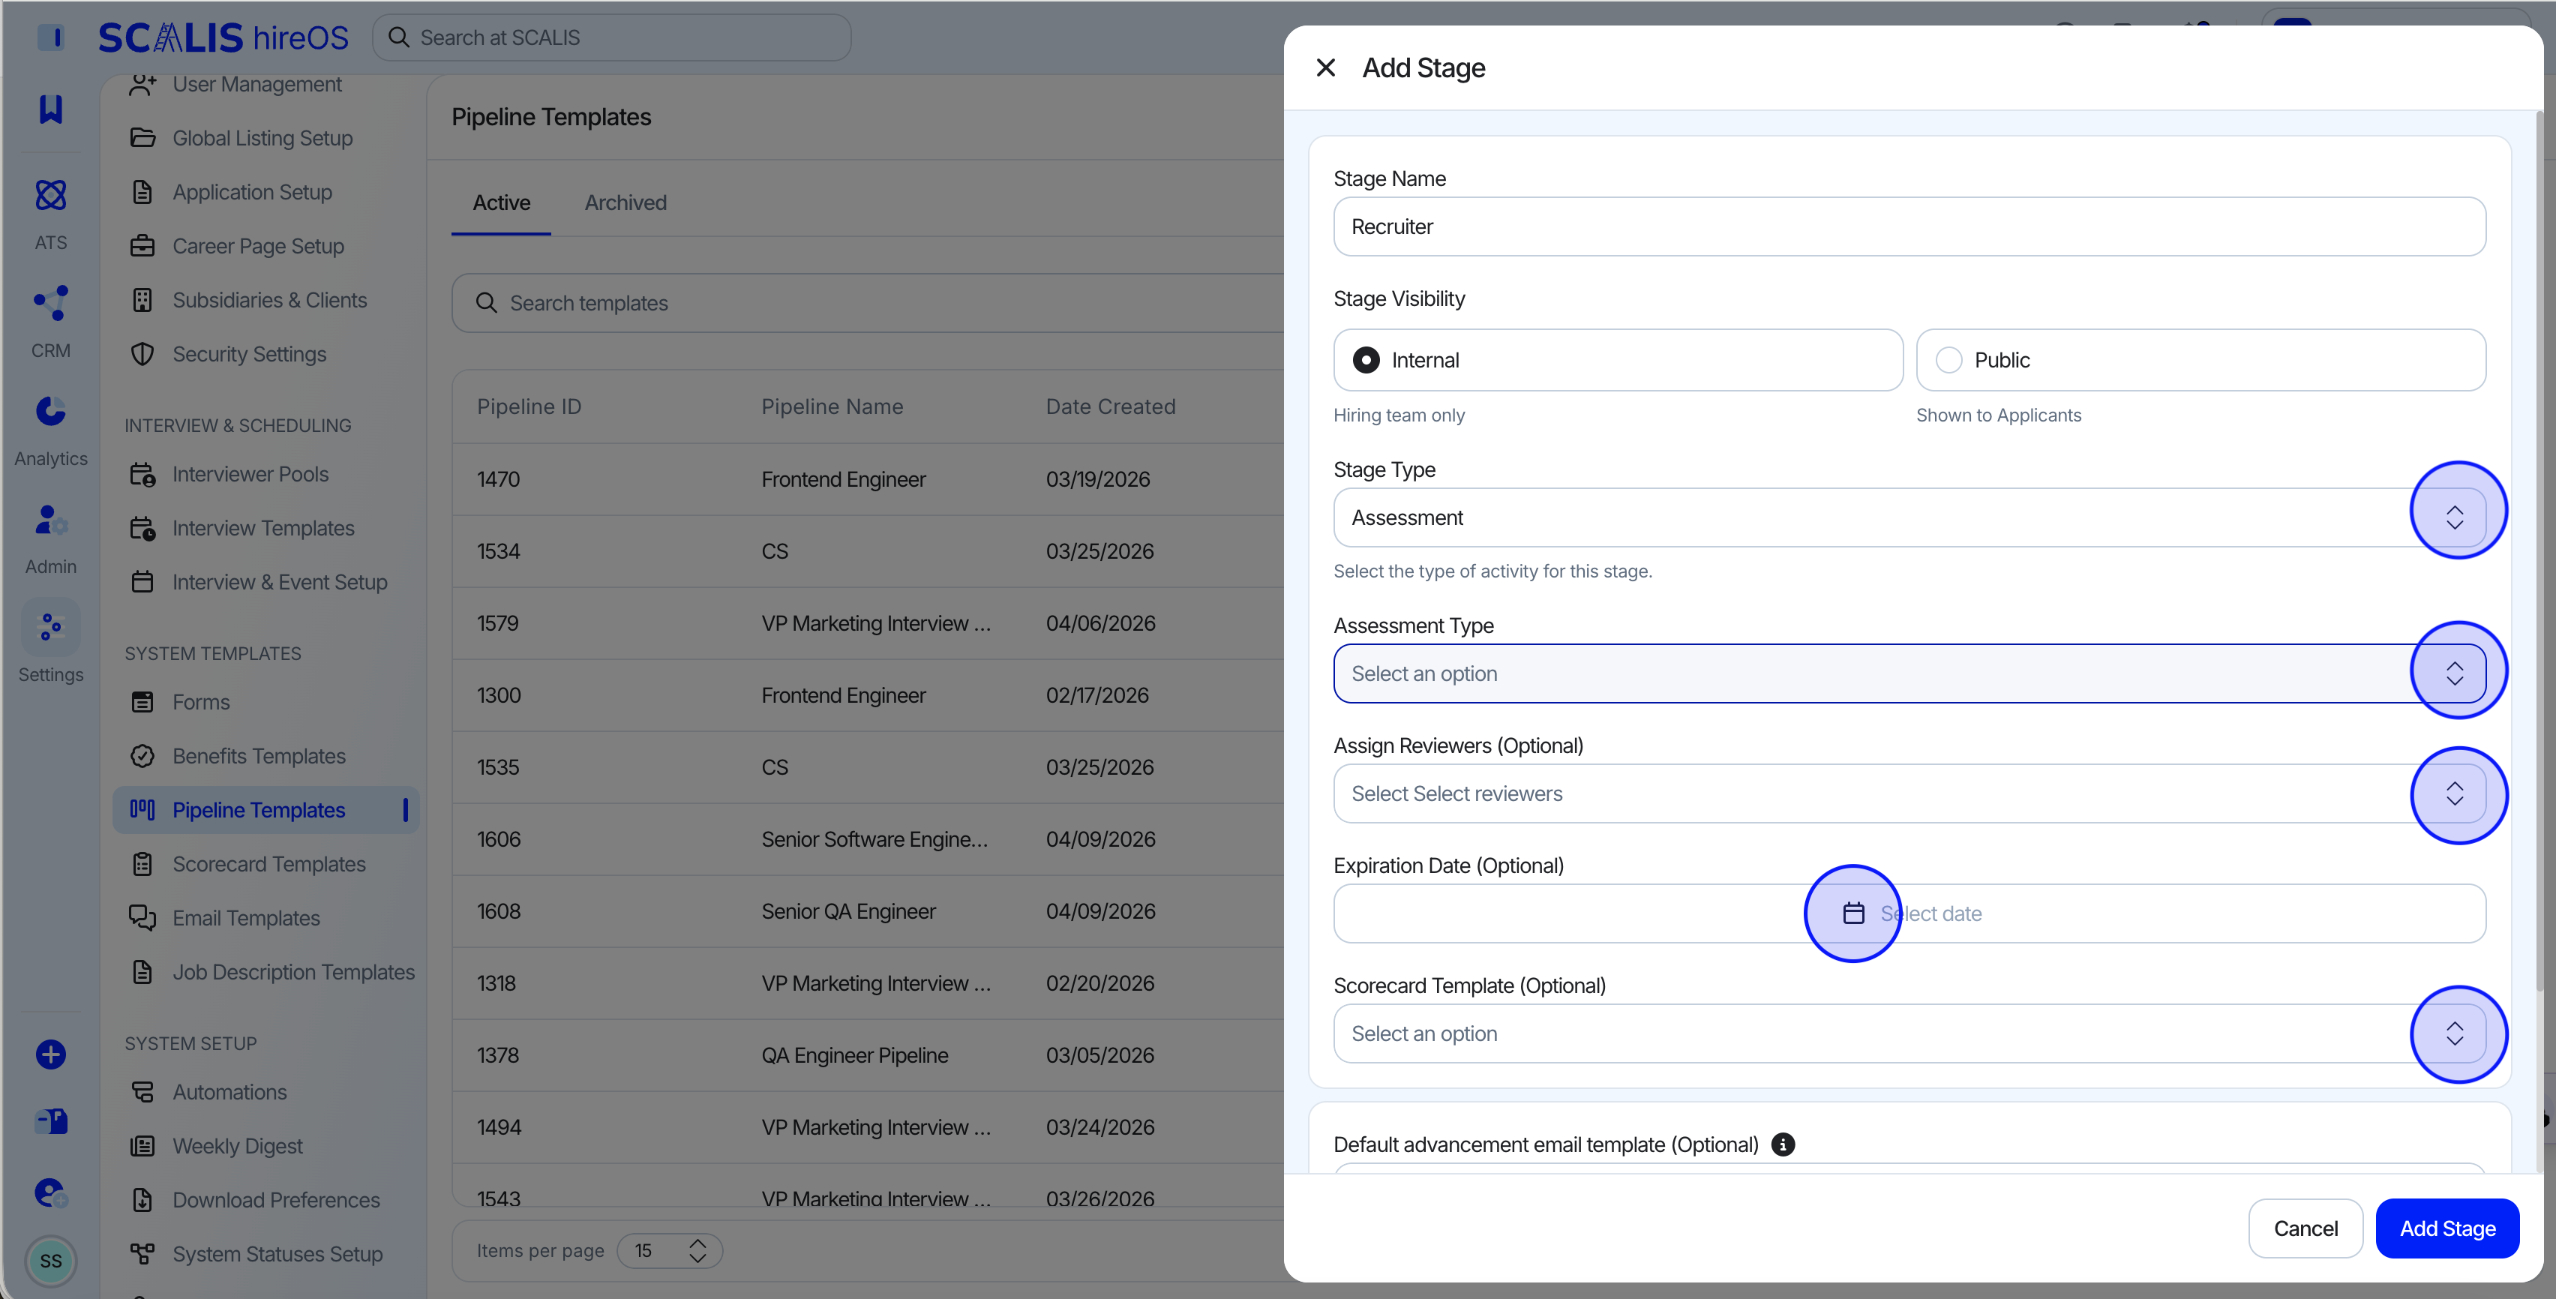
Click Add Stage and select a stage type.
You can set the visibility of each stage to Internal or Public (public stages are visible to candidates in their application).
⬇ See the Stage Types section below for what each type does and requires.
💡 Note: Sourcing and Application Review always start every pipeline and can't be customized.
4
Step 4
Save Your Pipeline Template
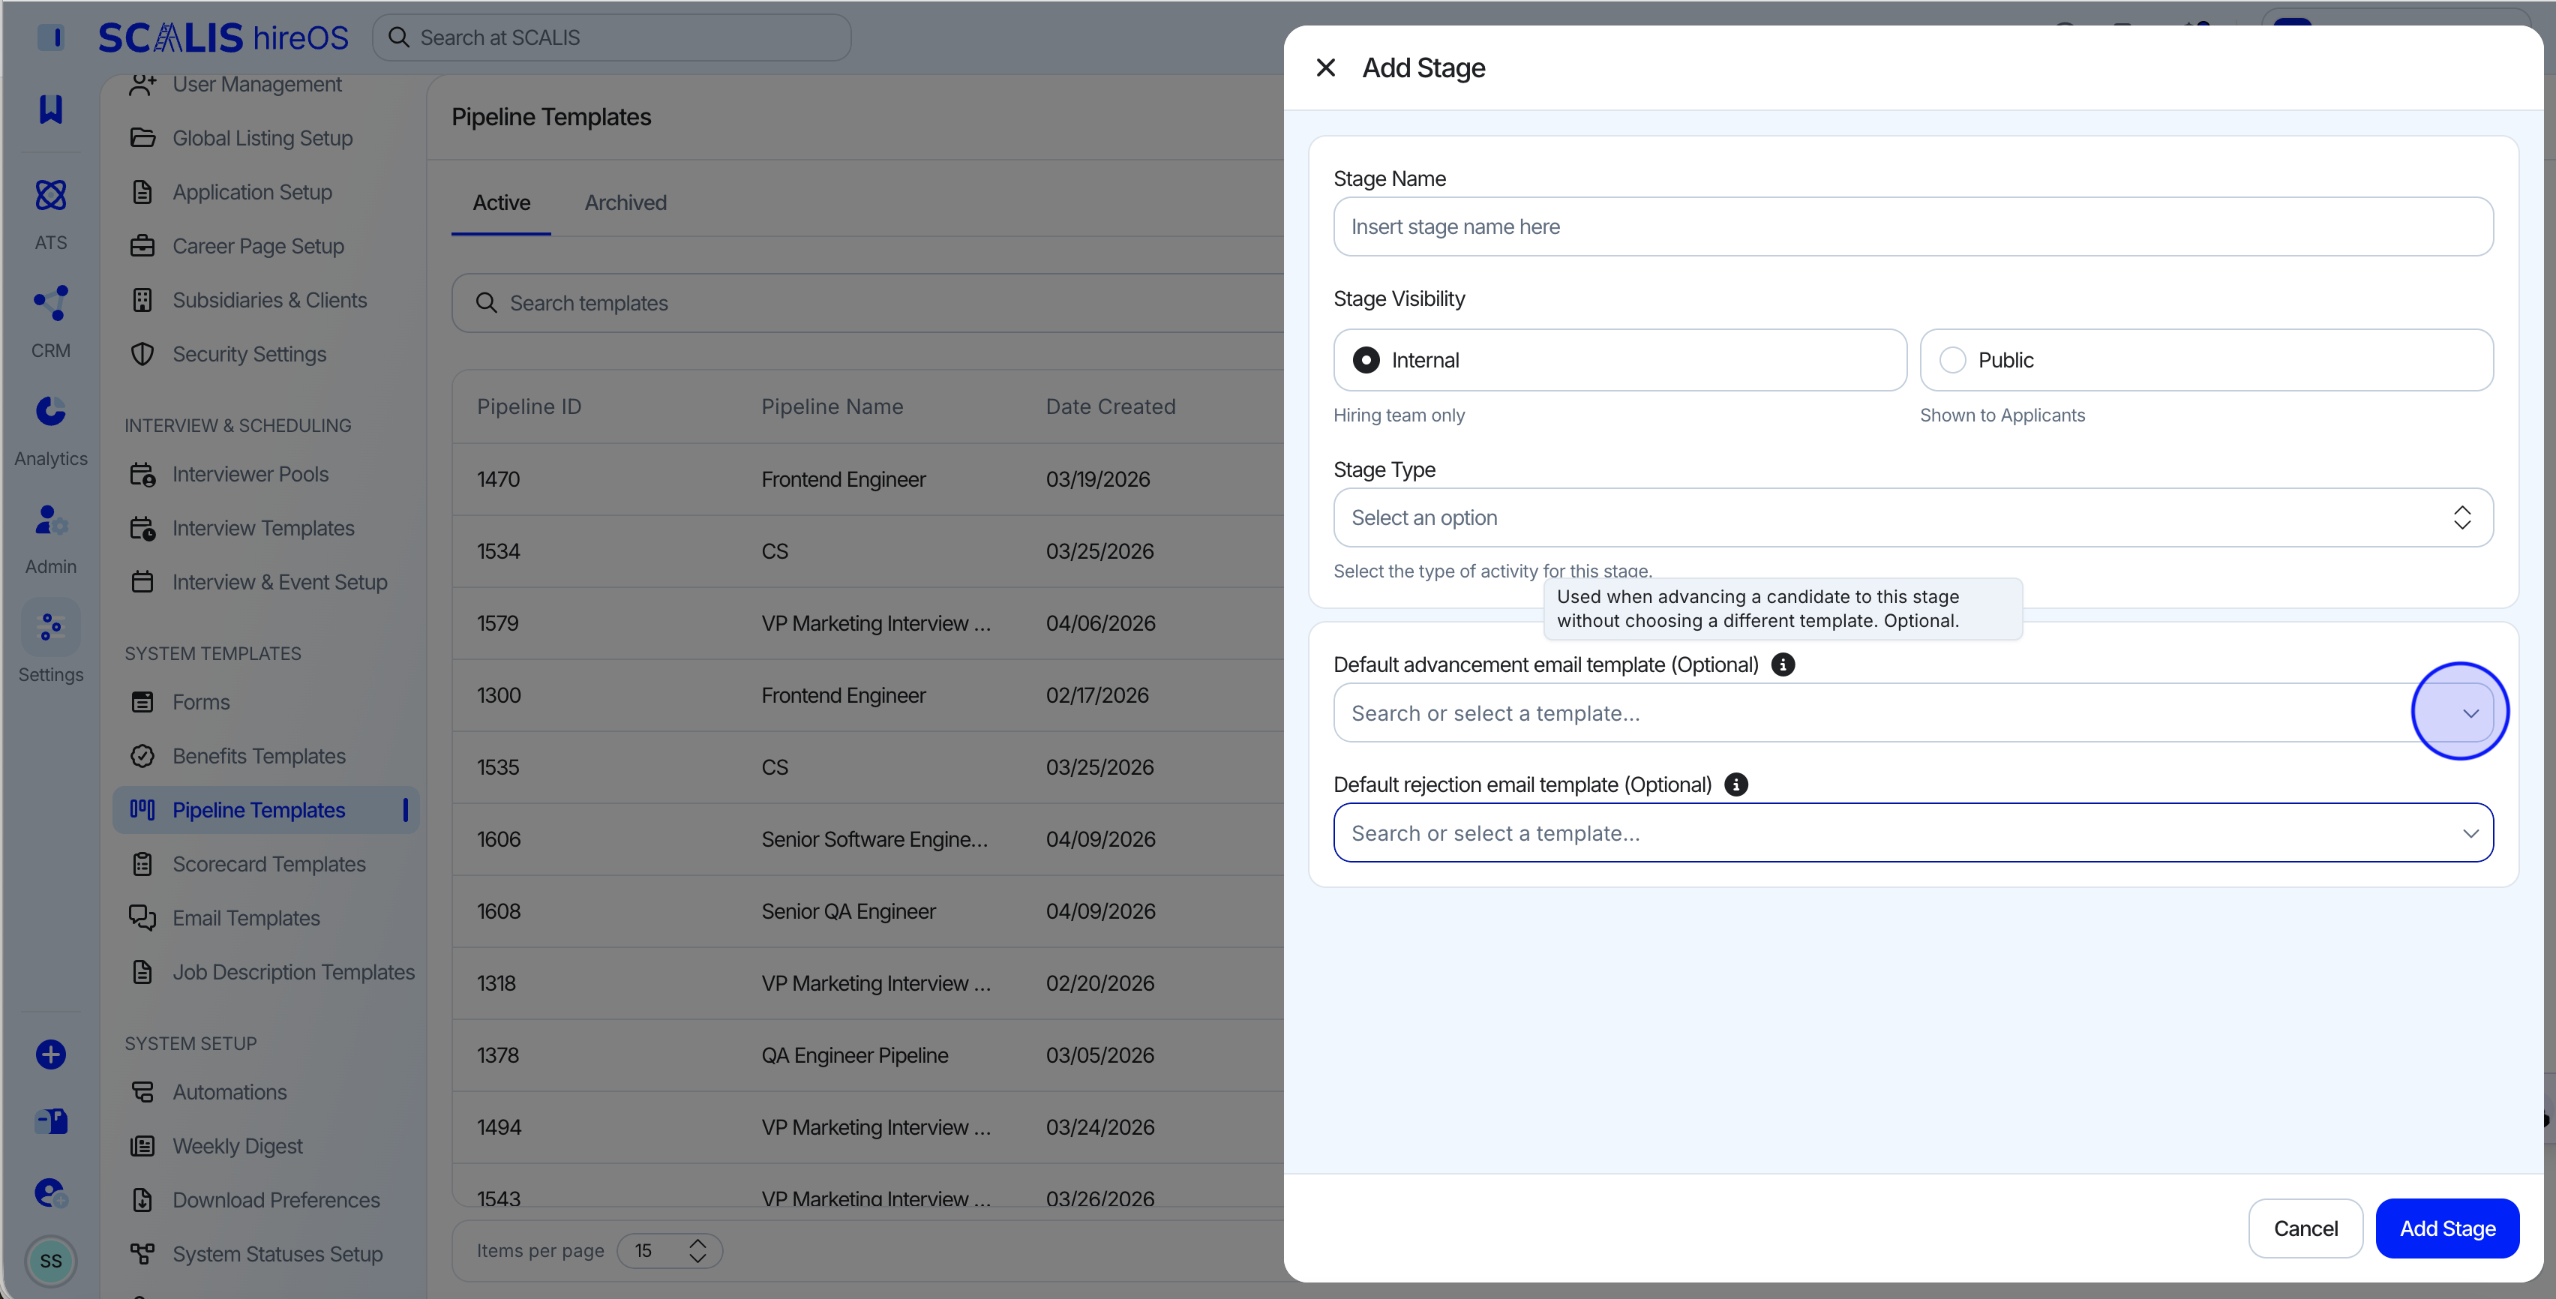
You can also add an Advance Candidate email, sent when a candidate is moved to the next stage.
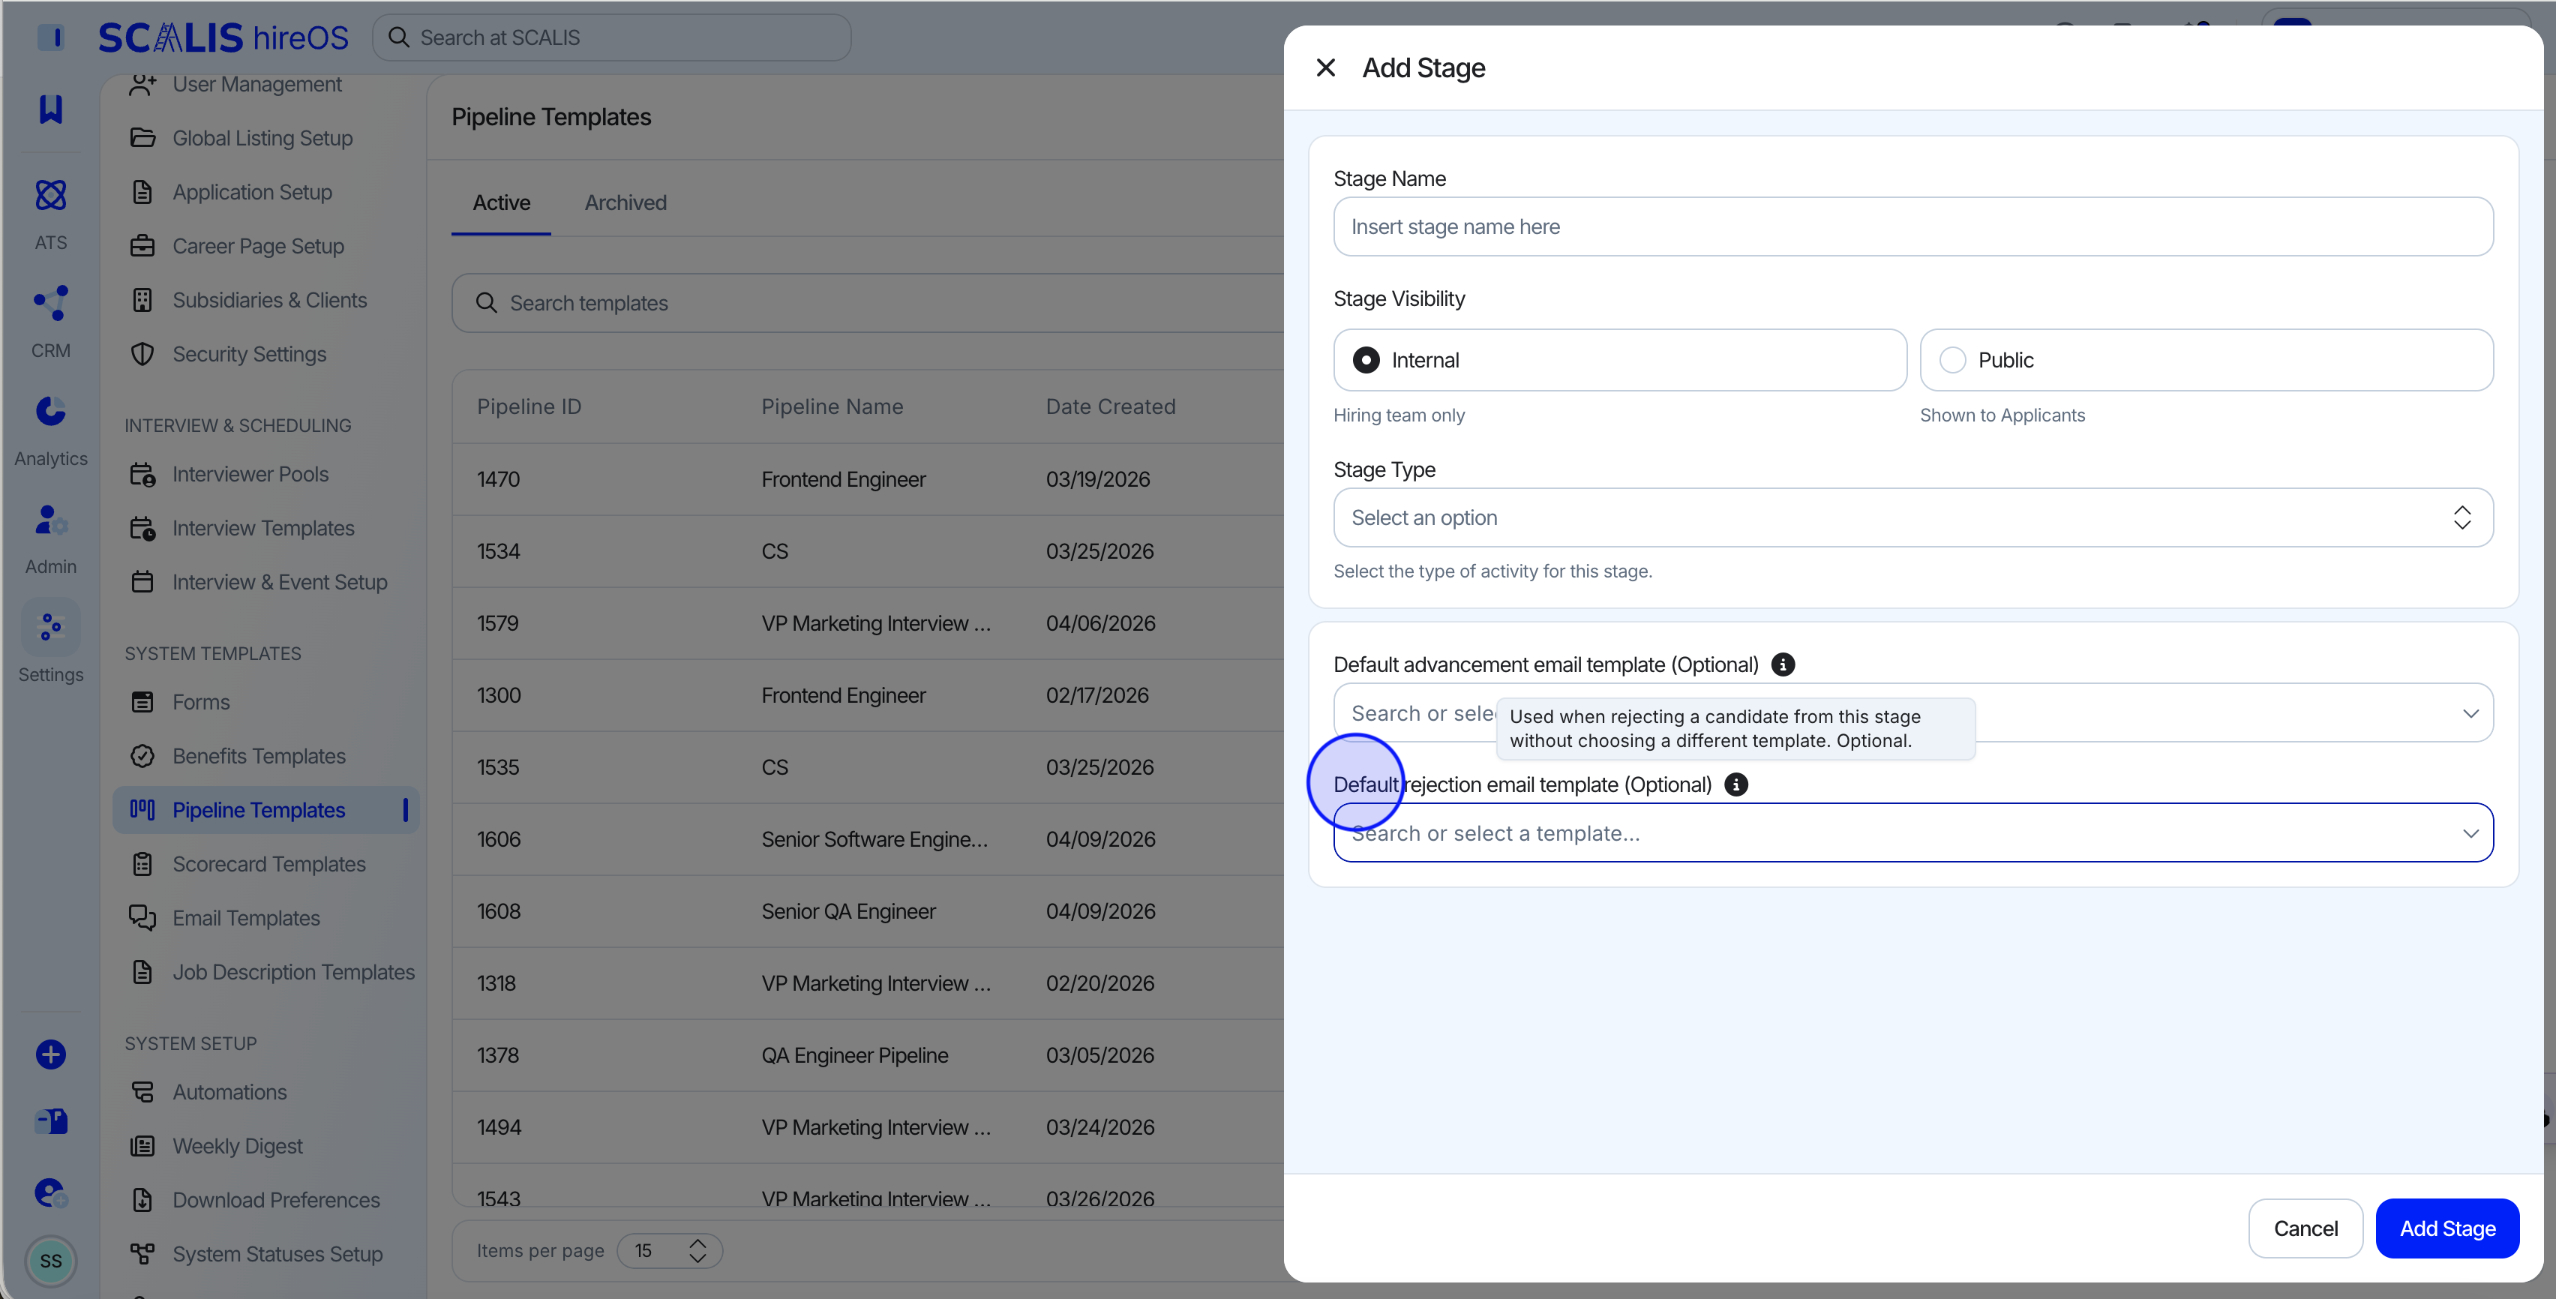
You can also add a Rejection email, sent when a candidate is rejected.
Once your stages are set up, click Save to finish creating the pipeline template.
💡 Note: Each milestone must include at least 1 stage before you can save. Advance Candidate and Rejection emails send automatically as soon as the matching action occurs.
Stage Types
Stage Type
Review
An internal team member reviews this stage. Reviewers are typically assigned based on expertise or stage ownership.
💡 Note: You can assign multiple reviewers and set the number of reviews required before a candidate can move forward.

Stage Type
Phone Screen
The initial screening stage. Requires an Interview Template, an Interview Type (Phone Call or Video Call), and Scheduling Logic.
💡 Note: If Phone Call is selected, a phone number is required. To turn on the AI notetaker, Video Call must be selected.

Stage Type
Assessment
A technical or take-home assignment stage. Requires an Assessment Type (External Link, Take-Home file, or Video Screen), an Assignment Review owner, an Expiration Date, and a Scorecard Template.
💡 Note: To add a Video Screen as the assessment, you must select an already-created video screen.
Stage Type
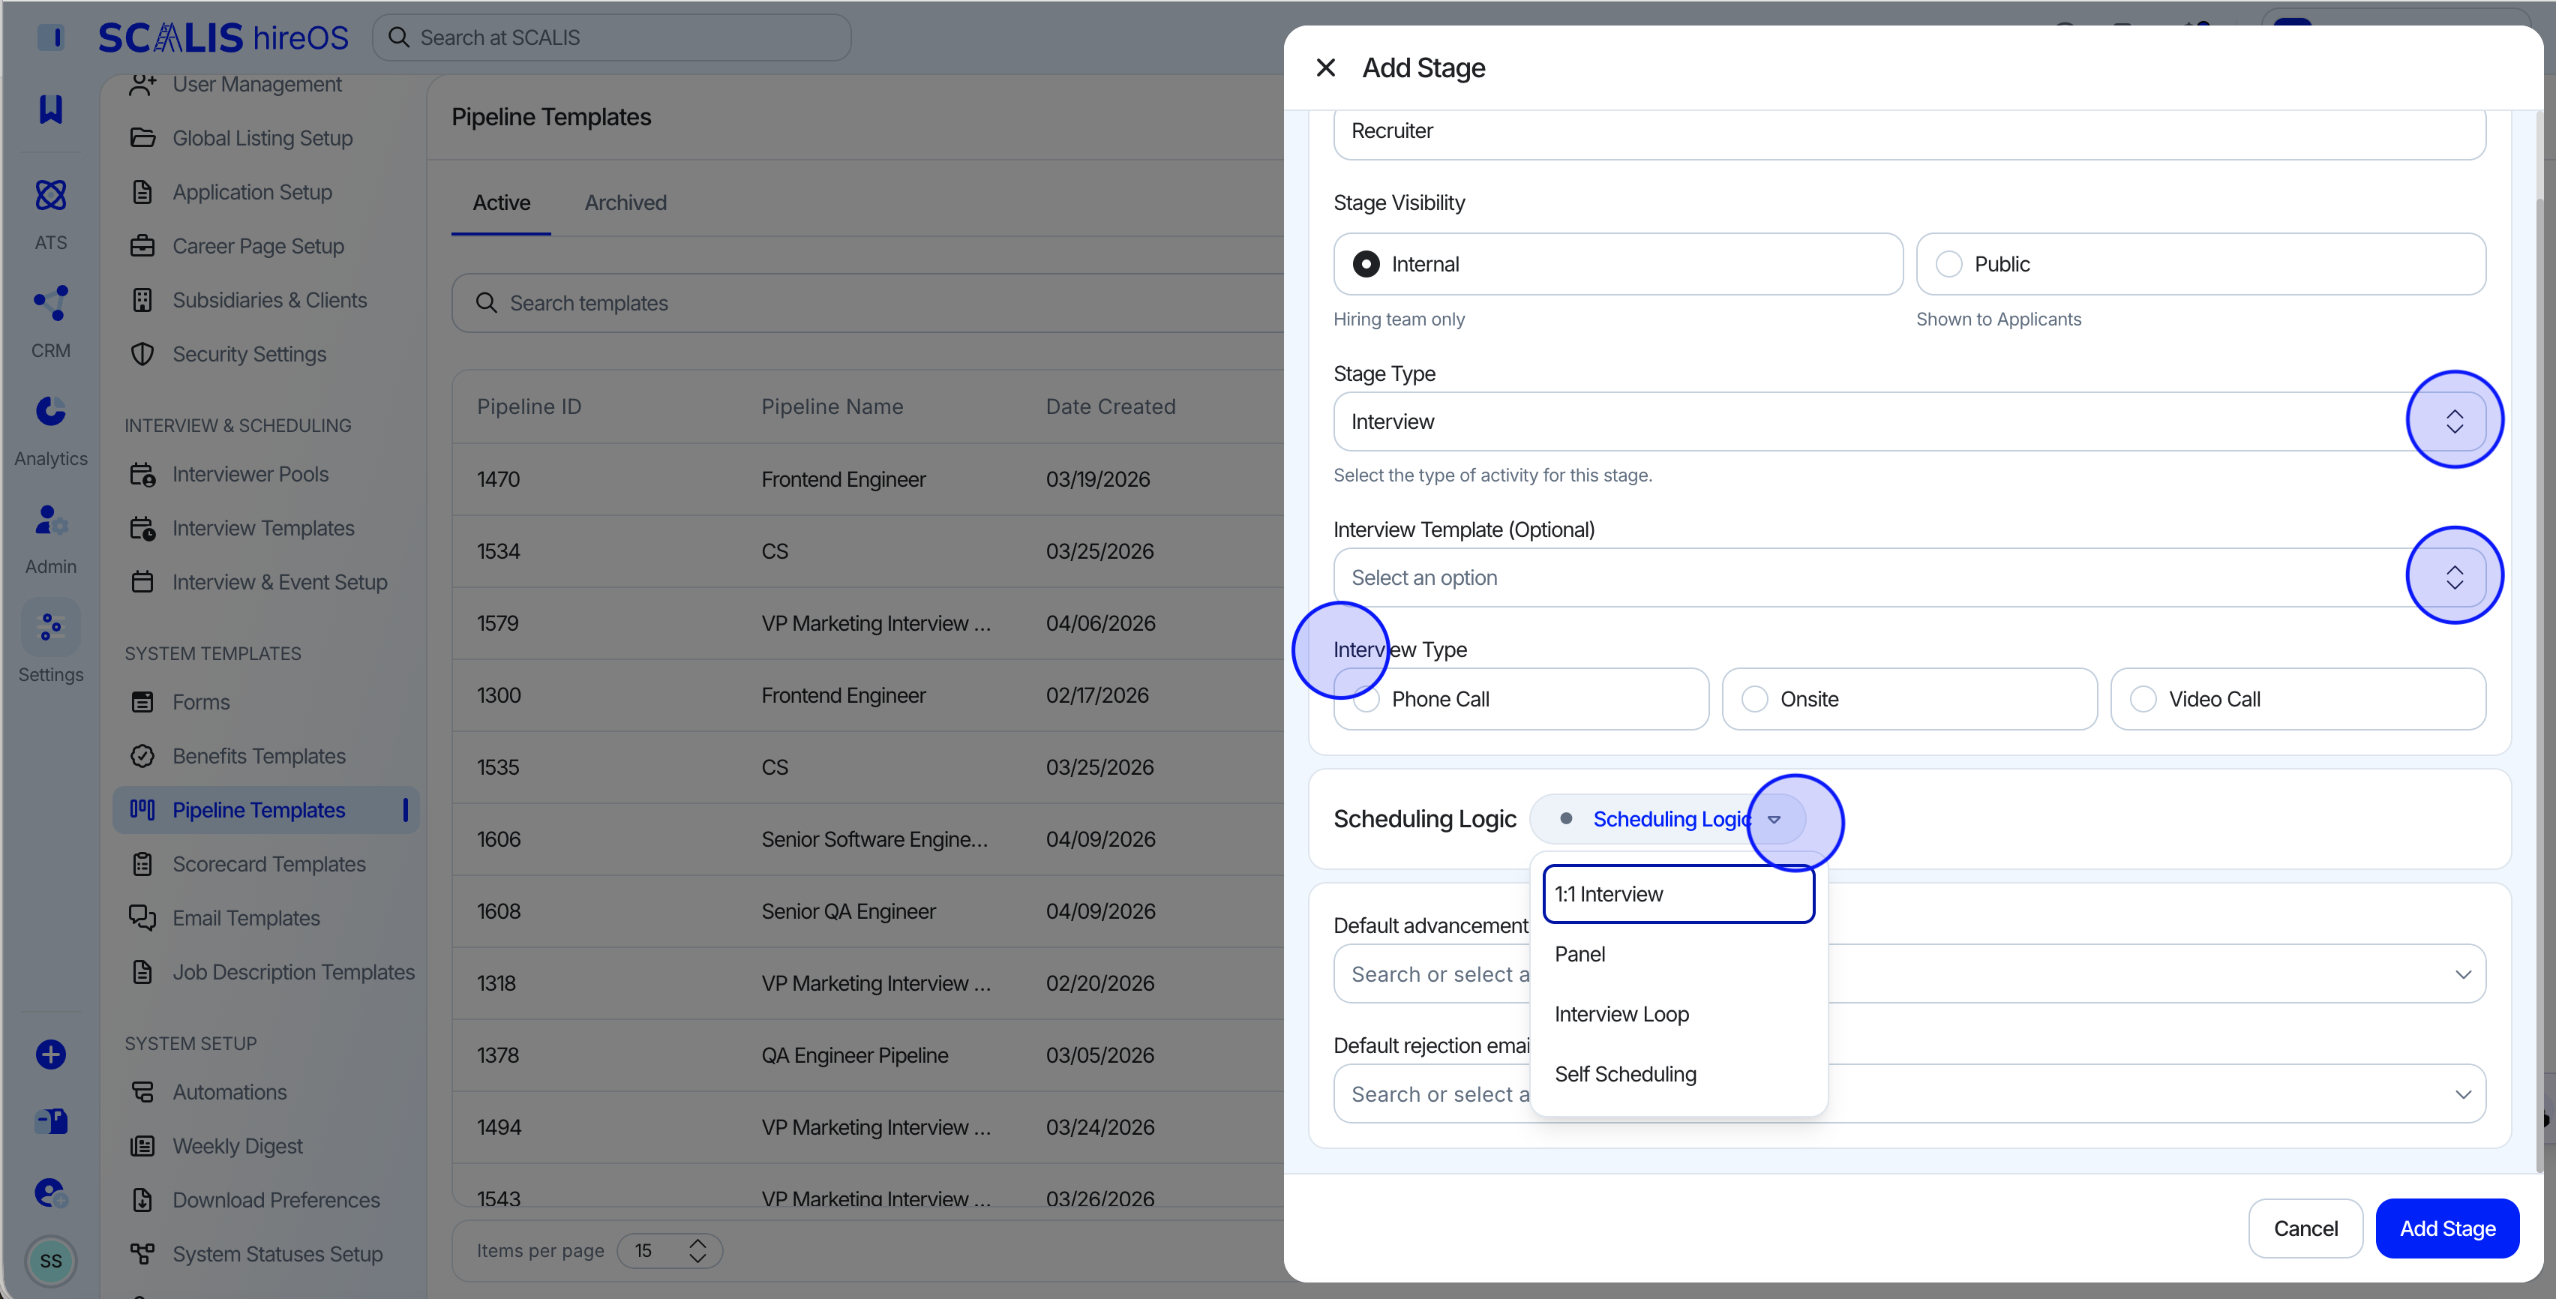
Interview
The core interview stage. Requires an Interview Type and Scheduling Logic.
💡 Note: An Interview Template is not required, but Interview Type and Scheduling Logic are.
Stage Type
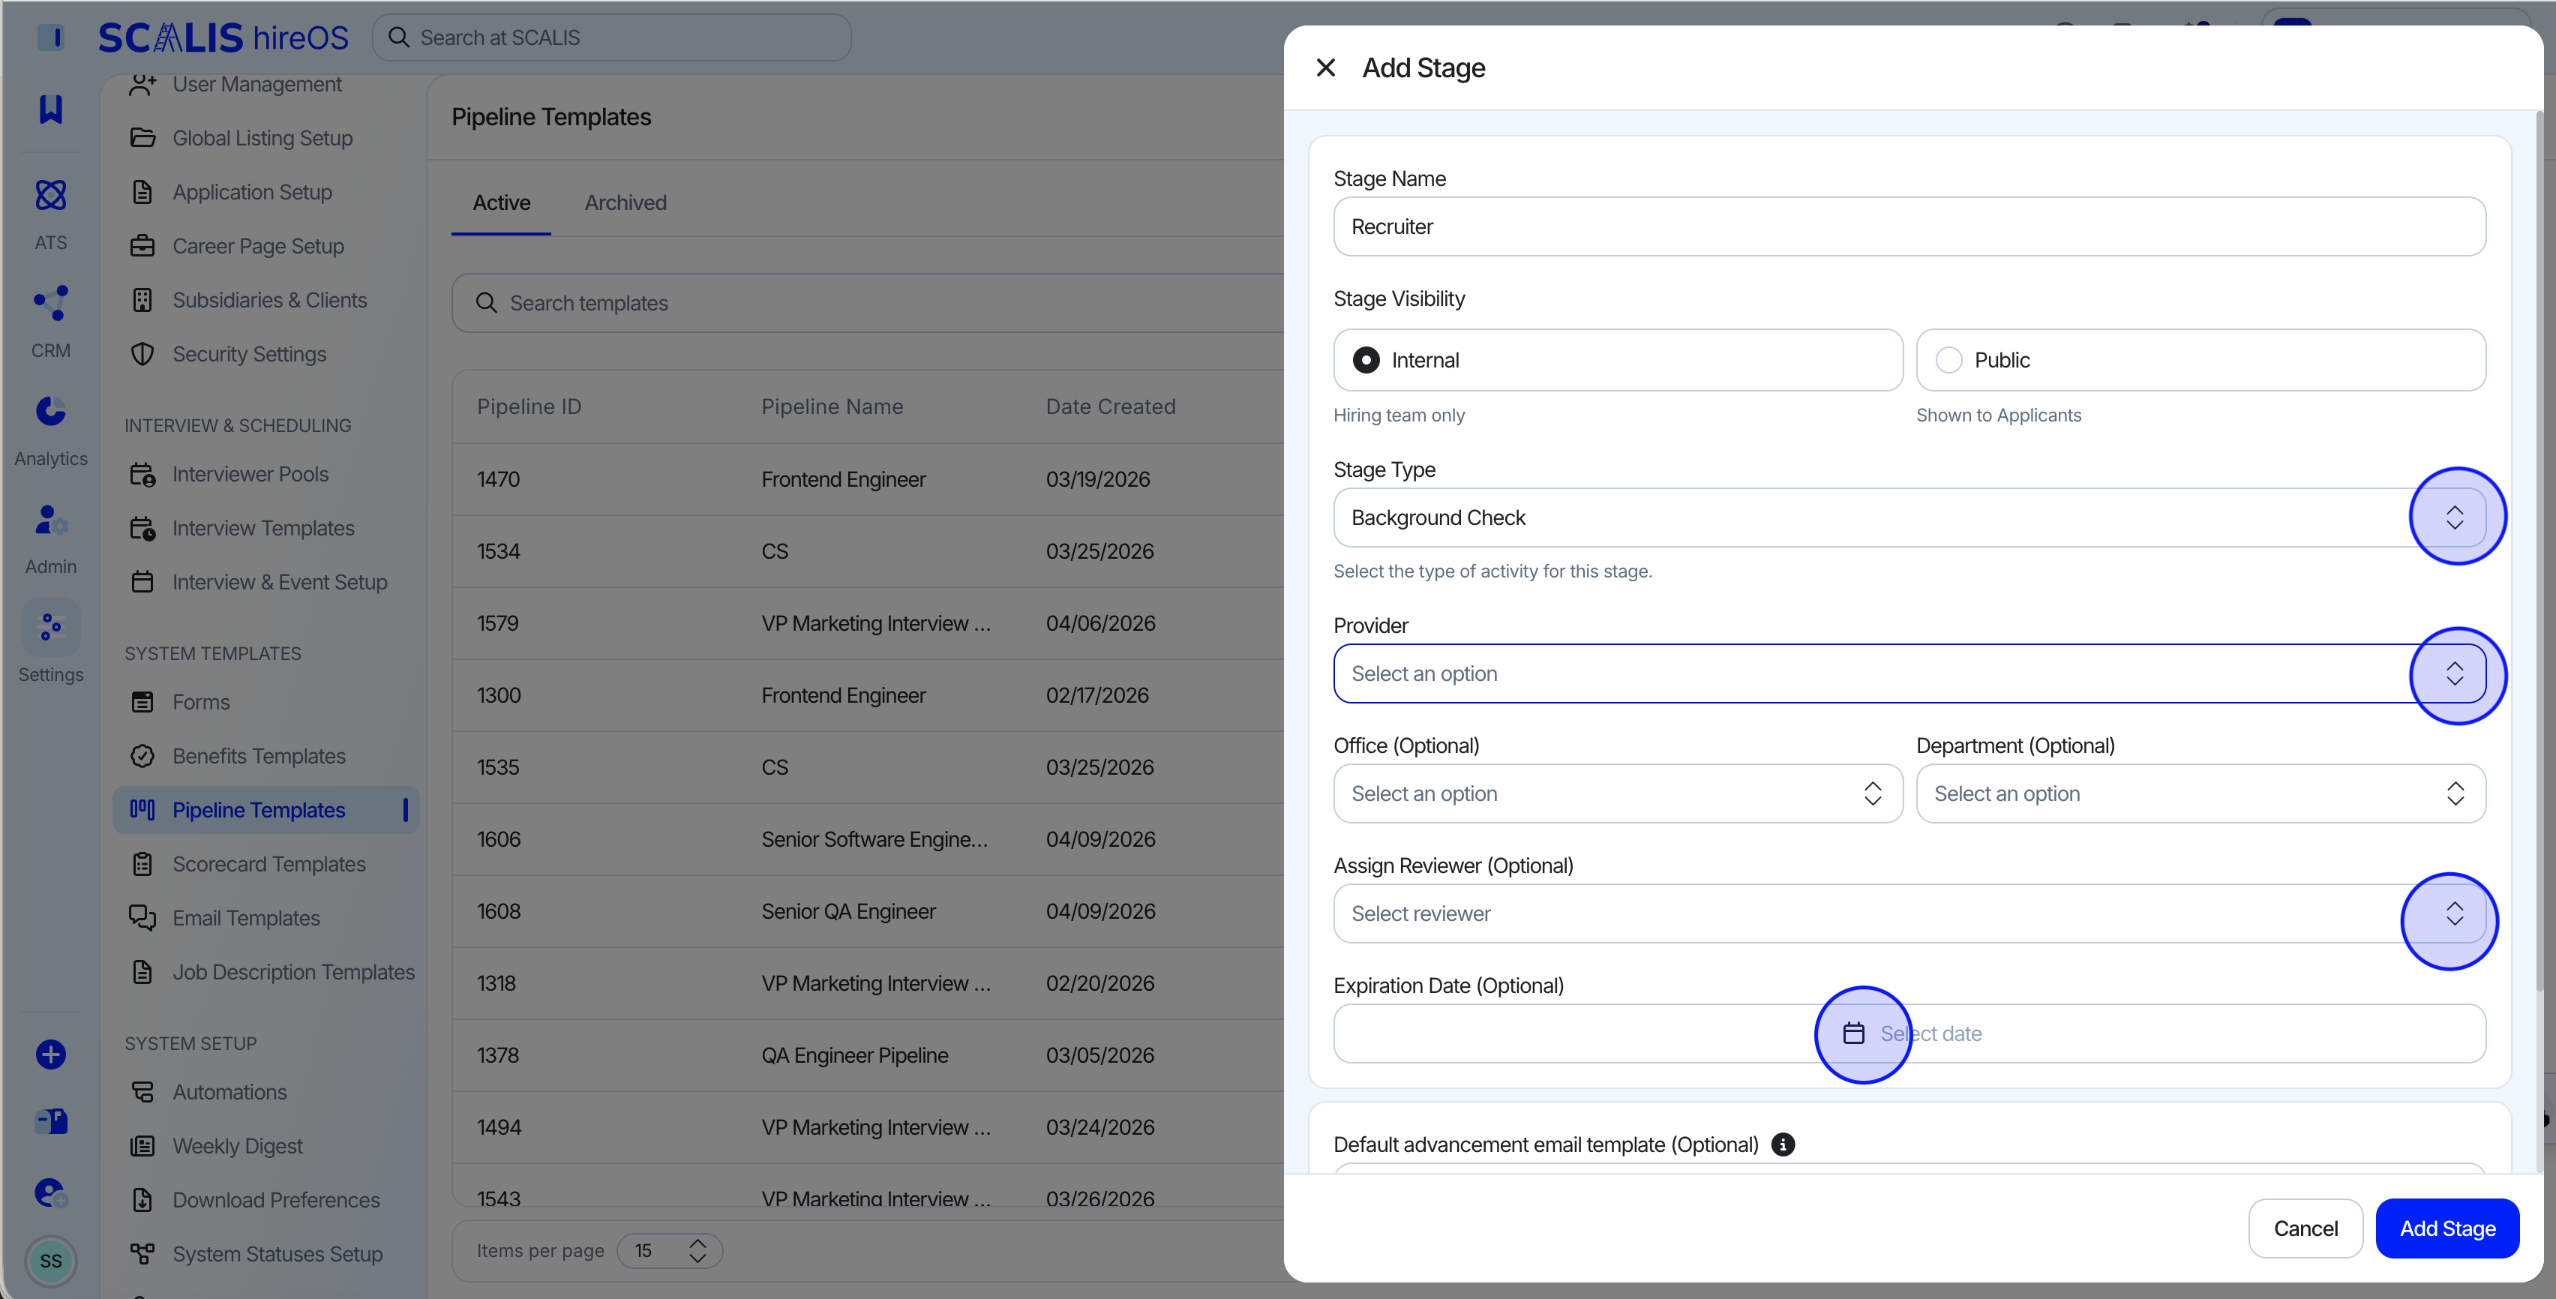
Background Check
SCALIS connects to multiple background check providers. Reach out to your CSM for more information.
You must select a provider for this stage.
Stage Type
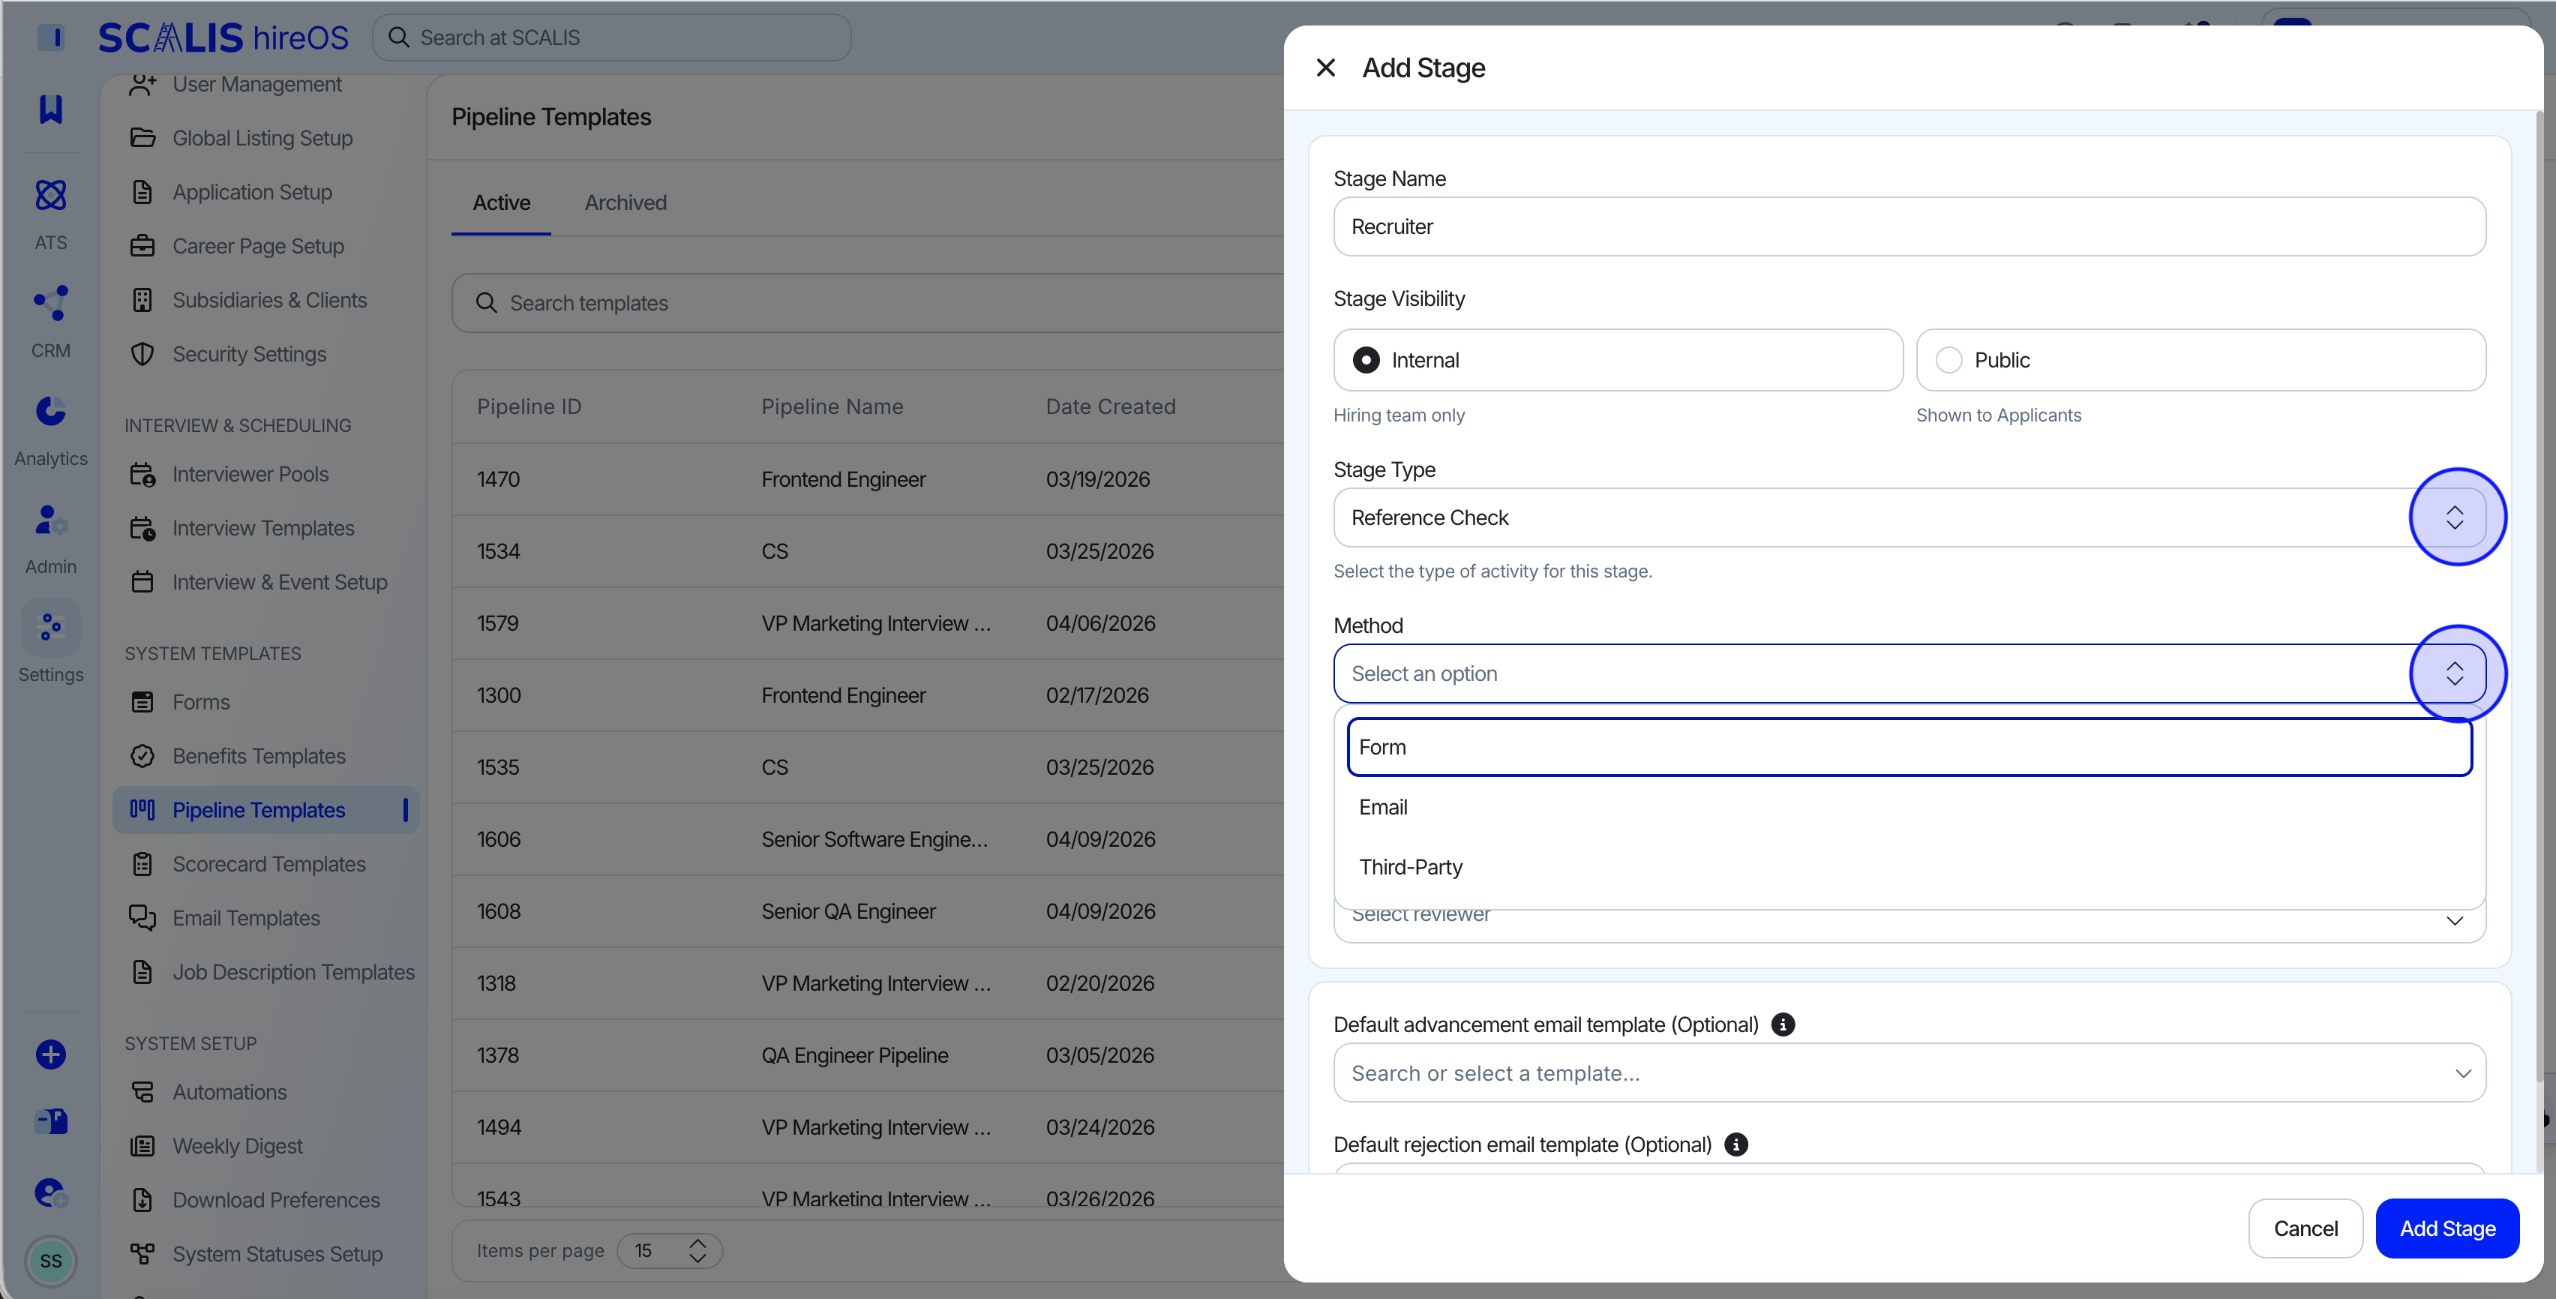
Reference Check
SCALIS connects to multiple reference check providers. Reach out to your CSM for more information.
You must select a method, a number of references, and a reviewer for this stage.
Stage Type
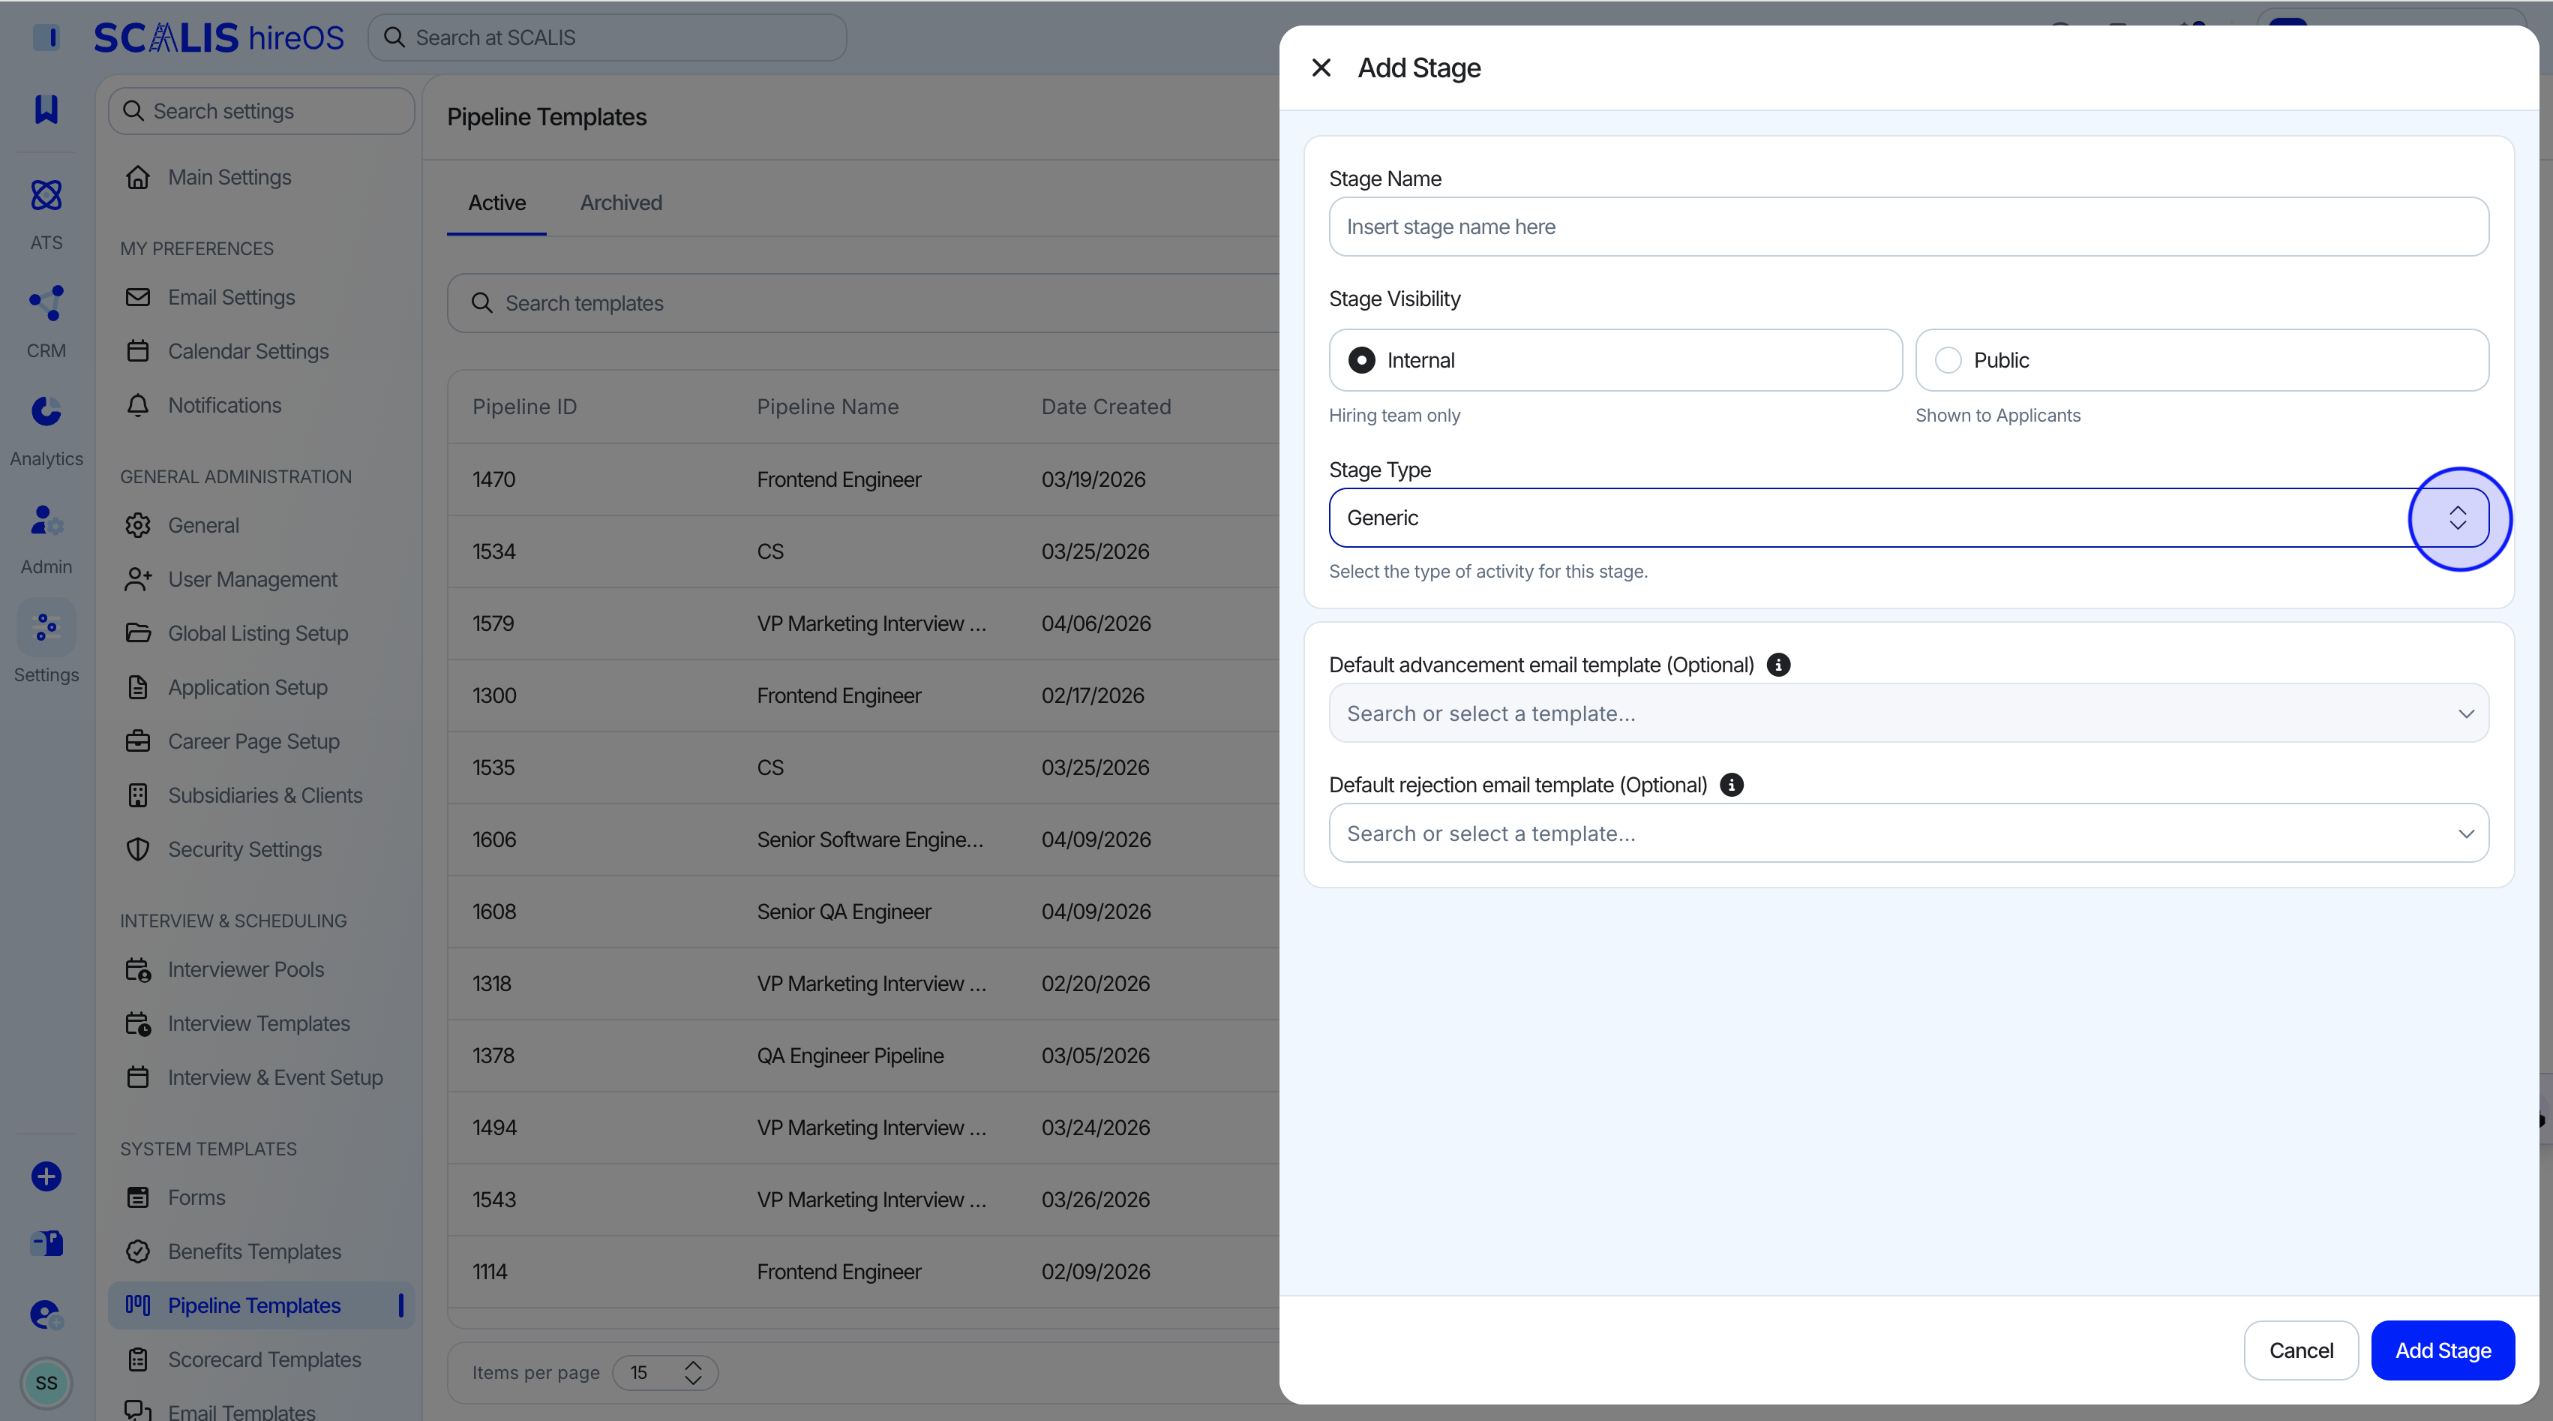
Generic
A flexible stage type with no predefined requirements. Use it for any process step that doesn't fit the other stage types.
💡 Note: This is the recommended stage type if the full pipeline details aren't fleshed out yet, since it allows the most flexibility.
Editing an Existing Pipeline Template
1
Step 1
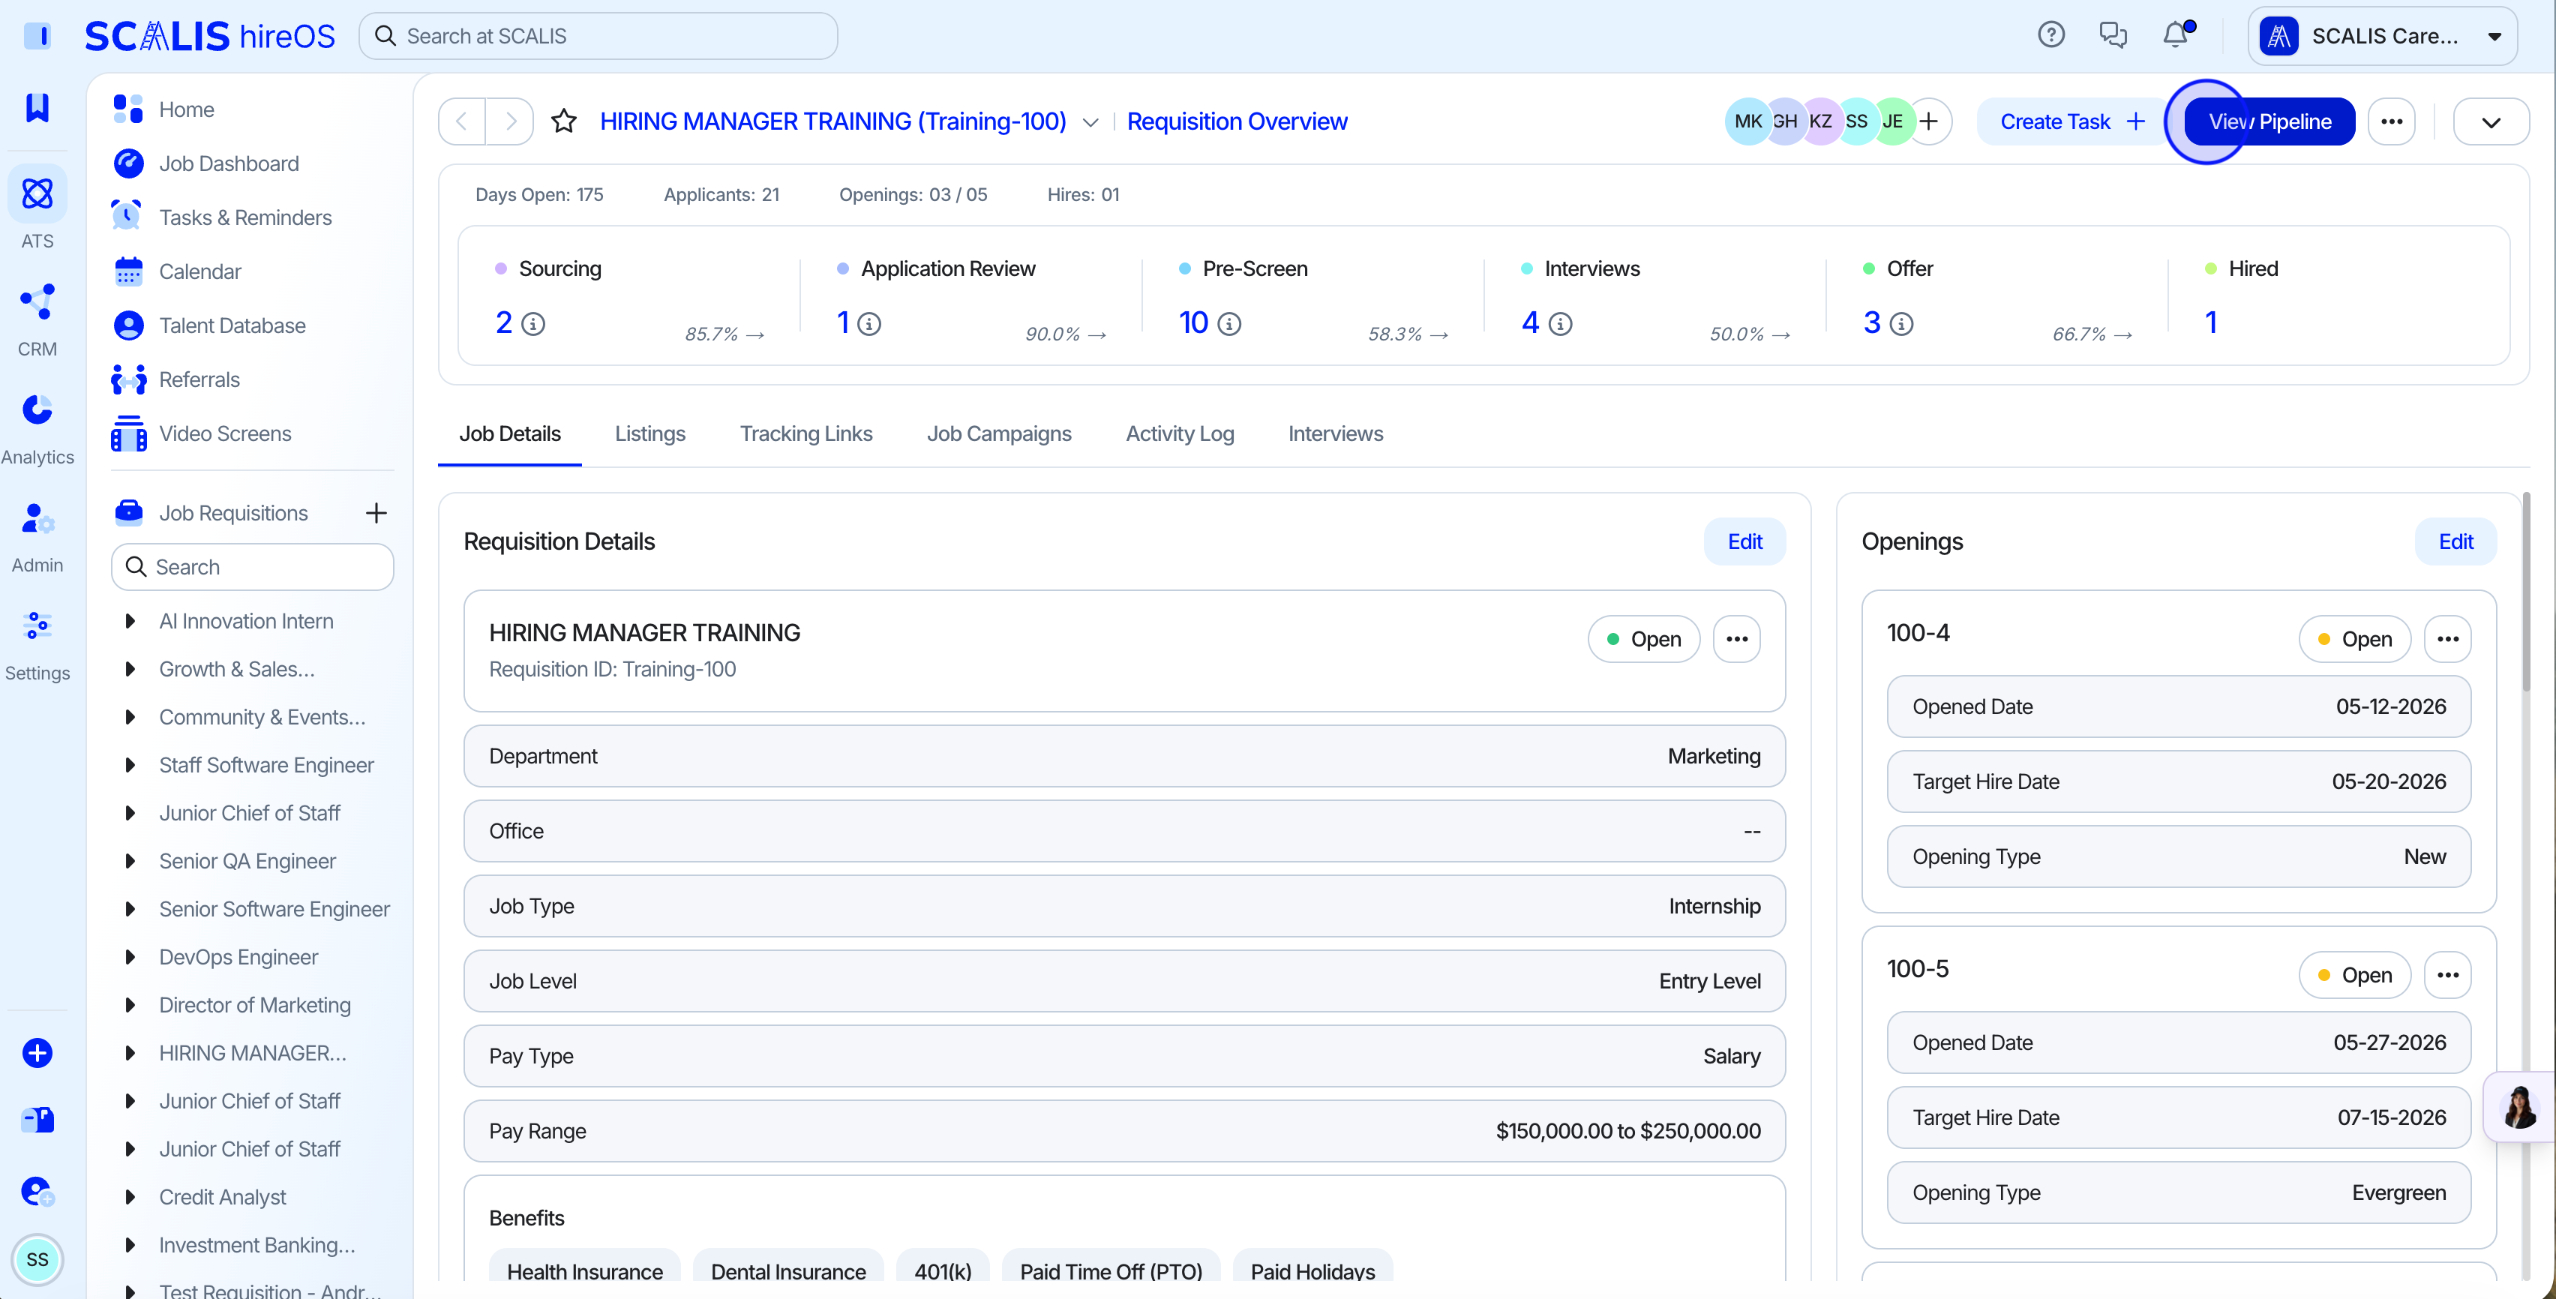
Go to the Job and View the Pipeline
From your job list, open the job whose pipeline you want to edit.
Open the job's Pipeline view to see its current stages.
2
Step 2
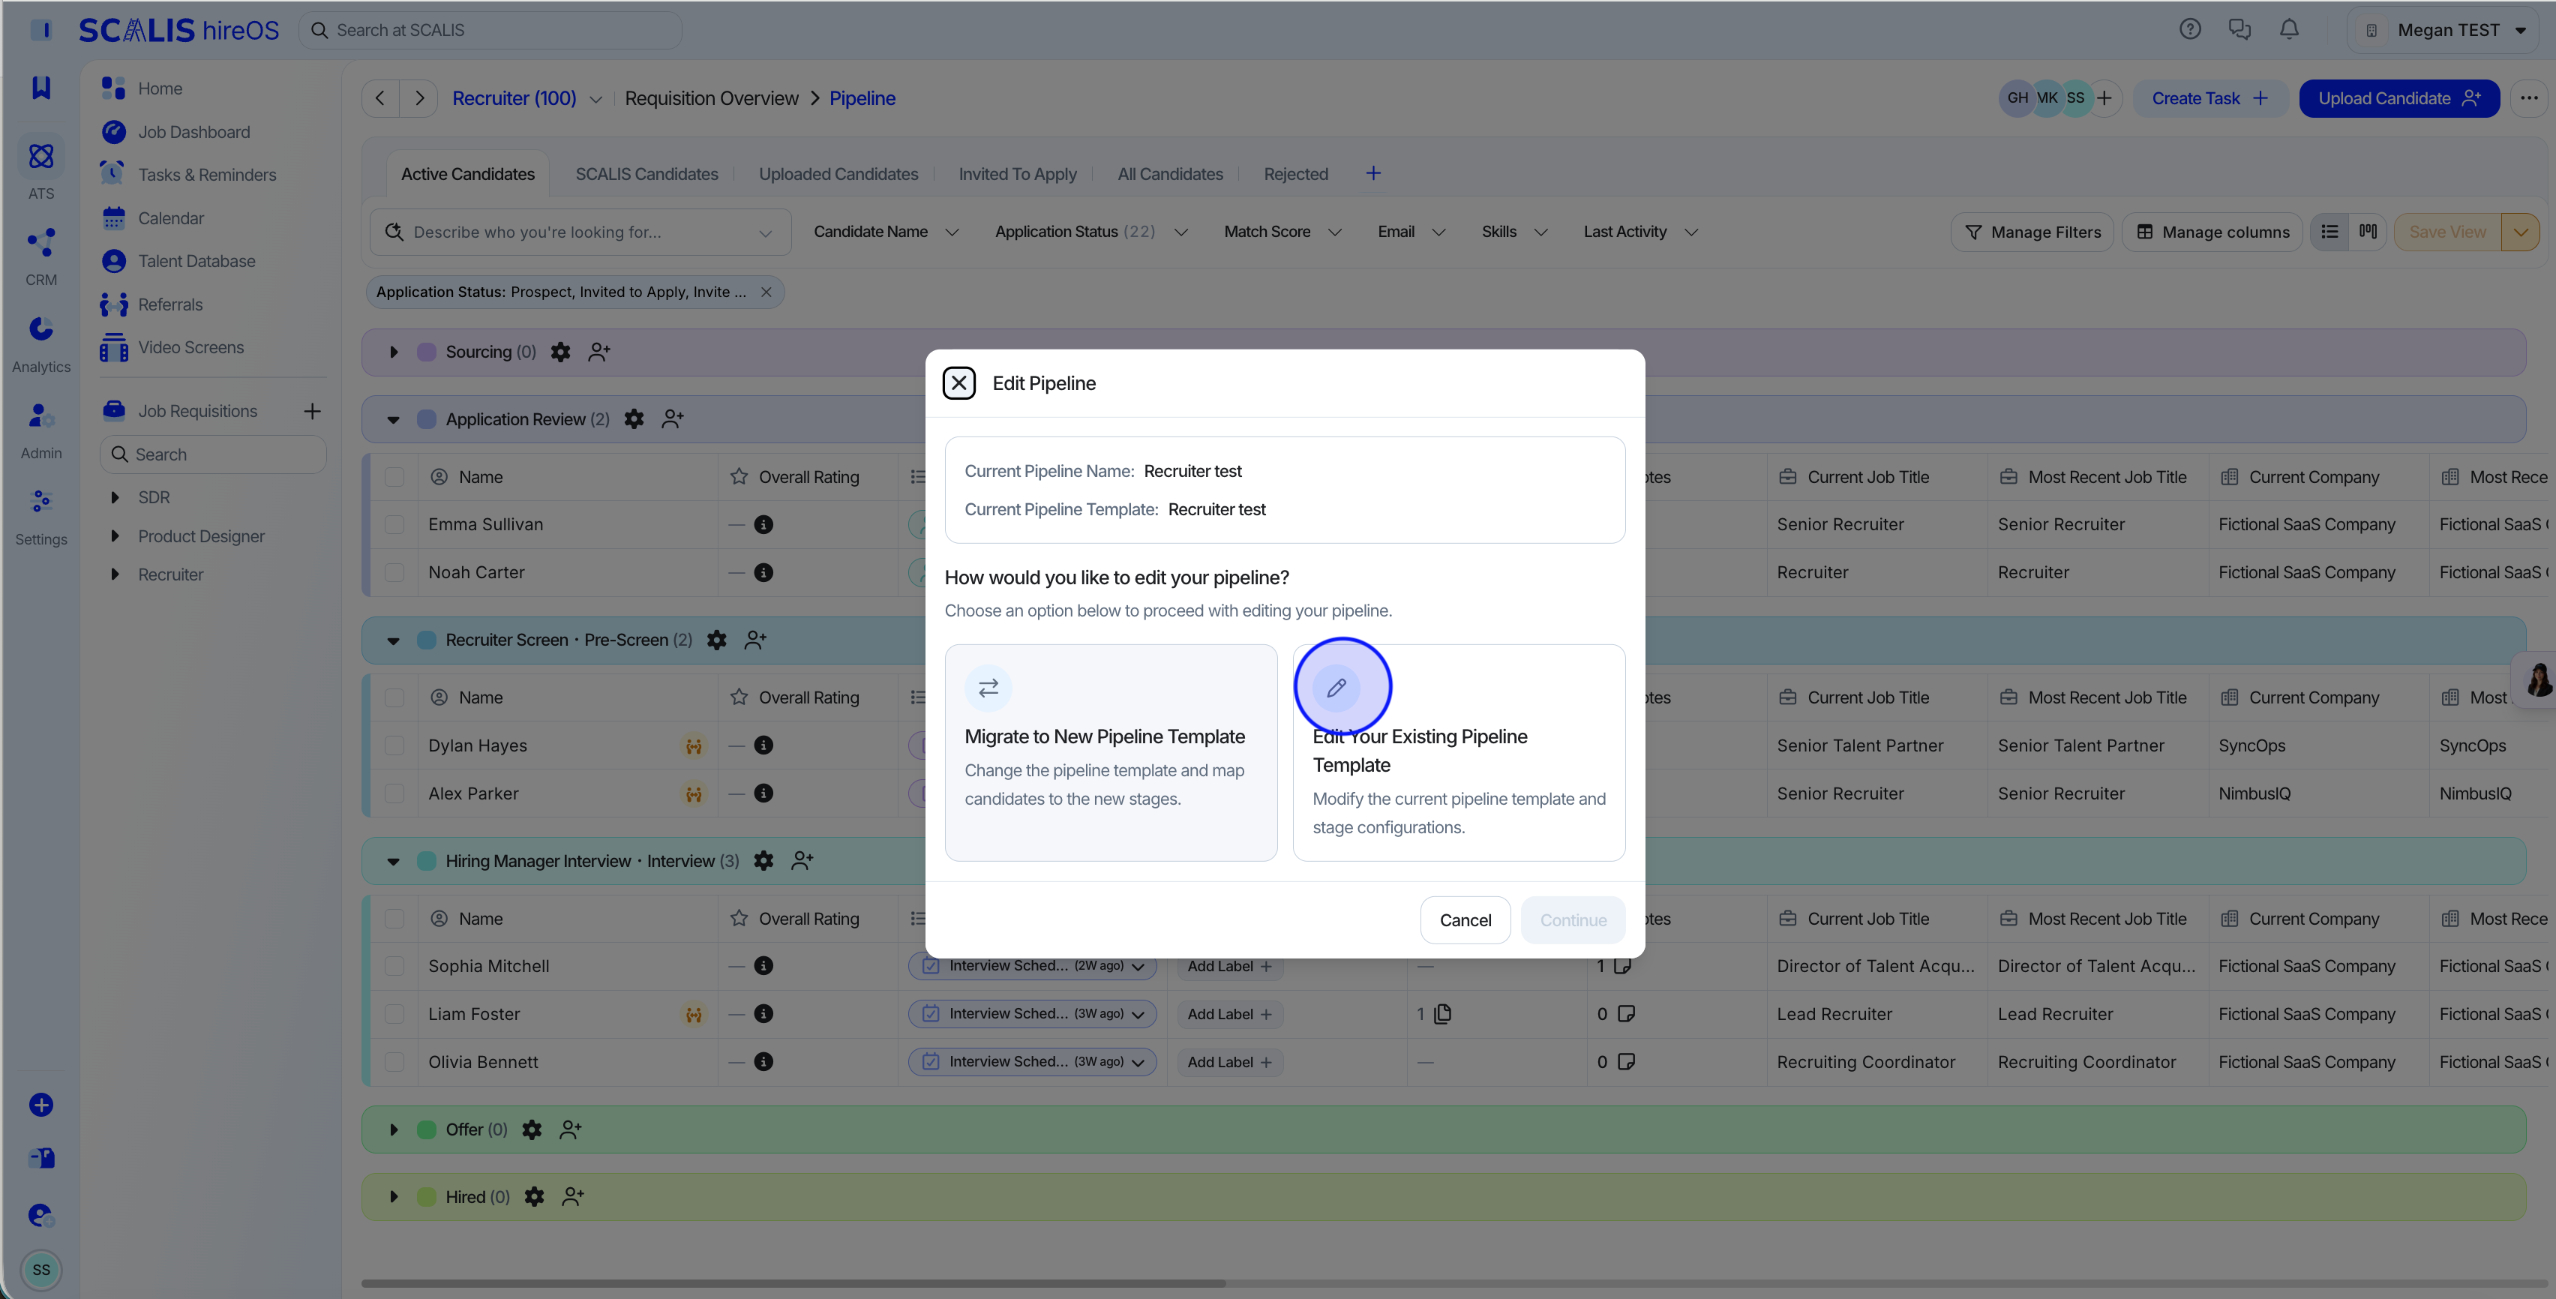
Edit the Pipeline
Click Edit Pipeline to make changes to the stages.
3
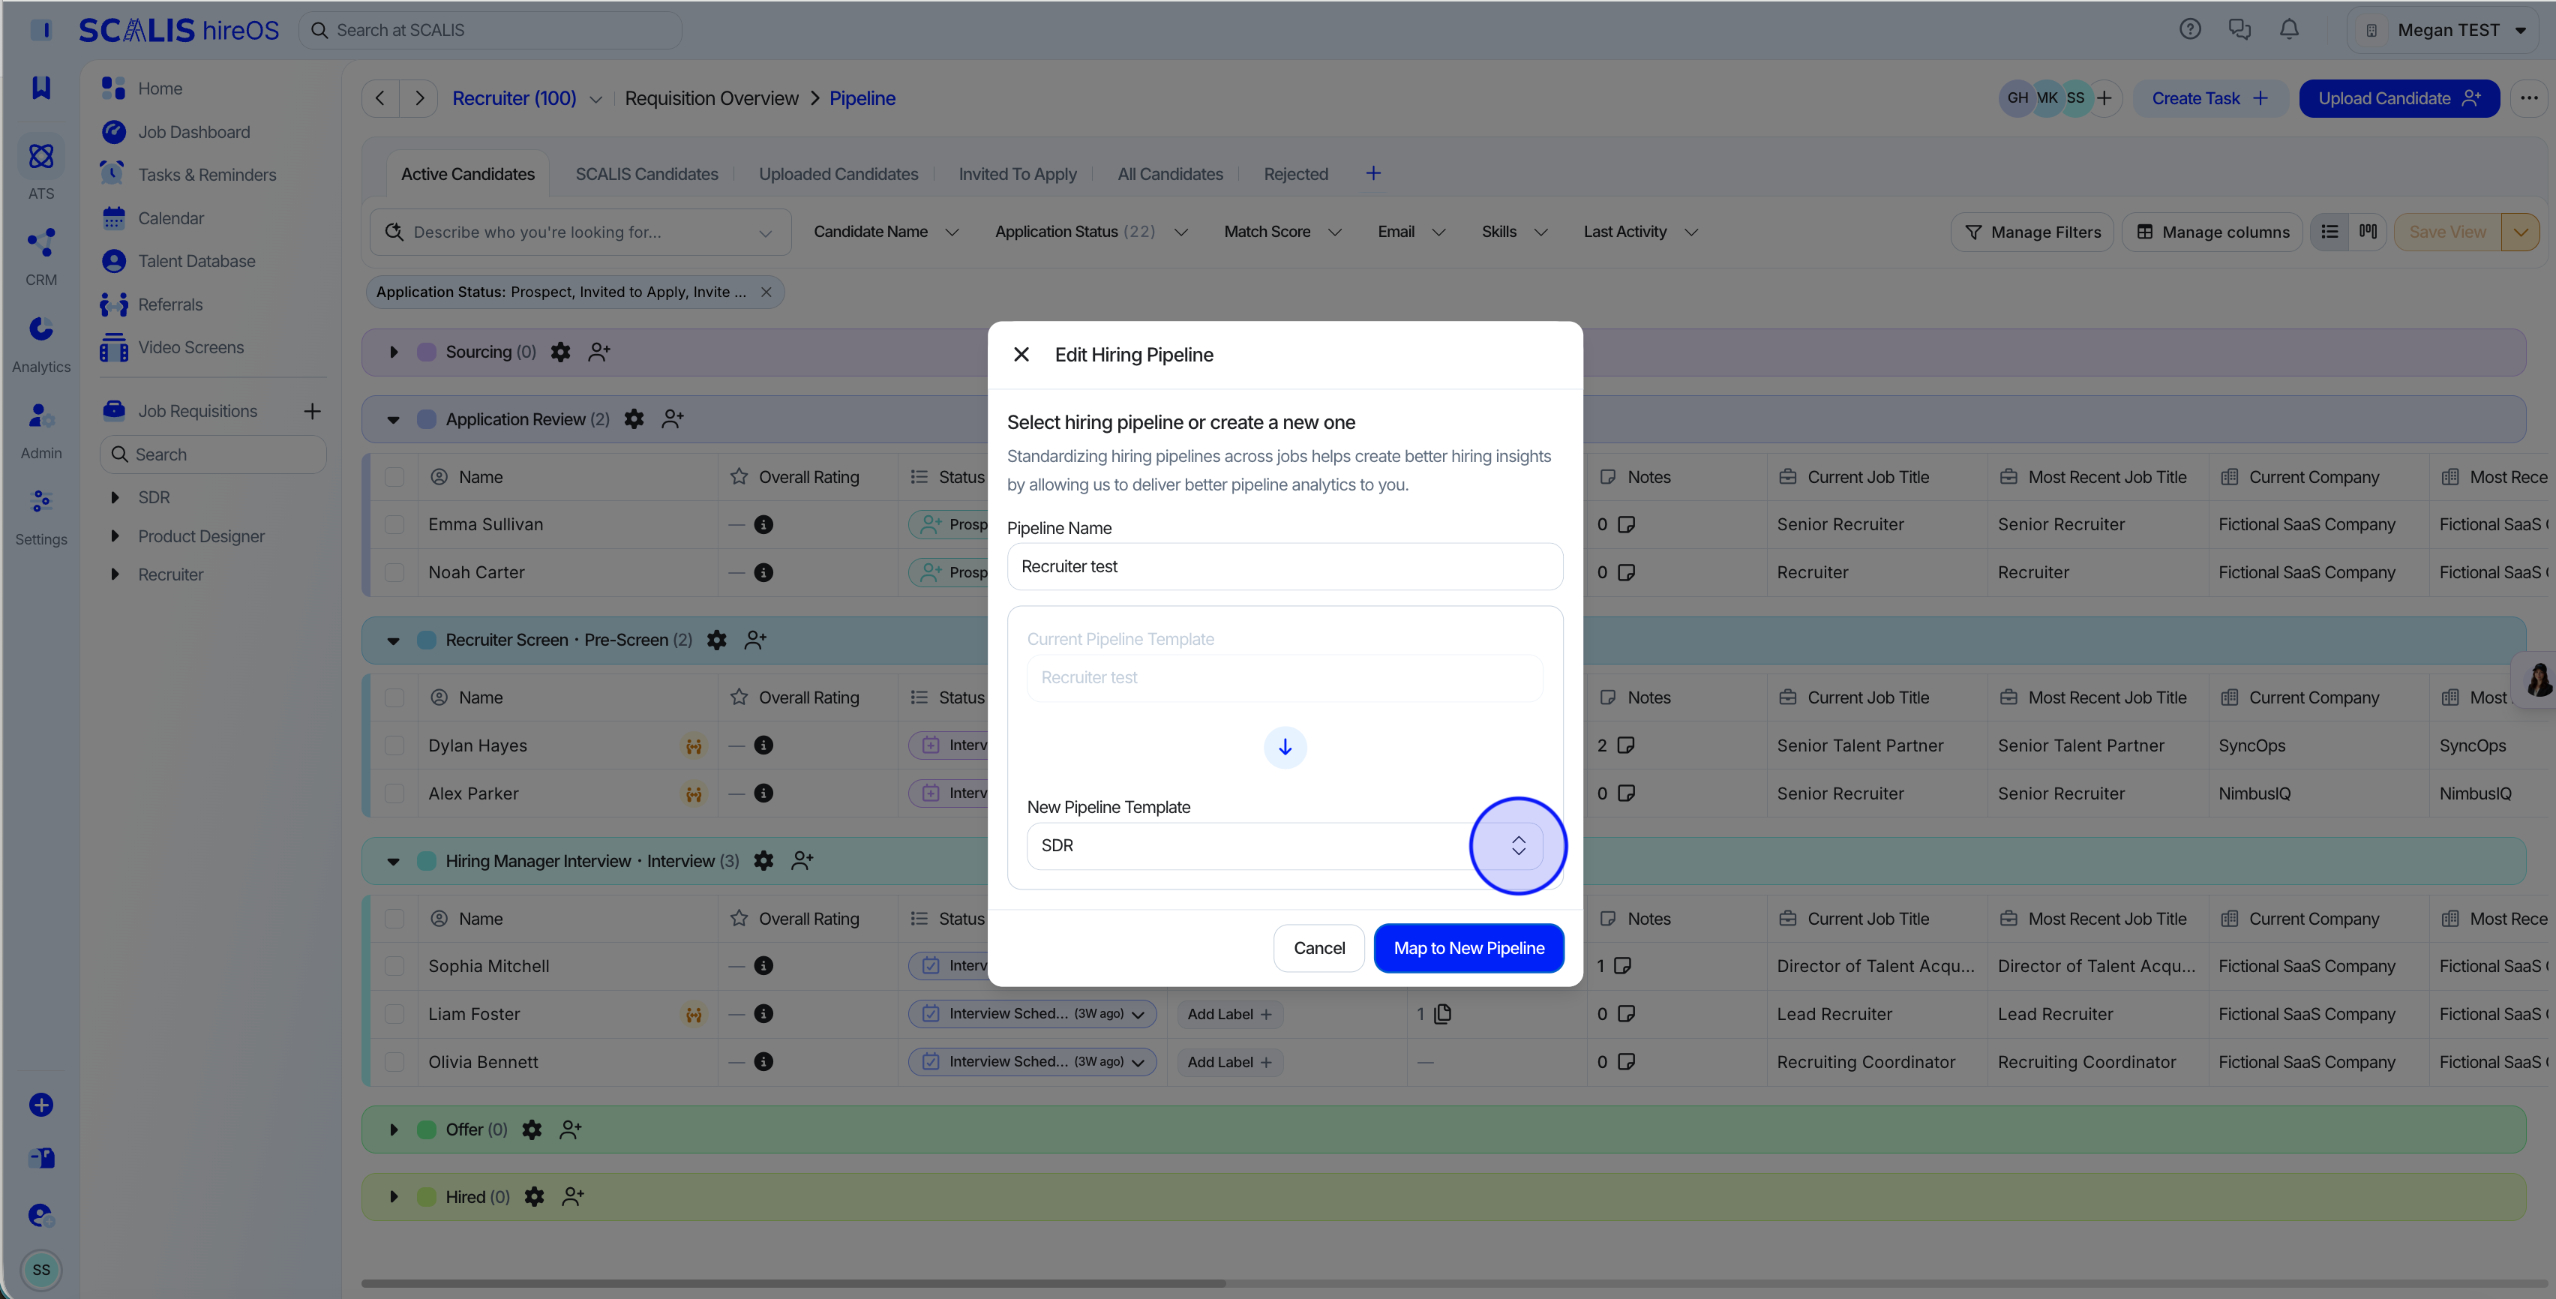
Step 3
Choose the New Pipeline
Choose the new pipeline you want the job to use.
✓
Final Step
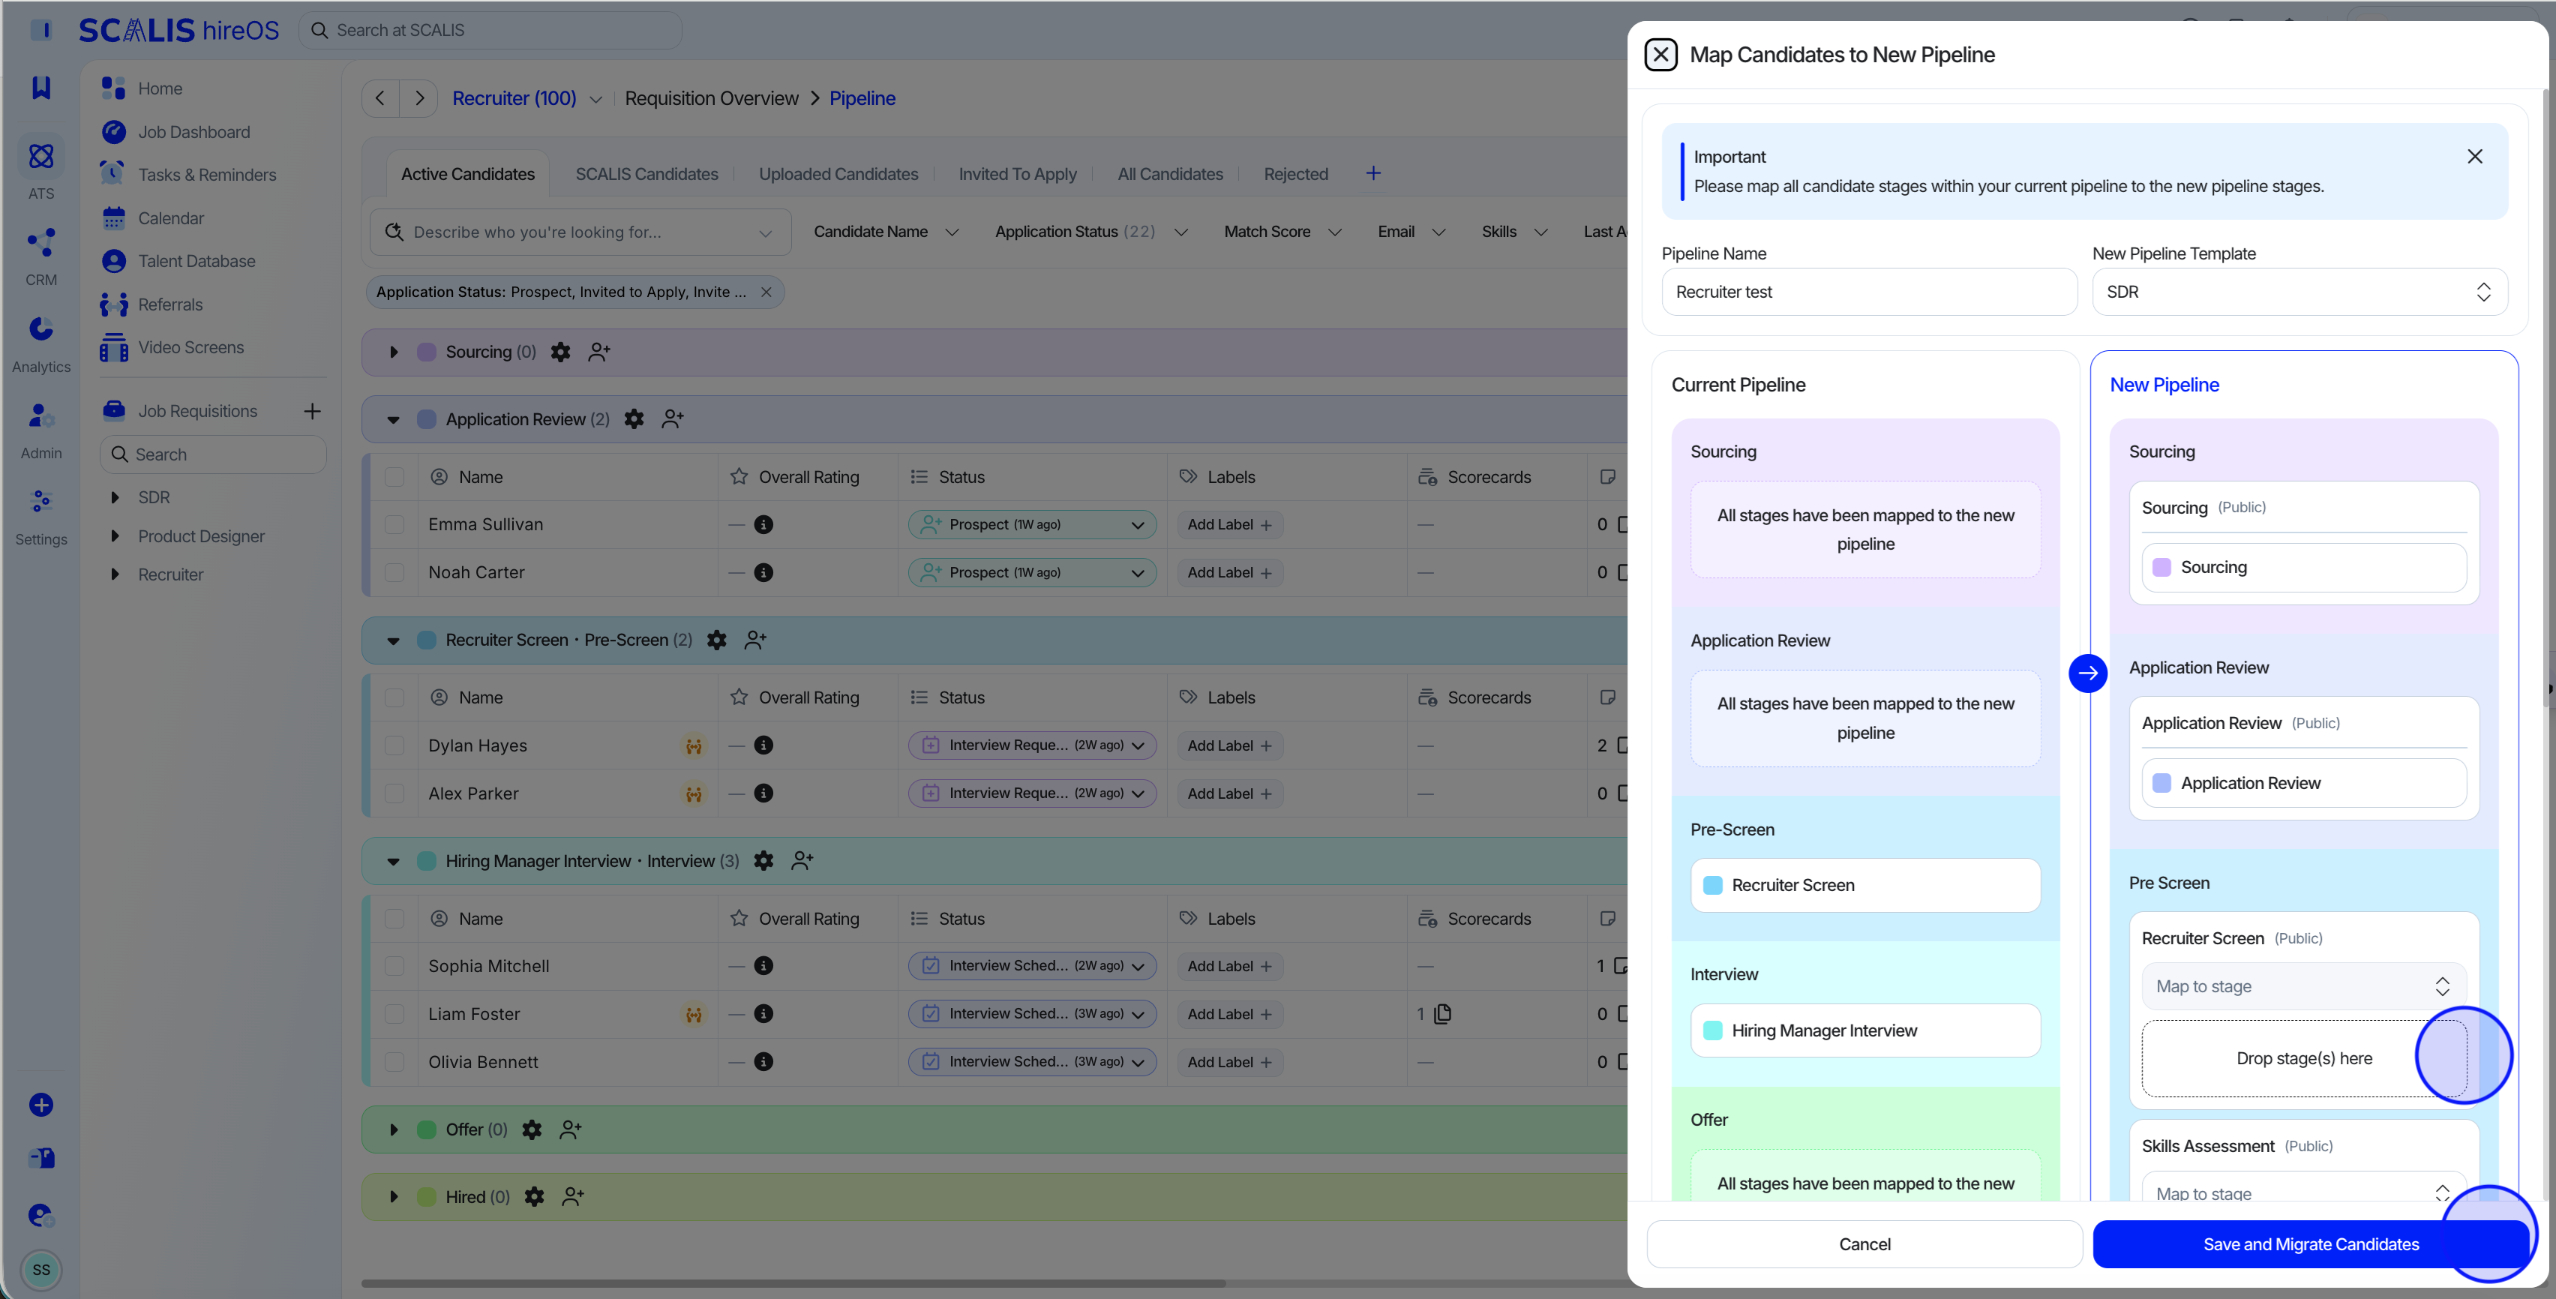
Map Candidates
Select a mapping plan to map your candidates to the updated pipeline stages.
That's it! Your pipeline template is ready to keep every requisition moving through a consistent process. Reach out to your CSM any time you need a hand.