.png?width=1391&height=437&name=SCALIS%20Logo%20(1).png)
OFFER MANAGEMENT
Creating an offer letter template helps streamline your hiring process. This guide walks you through building your own offer templates and inserting tokens that automatically populate candidate and job-specific details.
5 steps5 min read
Where to Start
1
Step 1
Open a new offer template
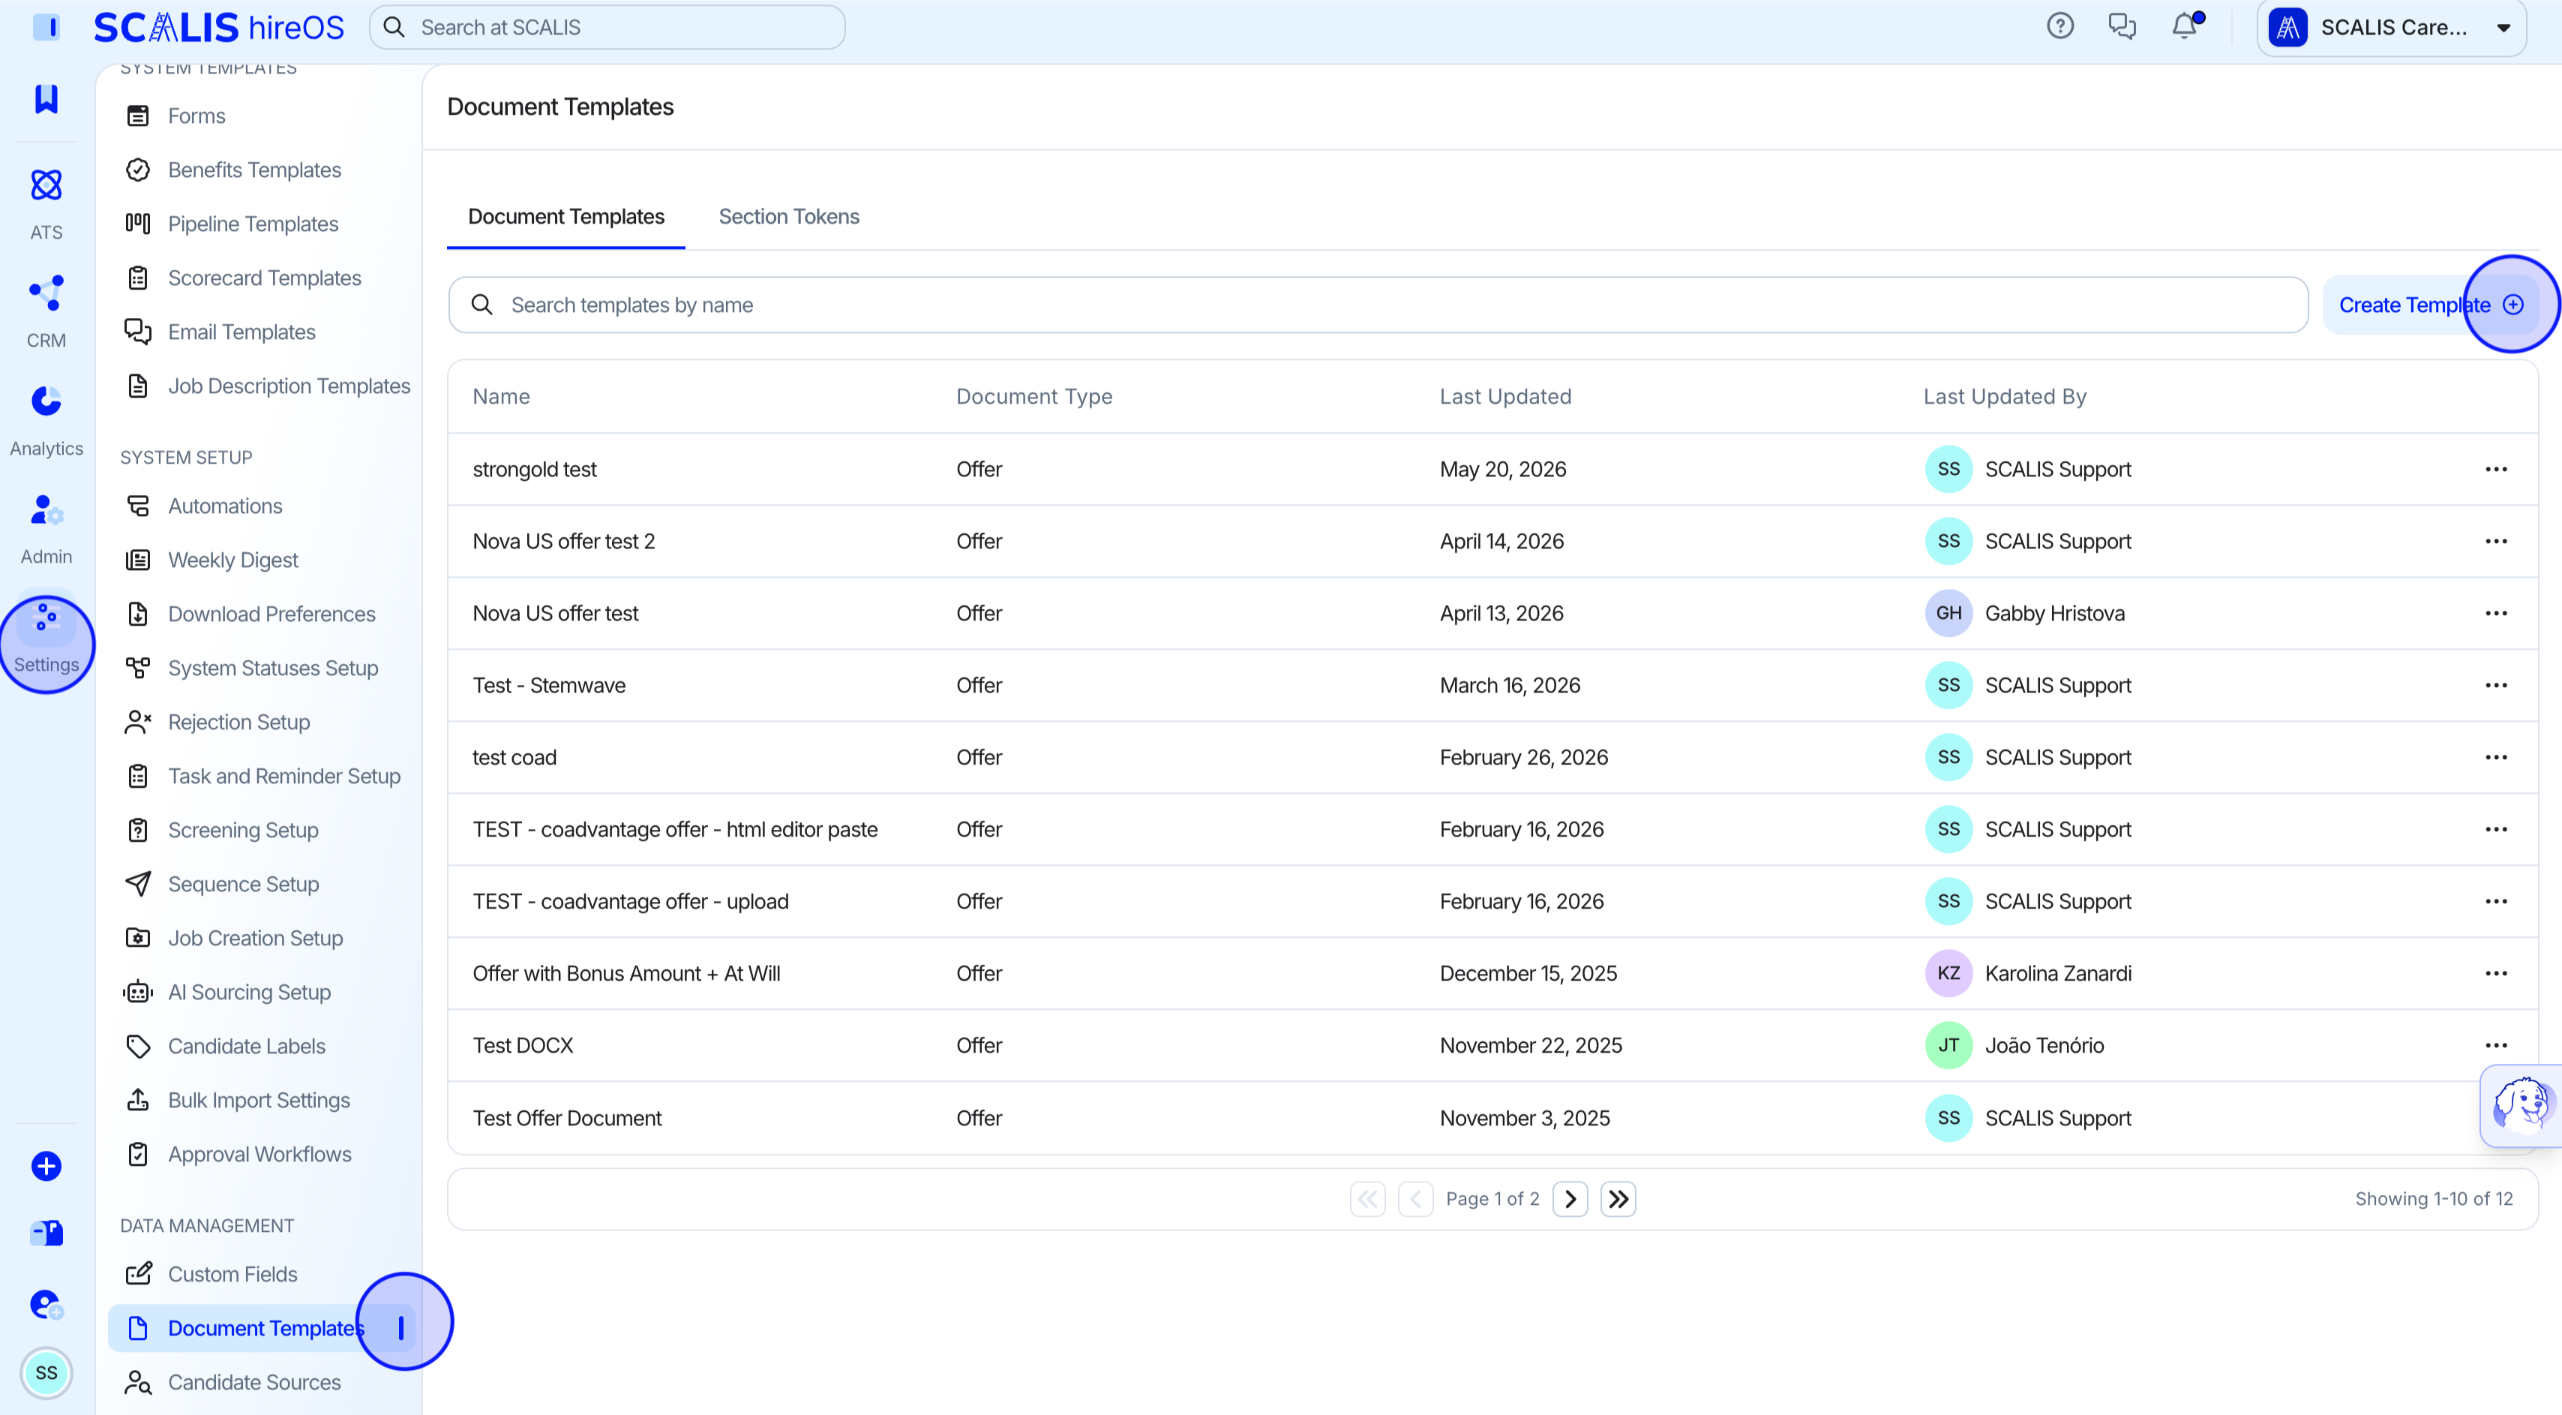
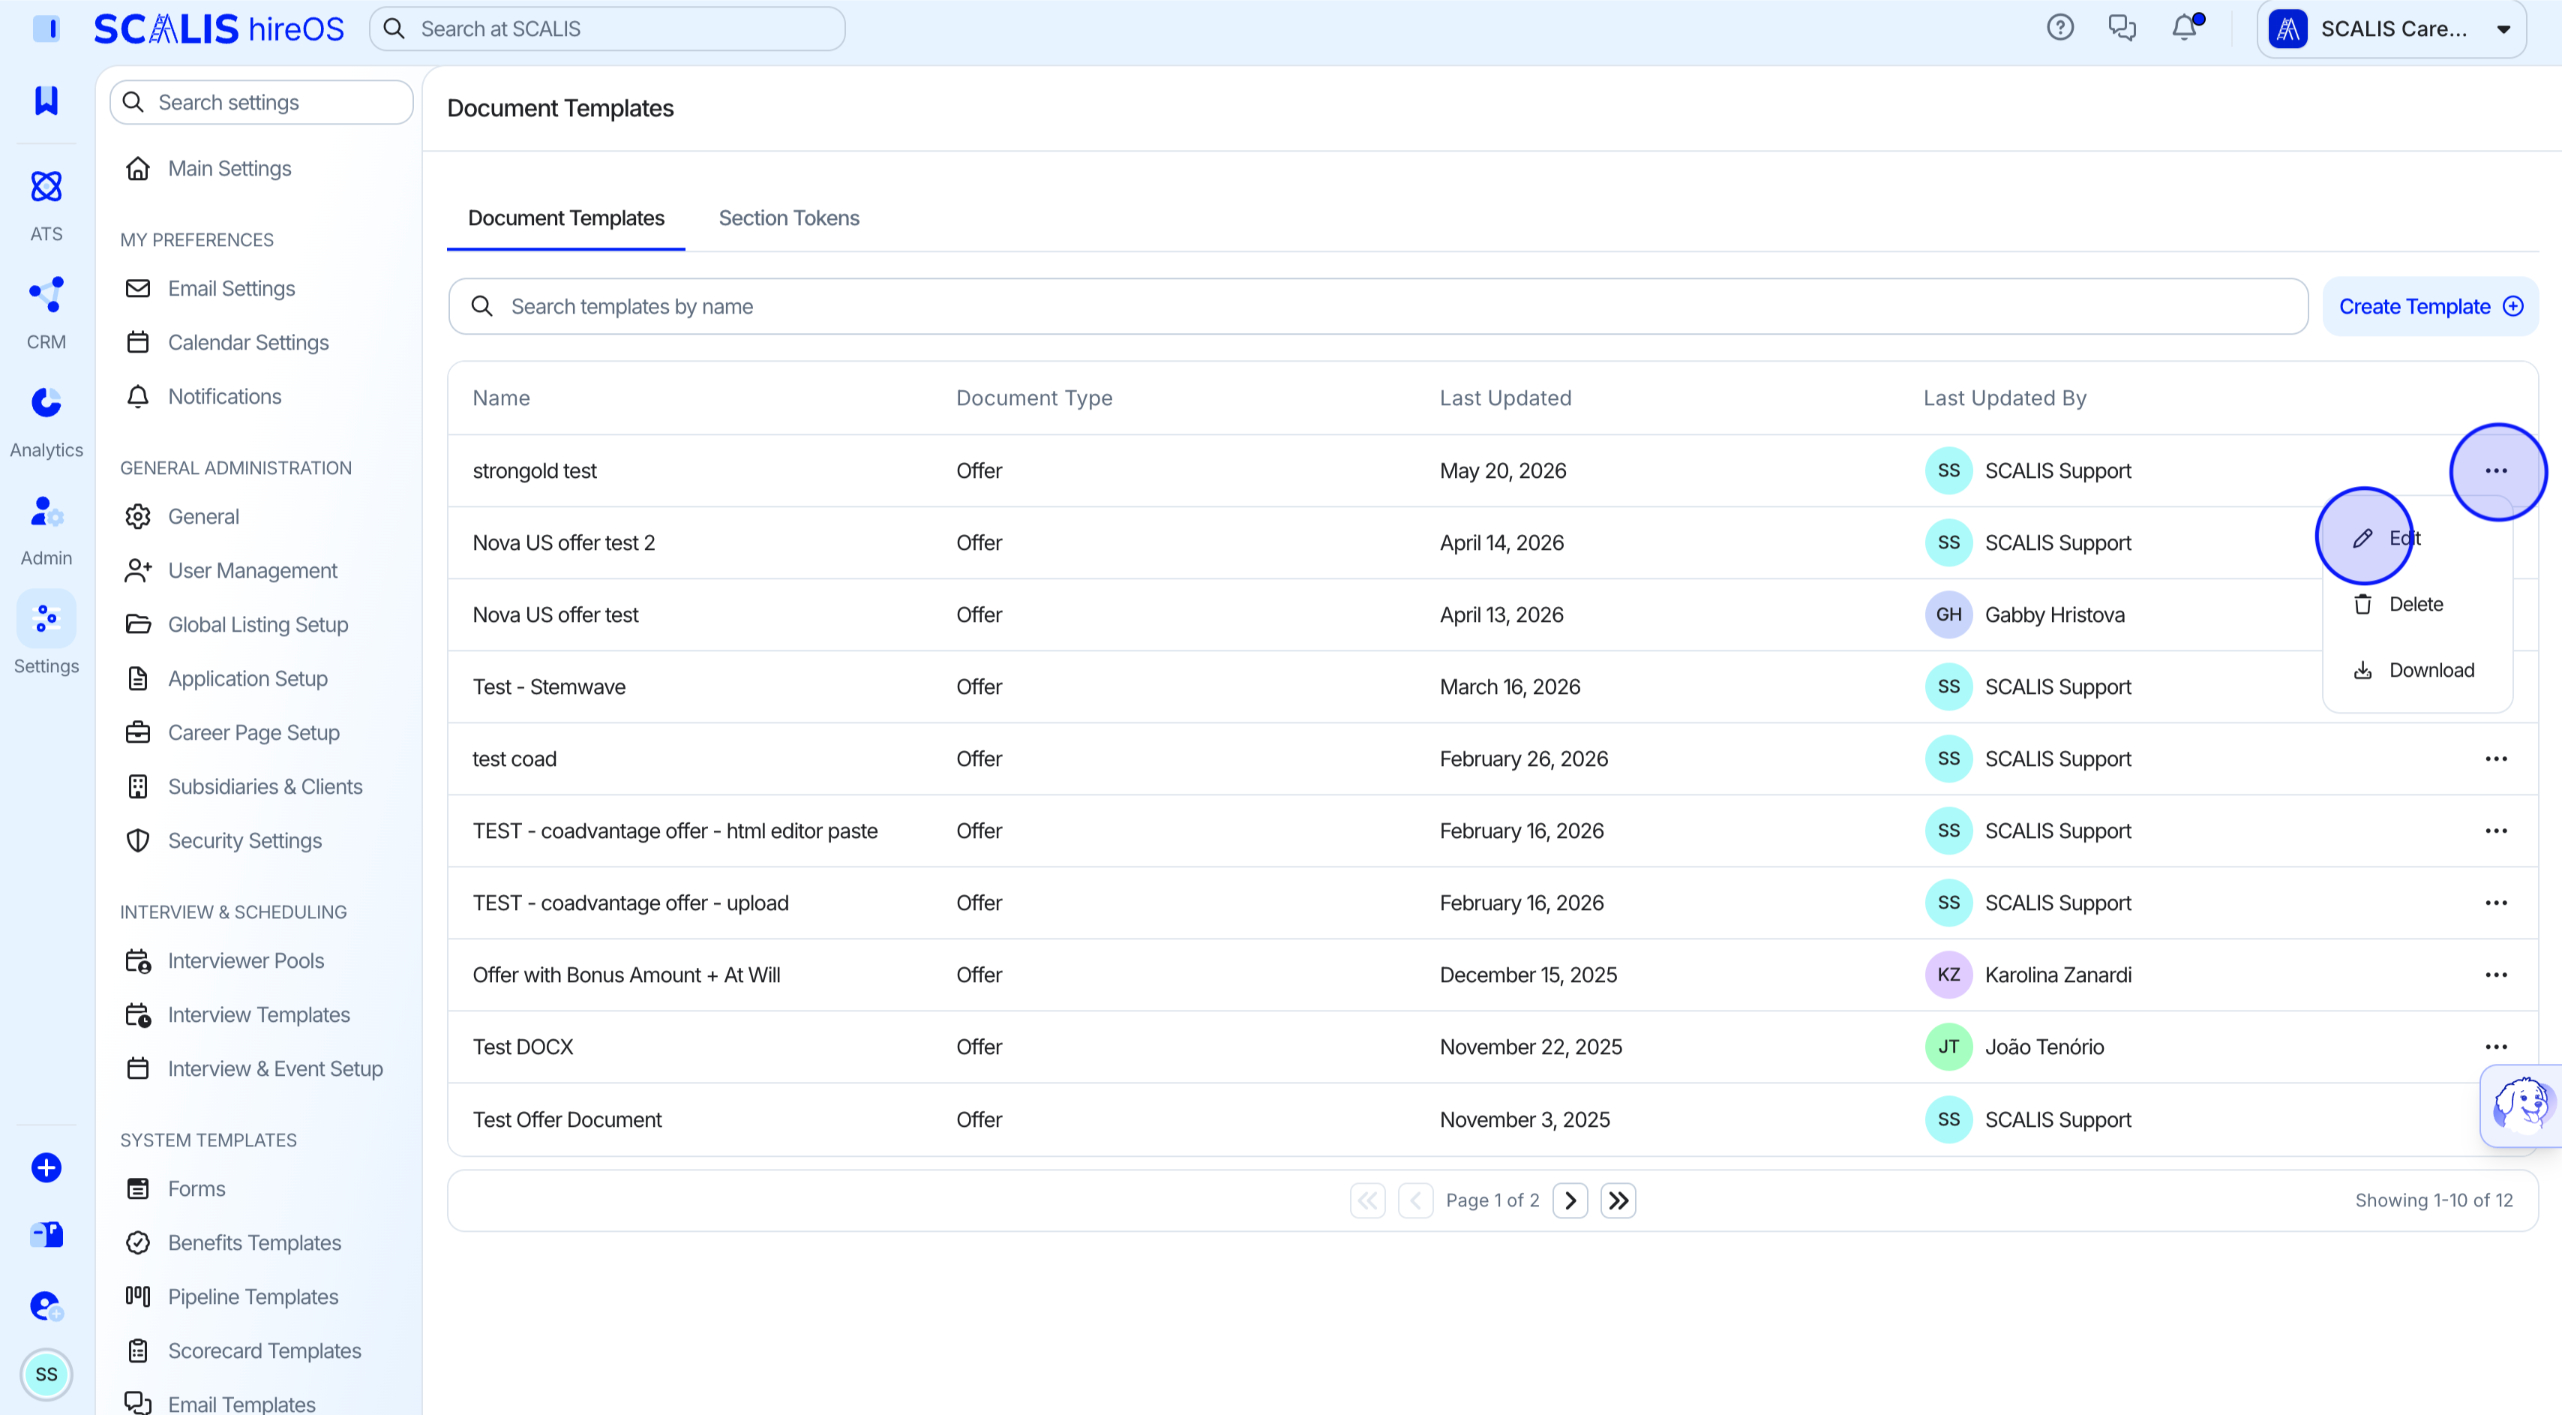
Navigate to Company Settings.
Select Document Template.
Select Create New Template > Offer.
Build Your Template
2
Step 2
Set up the template
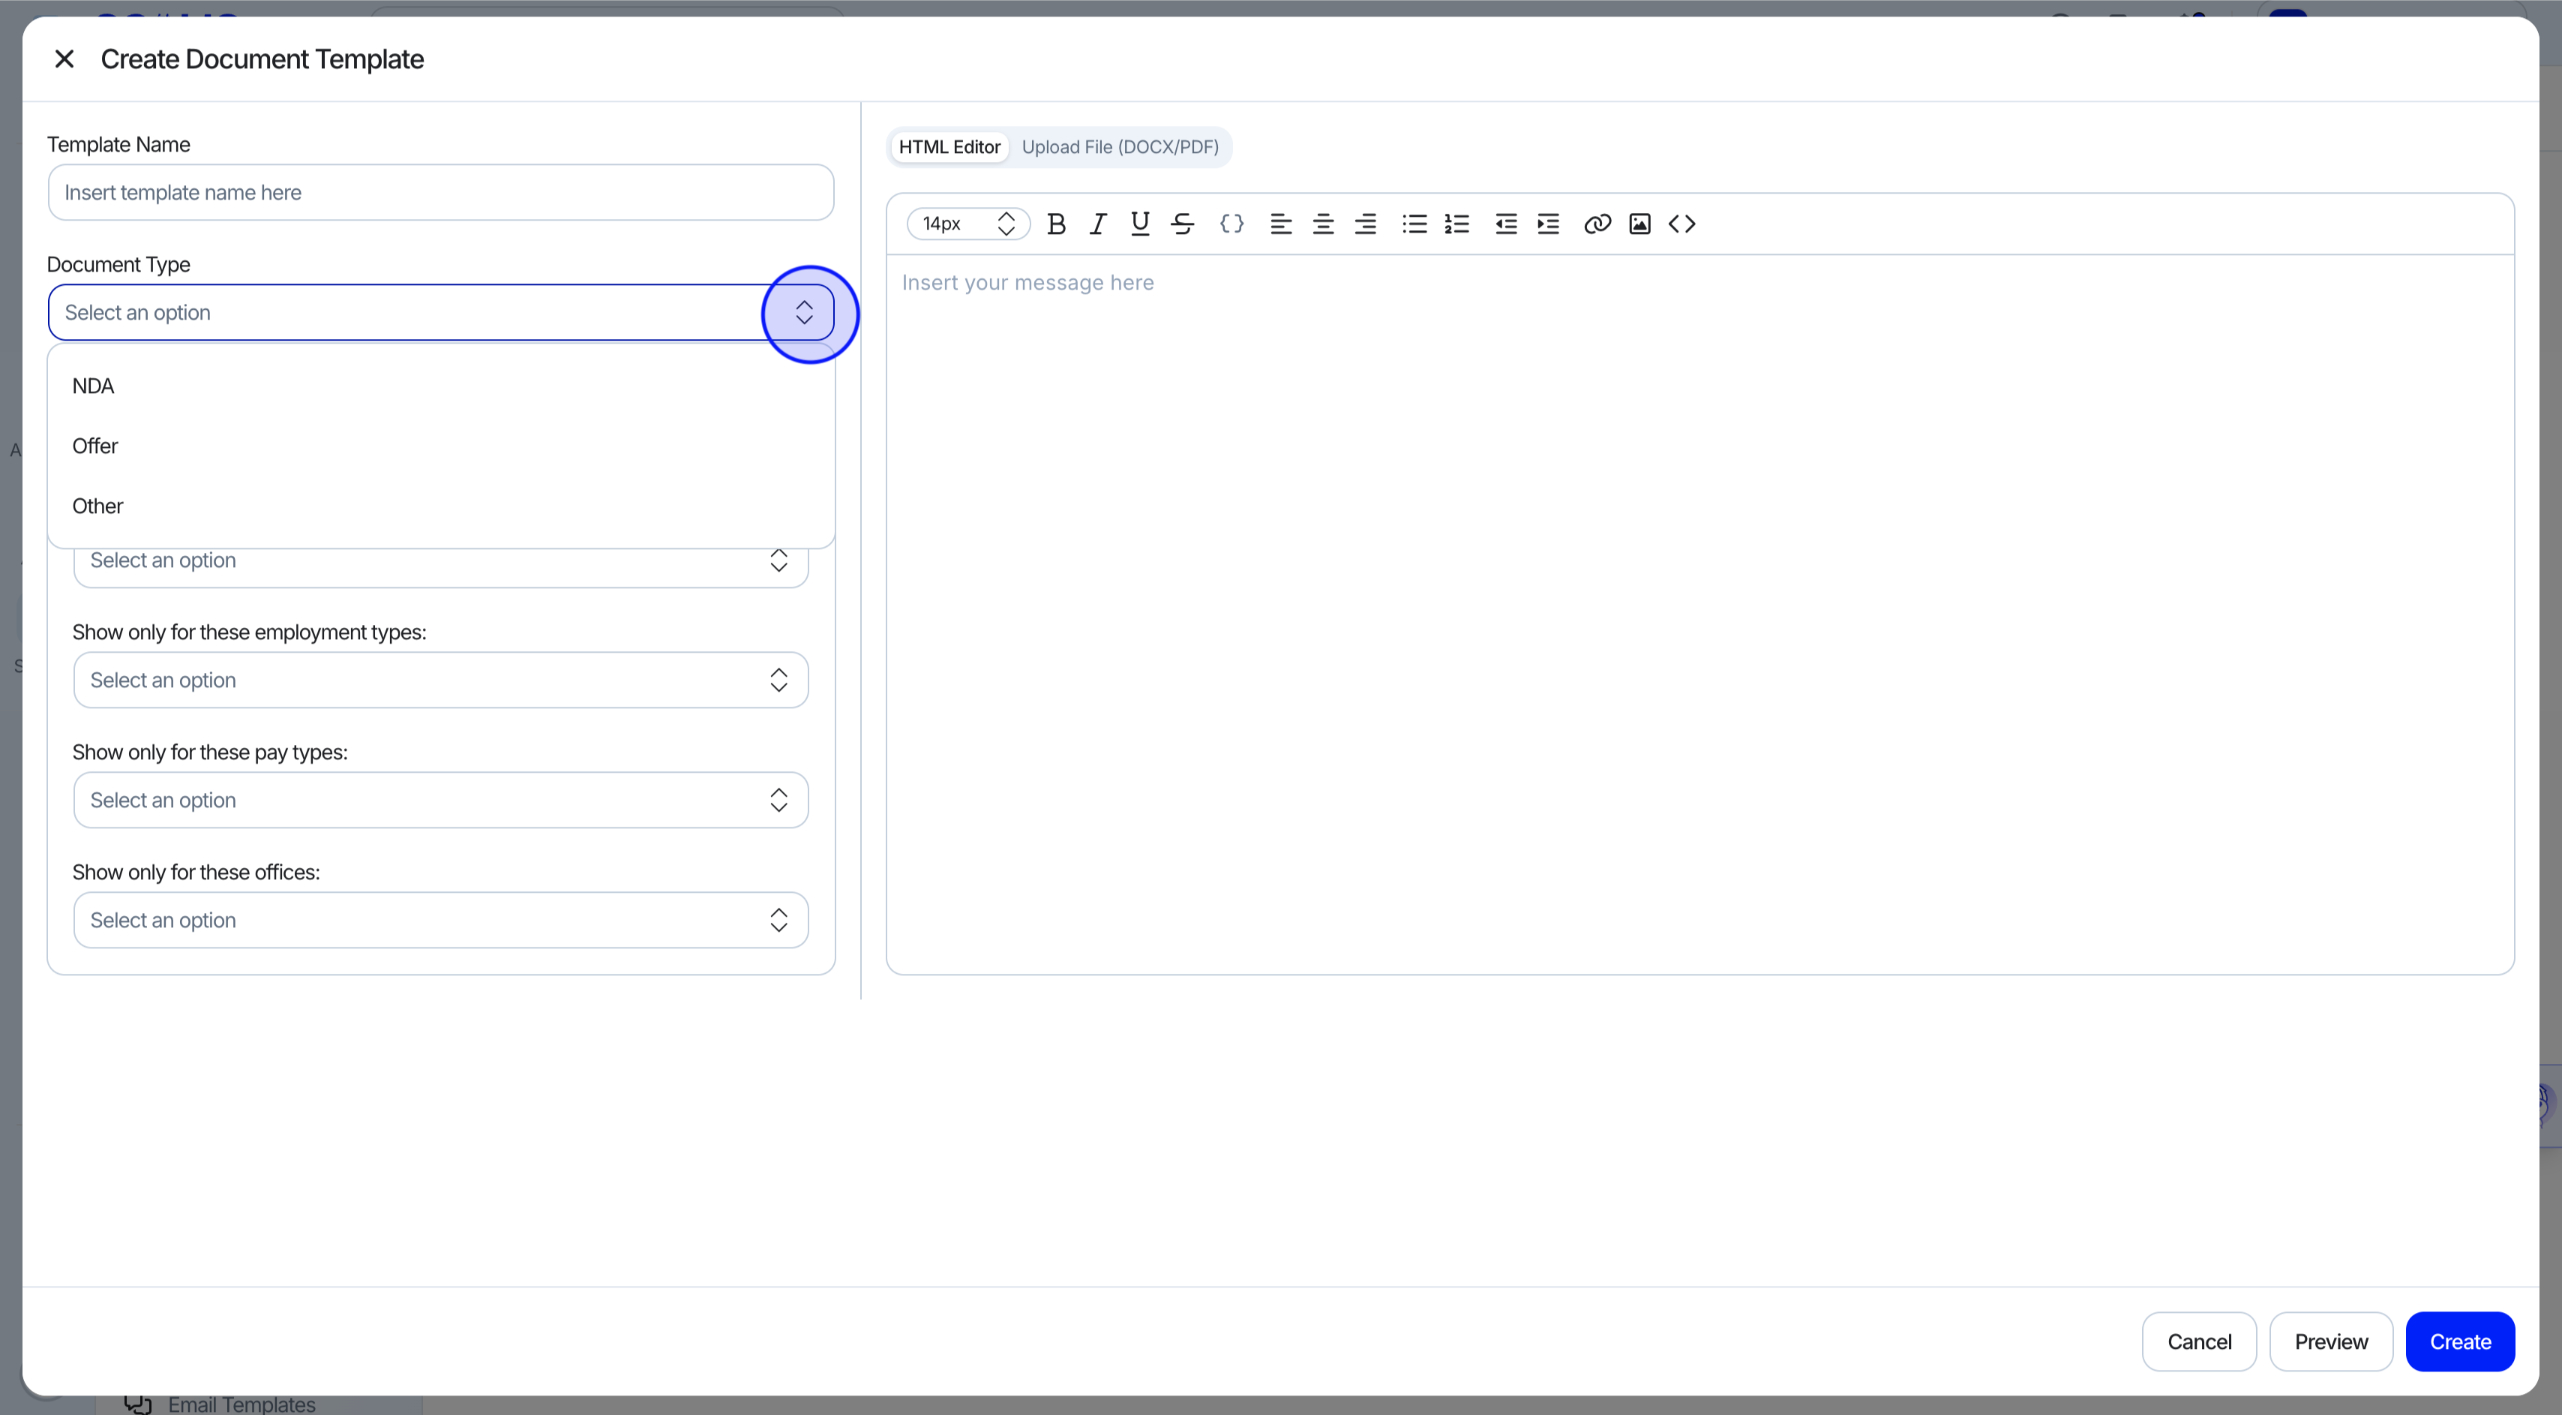
Fill out the required fields:
Template Name: give it a clear, descriptive name (e.g., Full-Time Sales Offer, Internship Summer 2025).
Document Type: select the type of document this template represents.
Set up any conditionals to control when this template applies, including:
Departments
Employment Types
Pay Types
Offices
3
Step 3
Write your offer letter and insert dynamic tokens
Think of this editor like Google Docs or Microsoft Word. Use formatting to create a polished, readable document.
In the text editor, draft the body of your offer letter. You can include:
Formatting and content options:
Headings, bullet points, and formatted paragraphs
Compensation details
Job responsibilities
Company disclaimers or legal terms
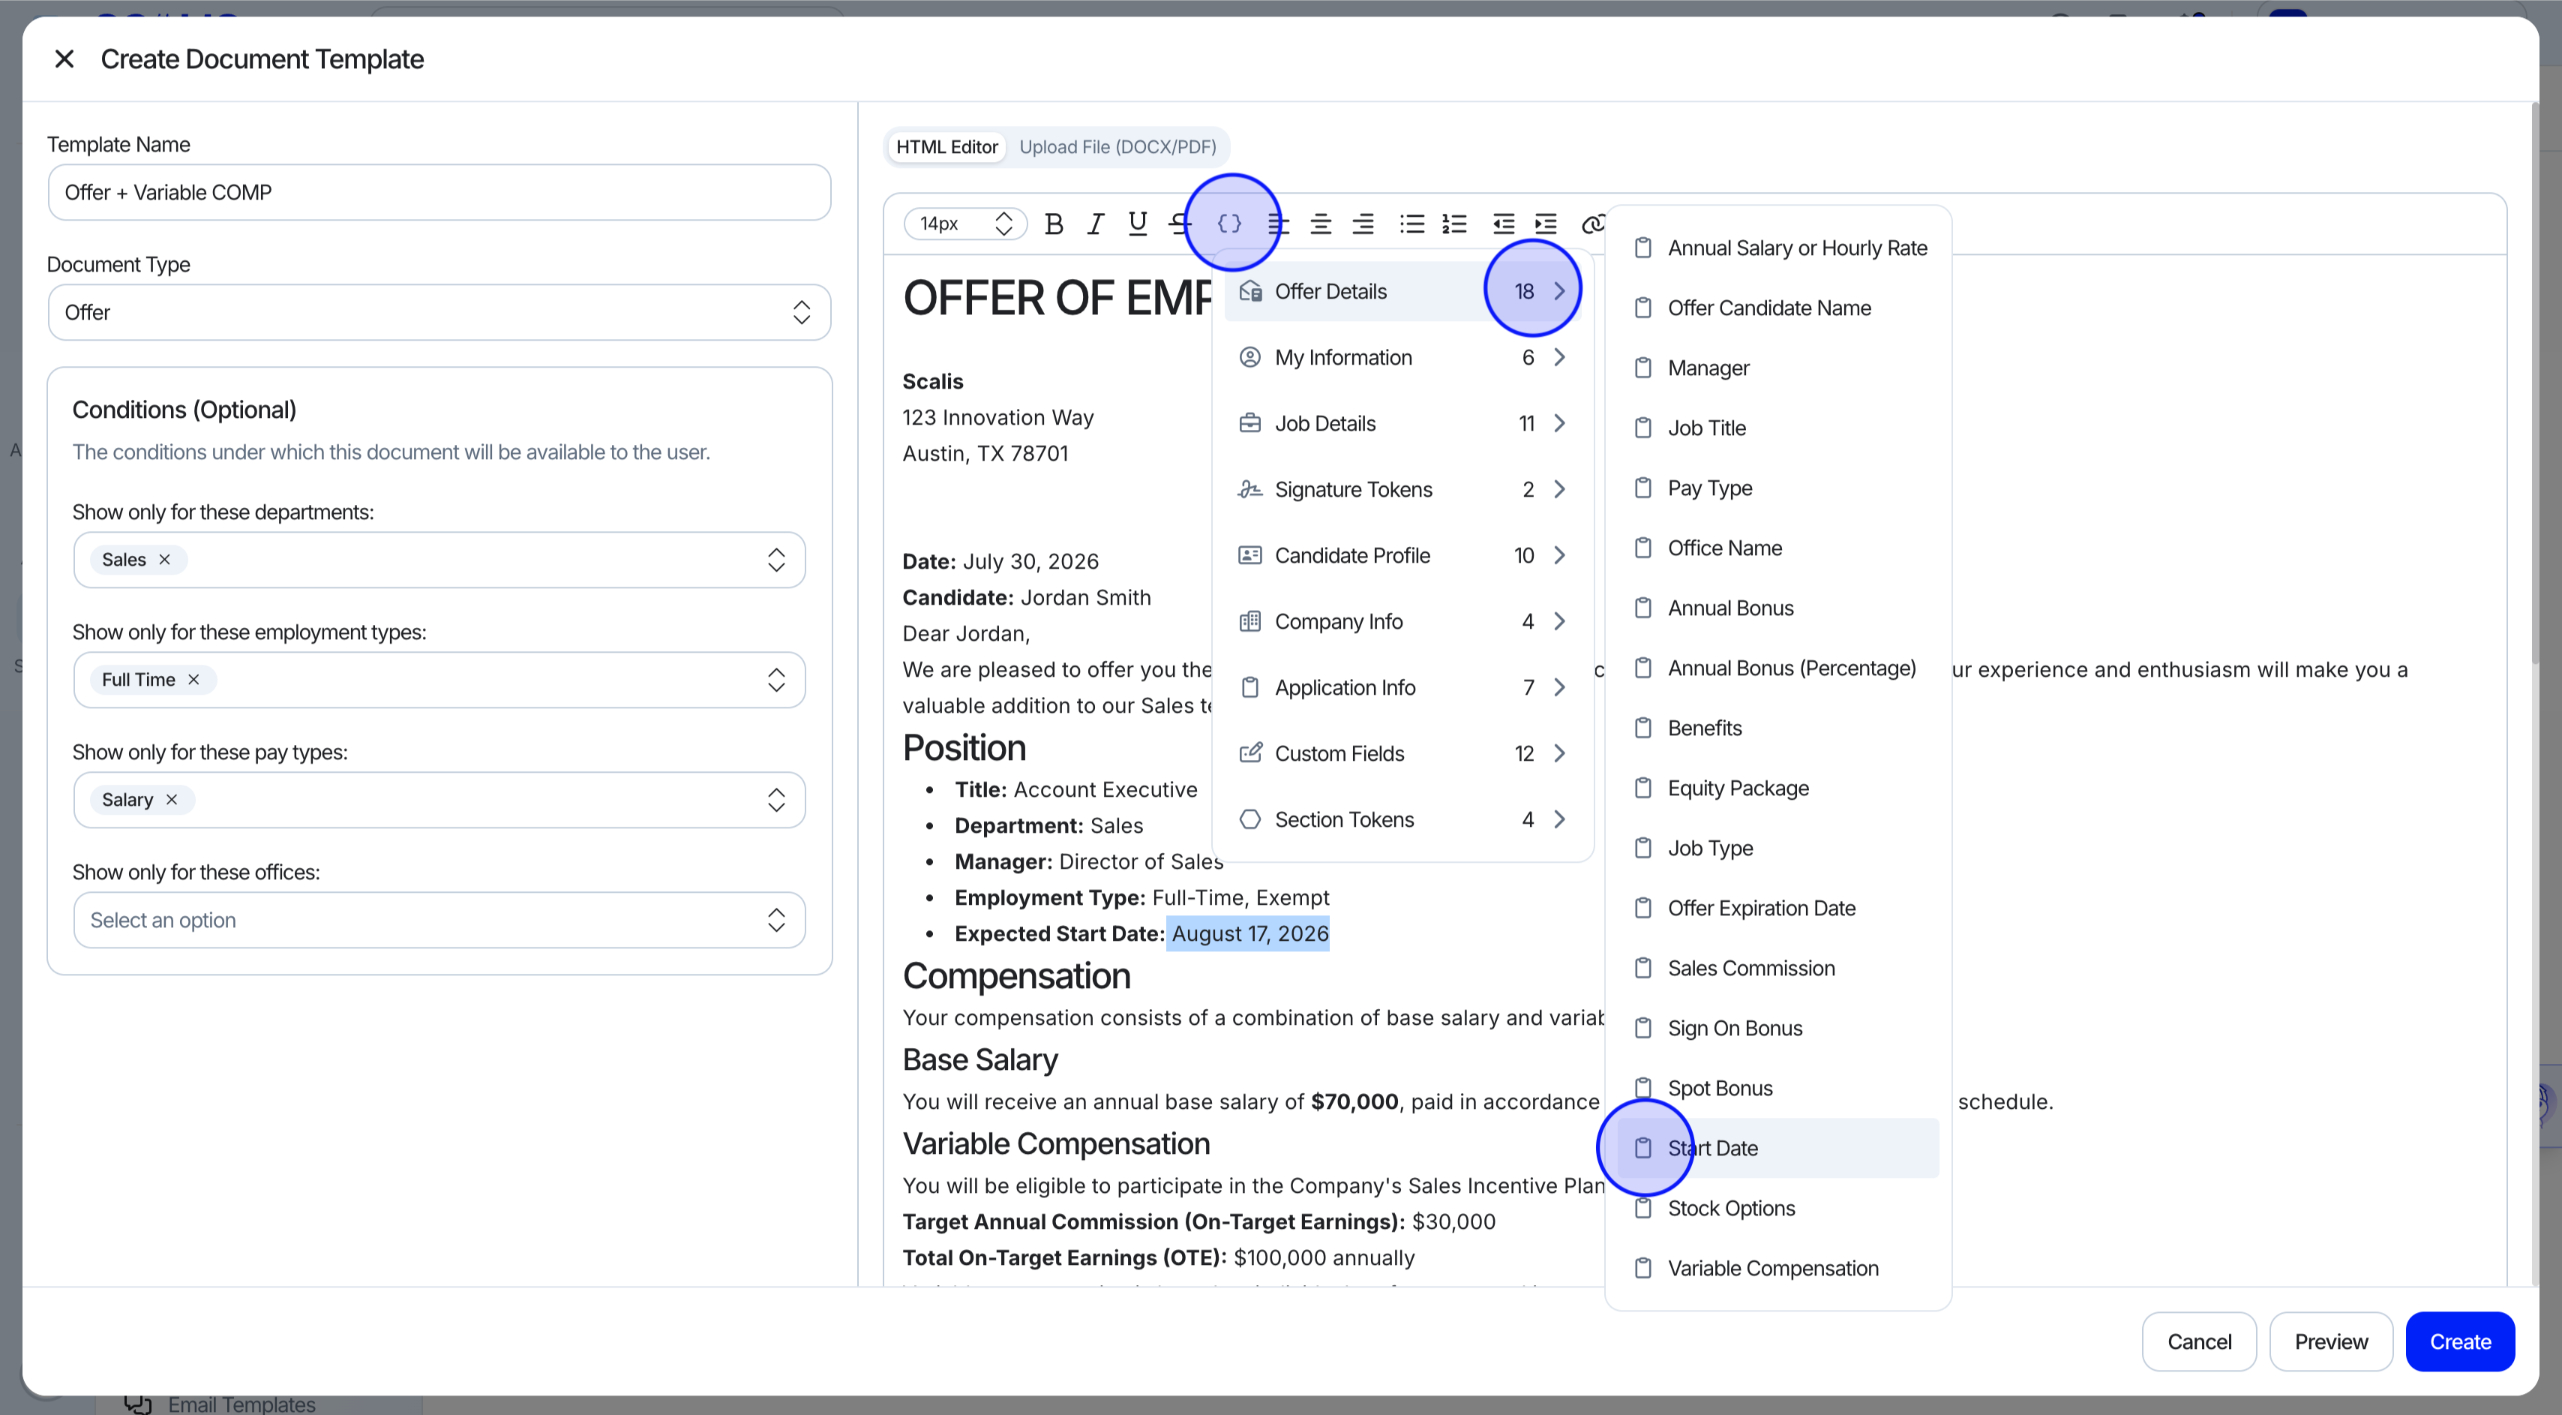
Dynamic tokens automatically populate data pulled from the candidate, job, or offer, saving time and reducing errors.
How to insert tokens
Place your cursor where you want the token.
Select the { } Insert Token button in the editor toolbar.
Browse and select from these categories:
Candidate Info (e.g., { Candidate_Full_Name })
Job Info (e.g., { Job_Title })
Offer Details (e.g., { Annual_Salary })
Custom Offer Fields (only visible if you've created any custom fields in Company Settings > Custom Fields)
💡 Note: Always insert tokens using the dropdown to avoid syntax errors. Tokens must be wrapped in double curly brackets, e.g., { Start_Date }.
4
Step 4
Preview and complete the offer document
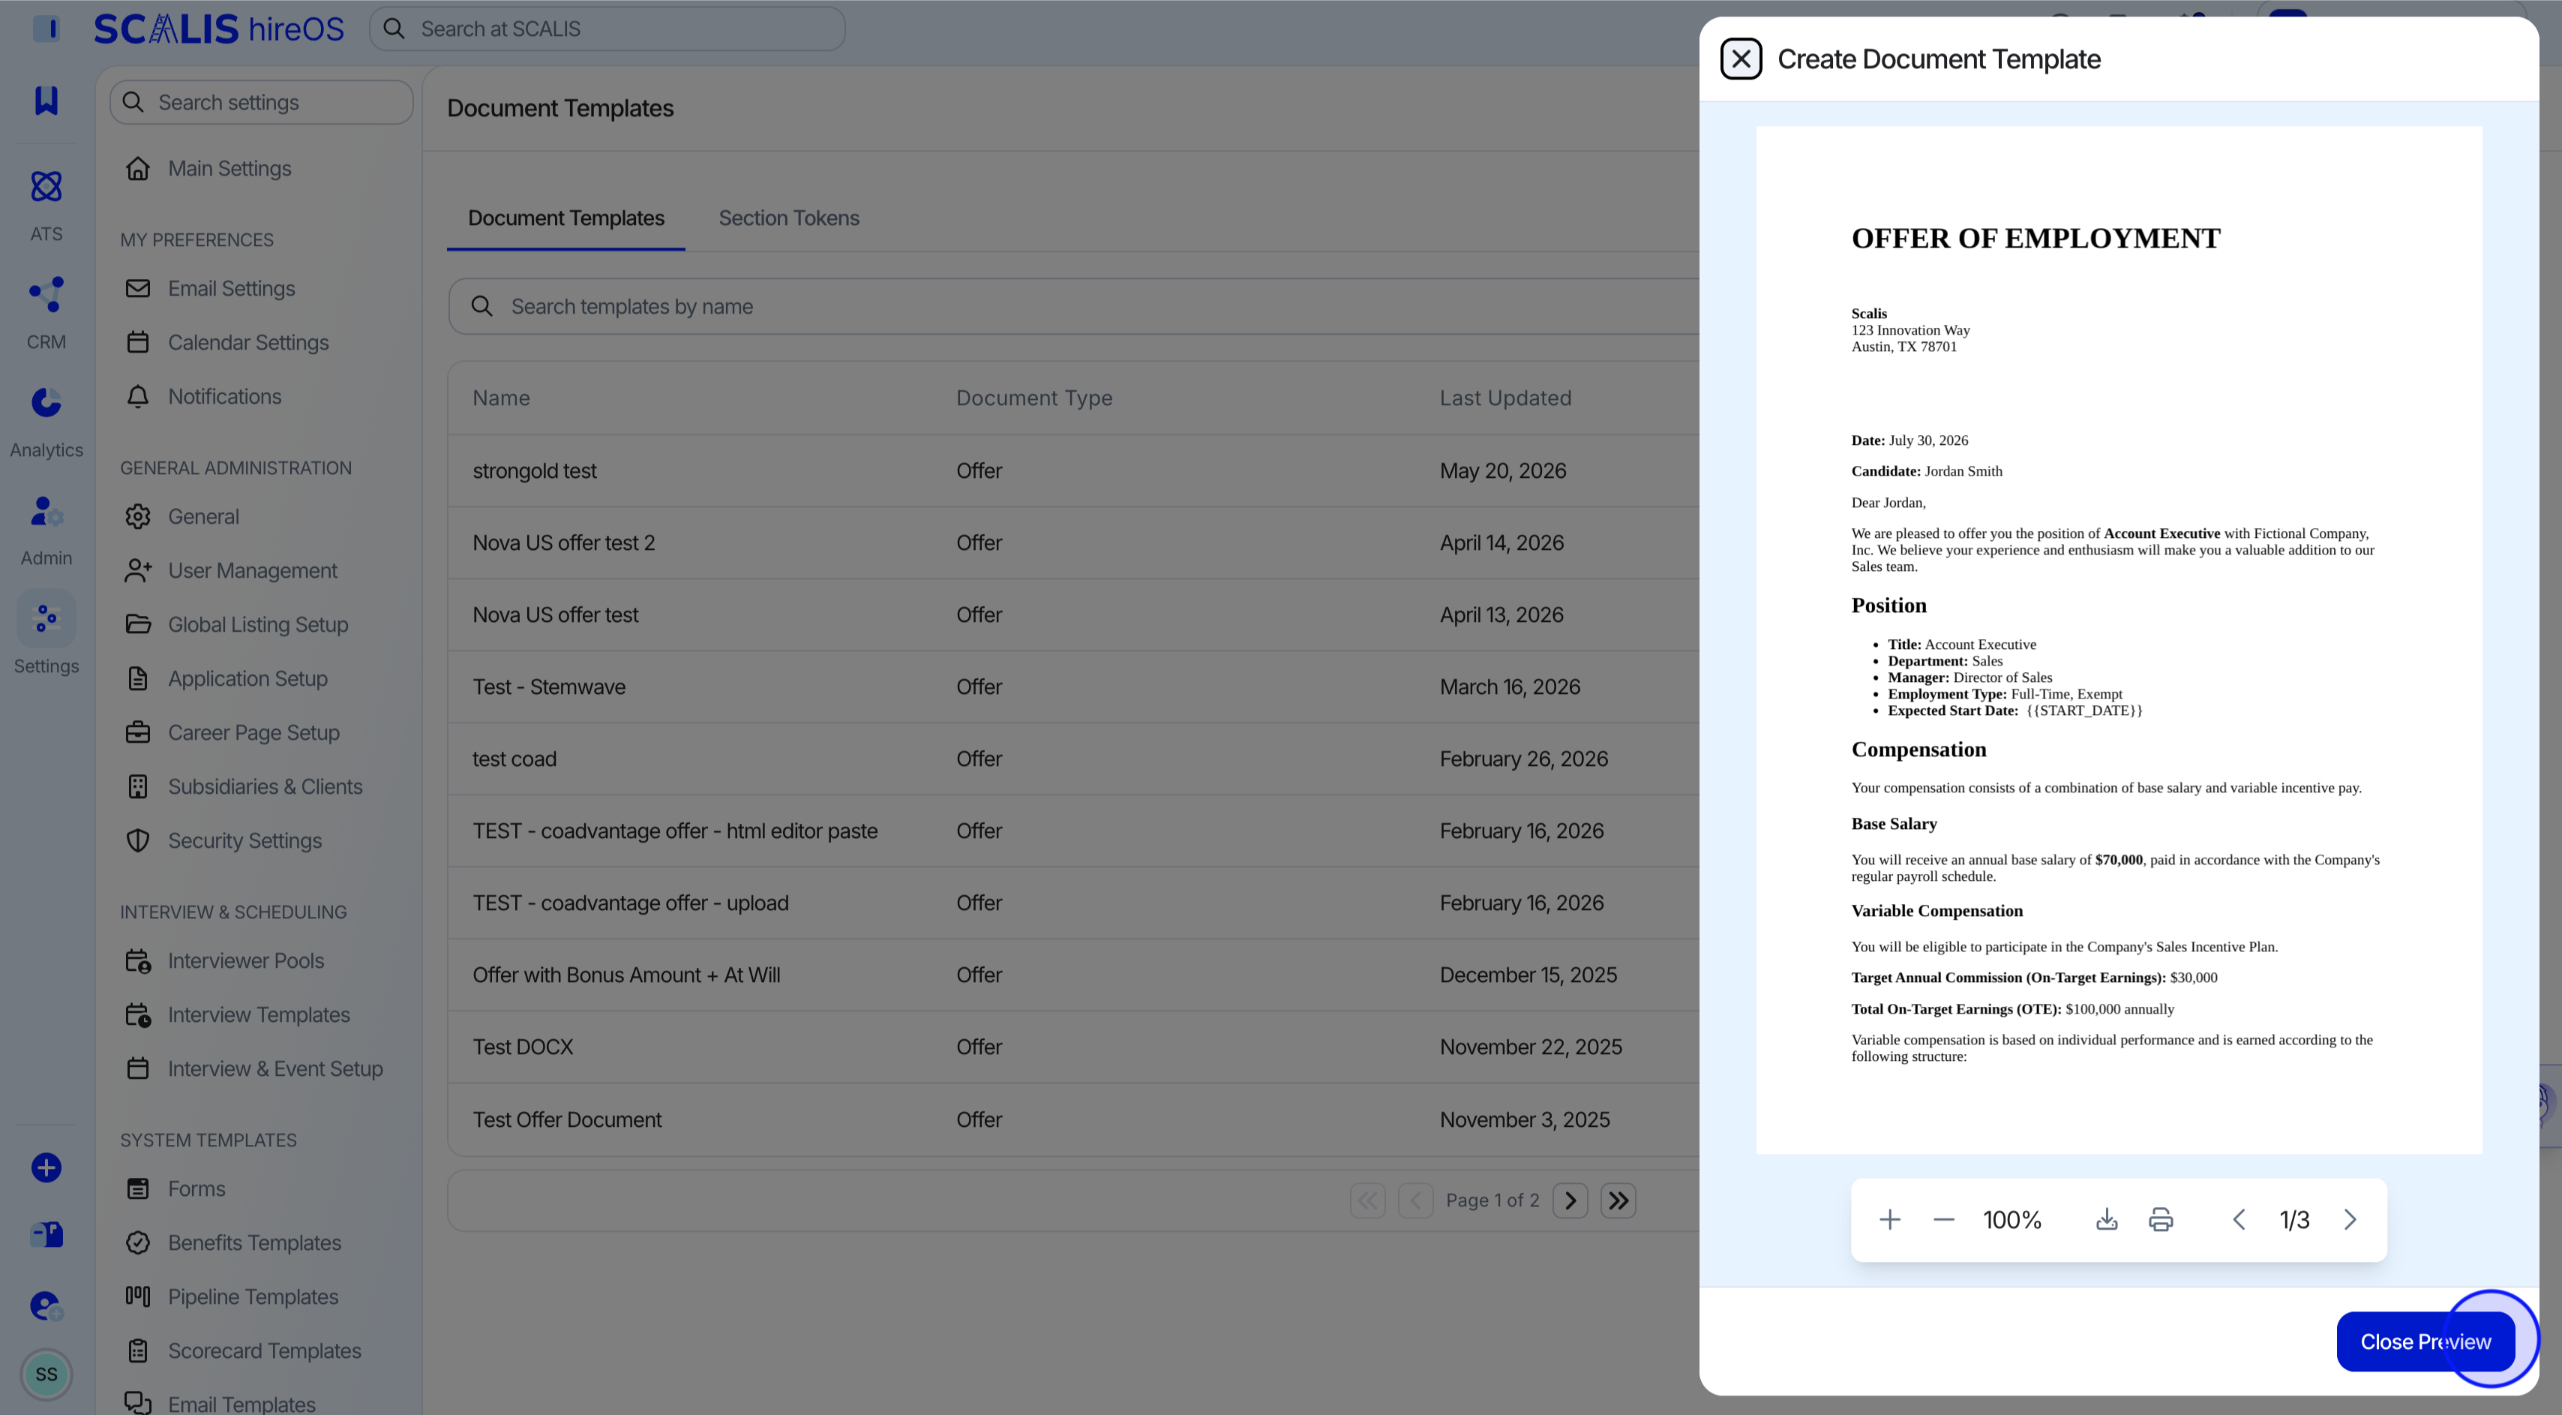
From editing, select Preview.
Review the preview and ensure no changes need to be made.
Select Close Preview.
Select Create to complete the offer document.
✓
Final Step
Edit or archive existing templates
To make changes to a template:
Select the "..." (ellipsis) next to the template.
Select Edit.
Adjust the content.
Select Save.
💡 Note: Need to remove an outdated template? Use the Archive option. This hides it from future use but retains it for record-keeping.
Frequently Asked Questions
What happens if a token is missing or blank?
If a token isn't populated when generating the offer, you'll see a placeholder value (e.g., { sign_on_bonus }). Double-check that all required fields were filled out when creating the offer.
Can I include multiple signers in a template?
Signers are configured when sending the offer, not in the template itself. However, we recommend indicating signer roles (e.g., candidate, hiring manager) in the doc layout if relevant.
Are templates customizable by department or location?
Yes. Create multiple templates tailored by job type, office, or region. You can even use conditional language or custom tokens for specific use cases.
With offer templates in place, you'll be able to generate and send fully personalized offer letters in just a few clicks, saving time and ensuring a professional candidate experience. Need help creating your first template or want examples? Reach out to your customer success manager.