.png?width=1391&height=437&name=SCALIS%20Logo%20(1).png)
INTEGRATIONS
Purchase paid job ads to third-party job boards through the Job Ad Marketplace.
6 steps5 min read
1
Step 1
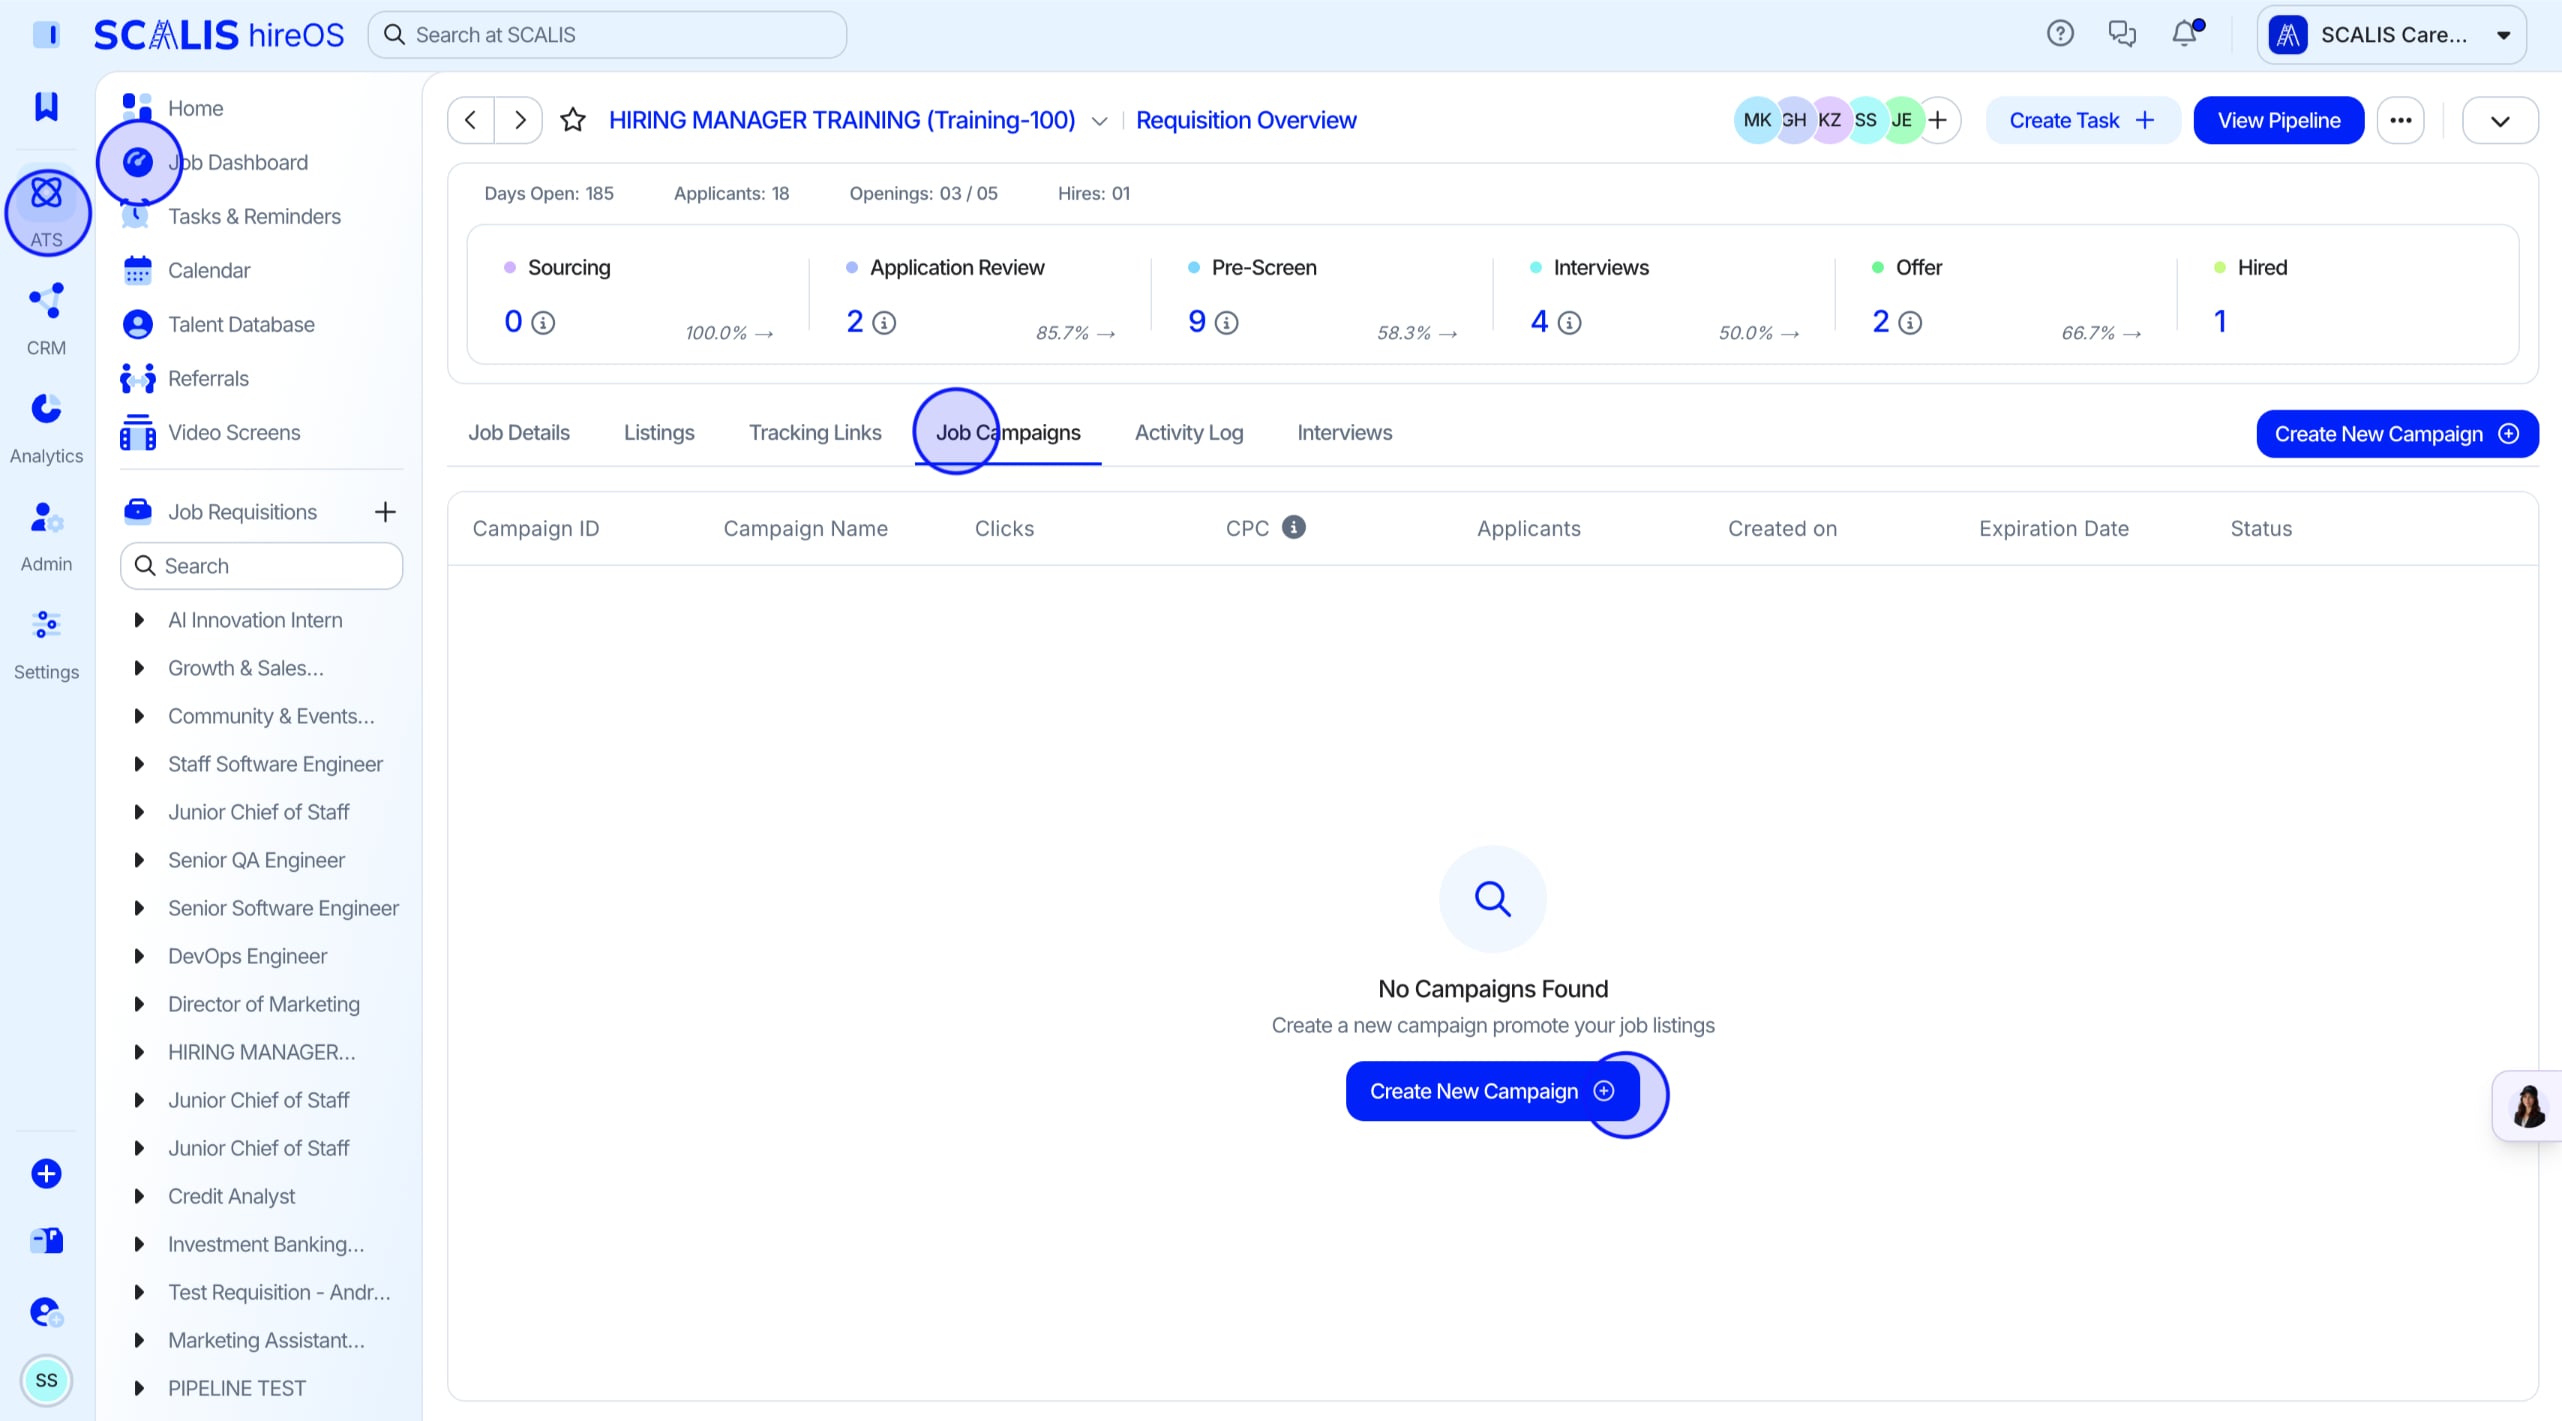
Access the Job Ad Marketplace
Go to your ATS and open the Job Dashboard.
Select the job you want to advertise.
Click the Job Campaigns tab.
Click Create New Campaign.
💡 Note: In addition to any paid job ads you purchase through SCALIS, all job listings are automatically posted to 32+ platforms at no extra cost to you.
2
Step 2
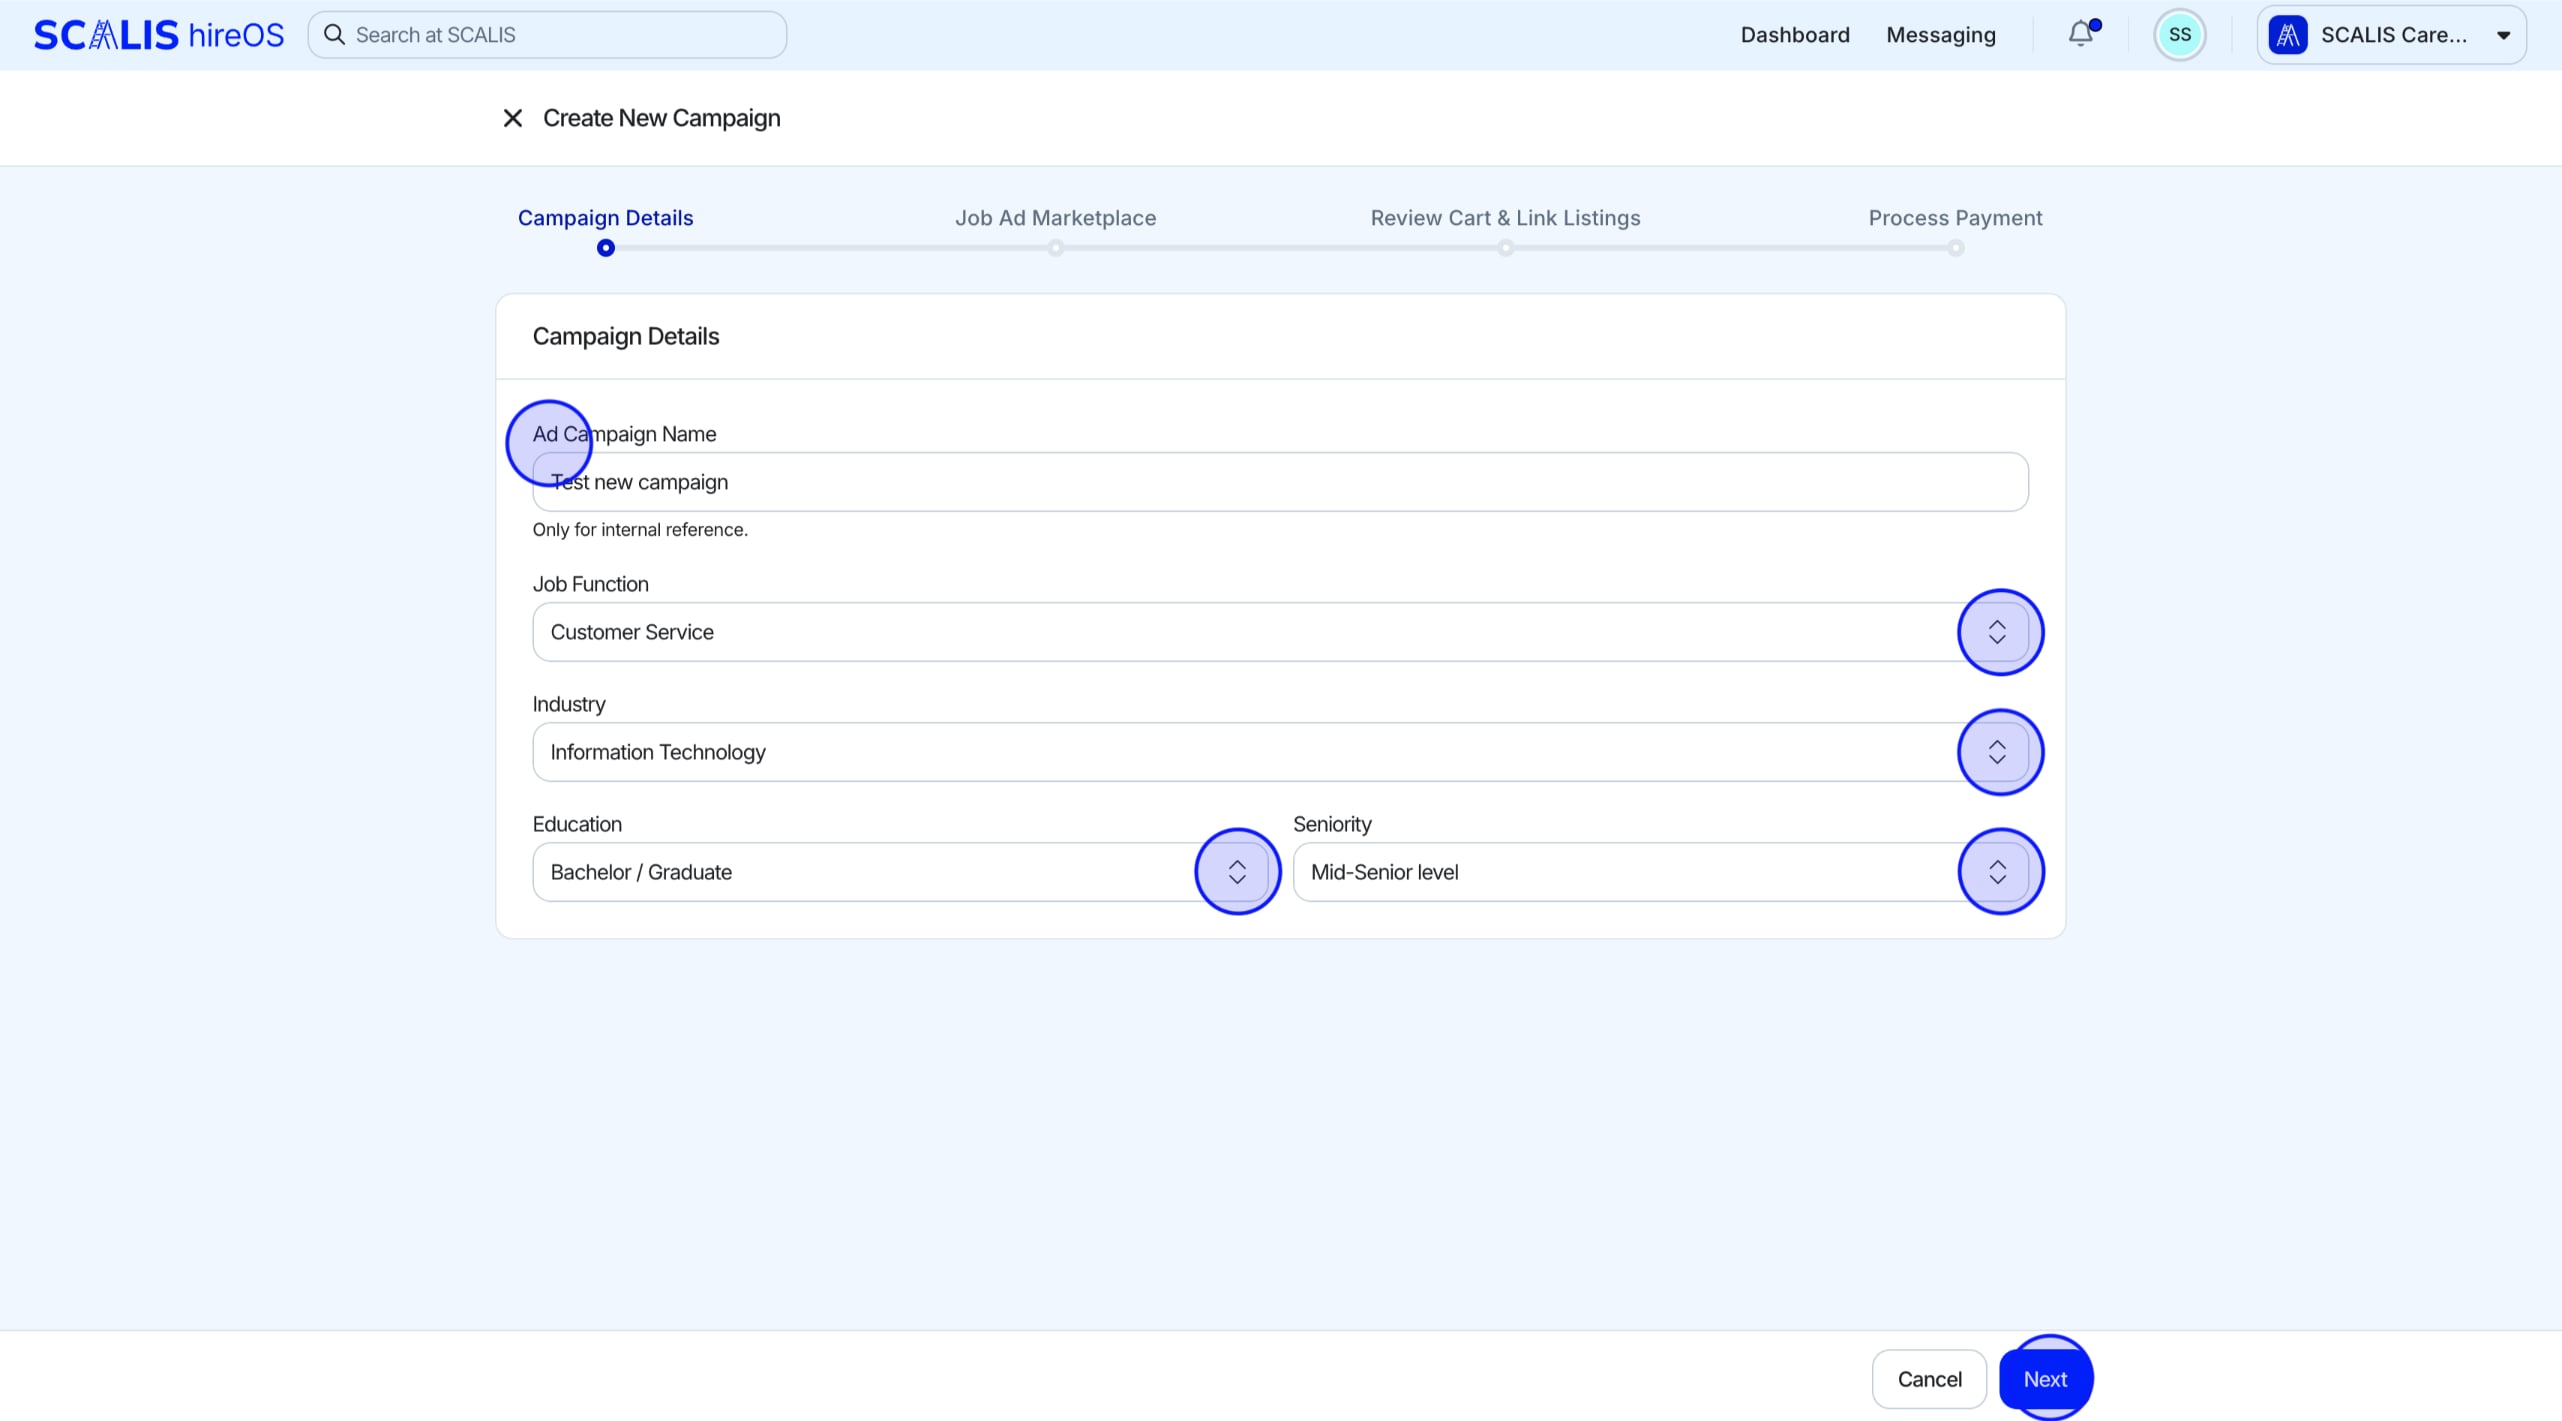
Create Your First Campaign
This opens the Campaign Details page. Name your campaign and add any additional details.
Once you've entered your details, click Next.
💡 Note: The more detail you add, the easier it'll be to find the right job ads.
3
Step 3
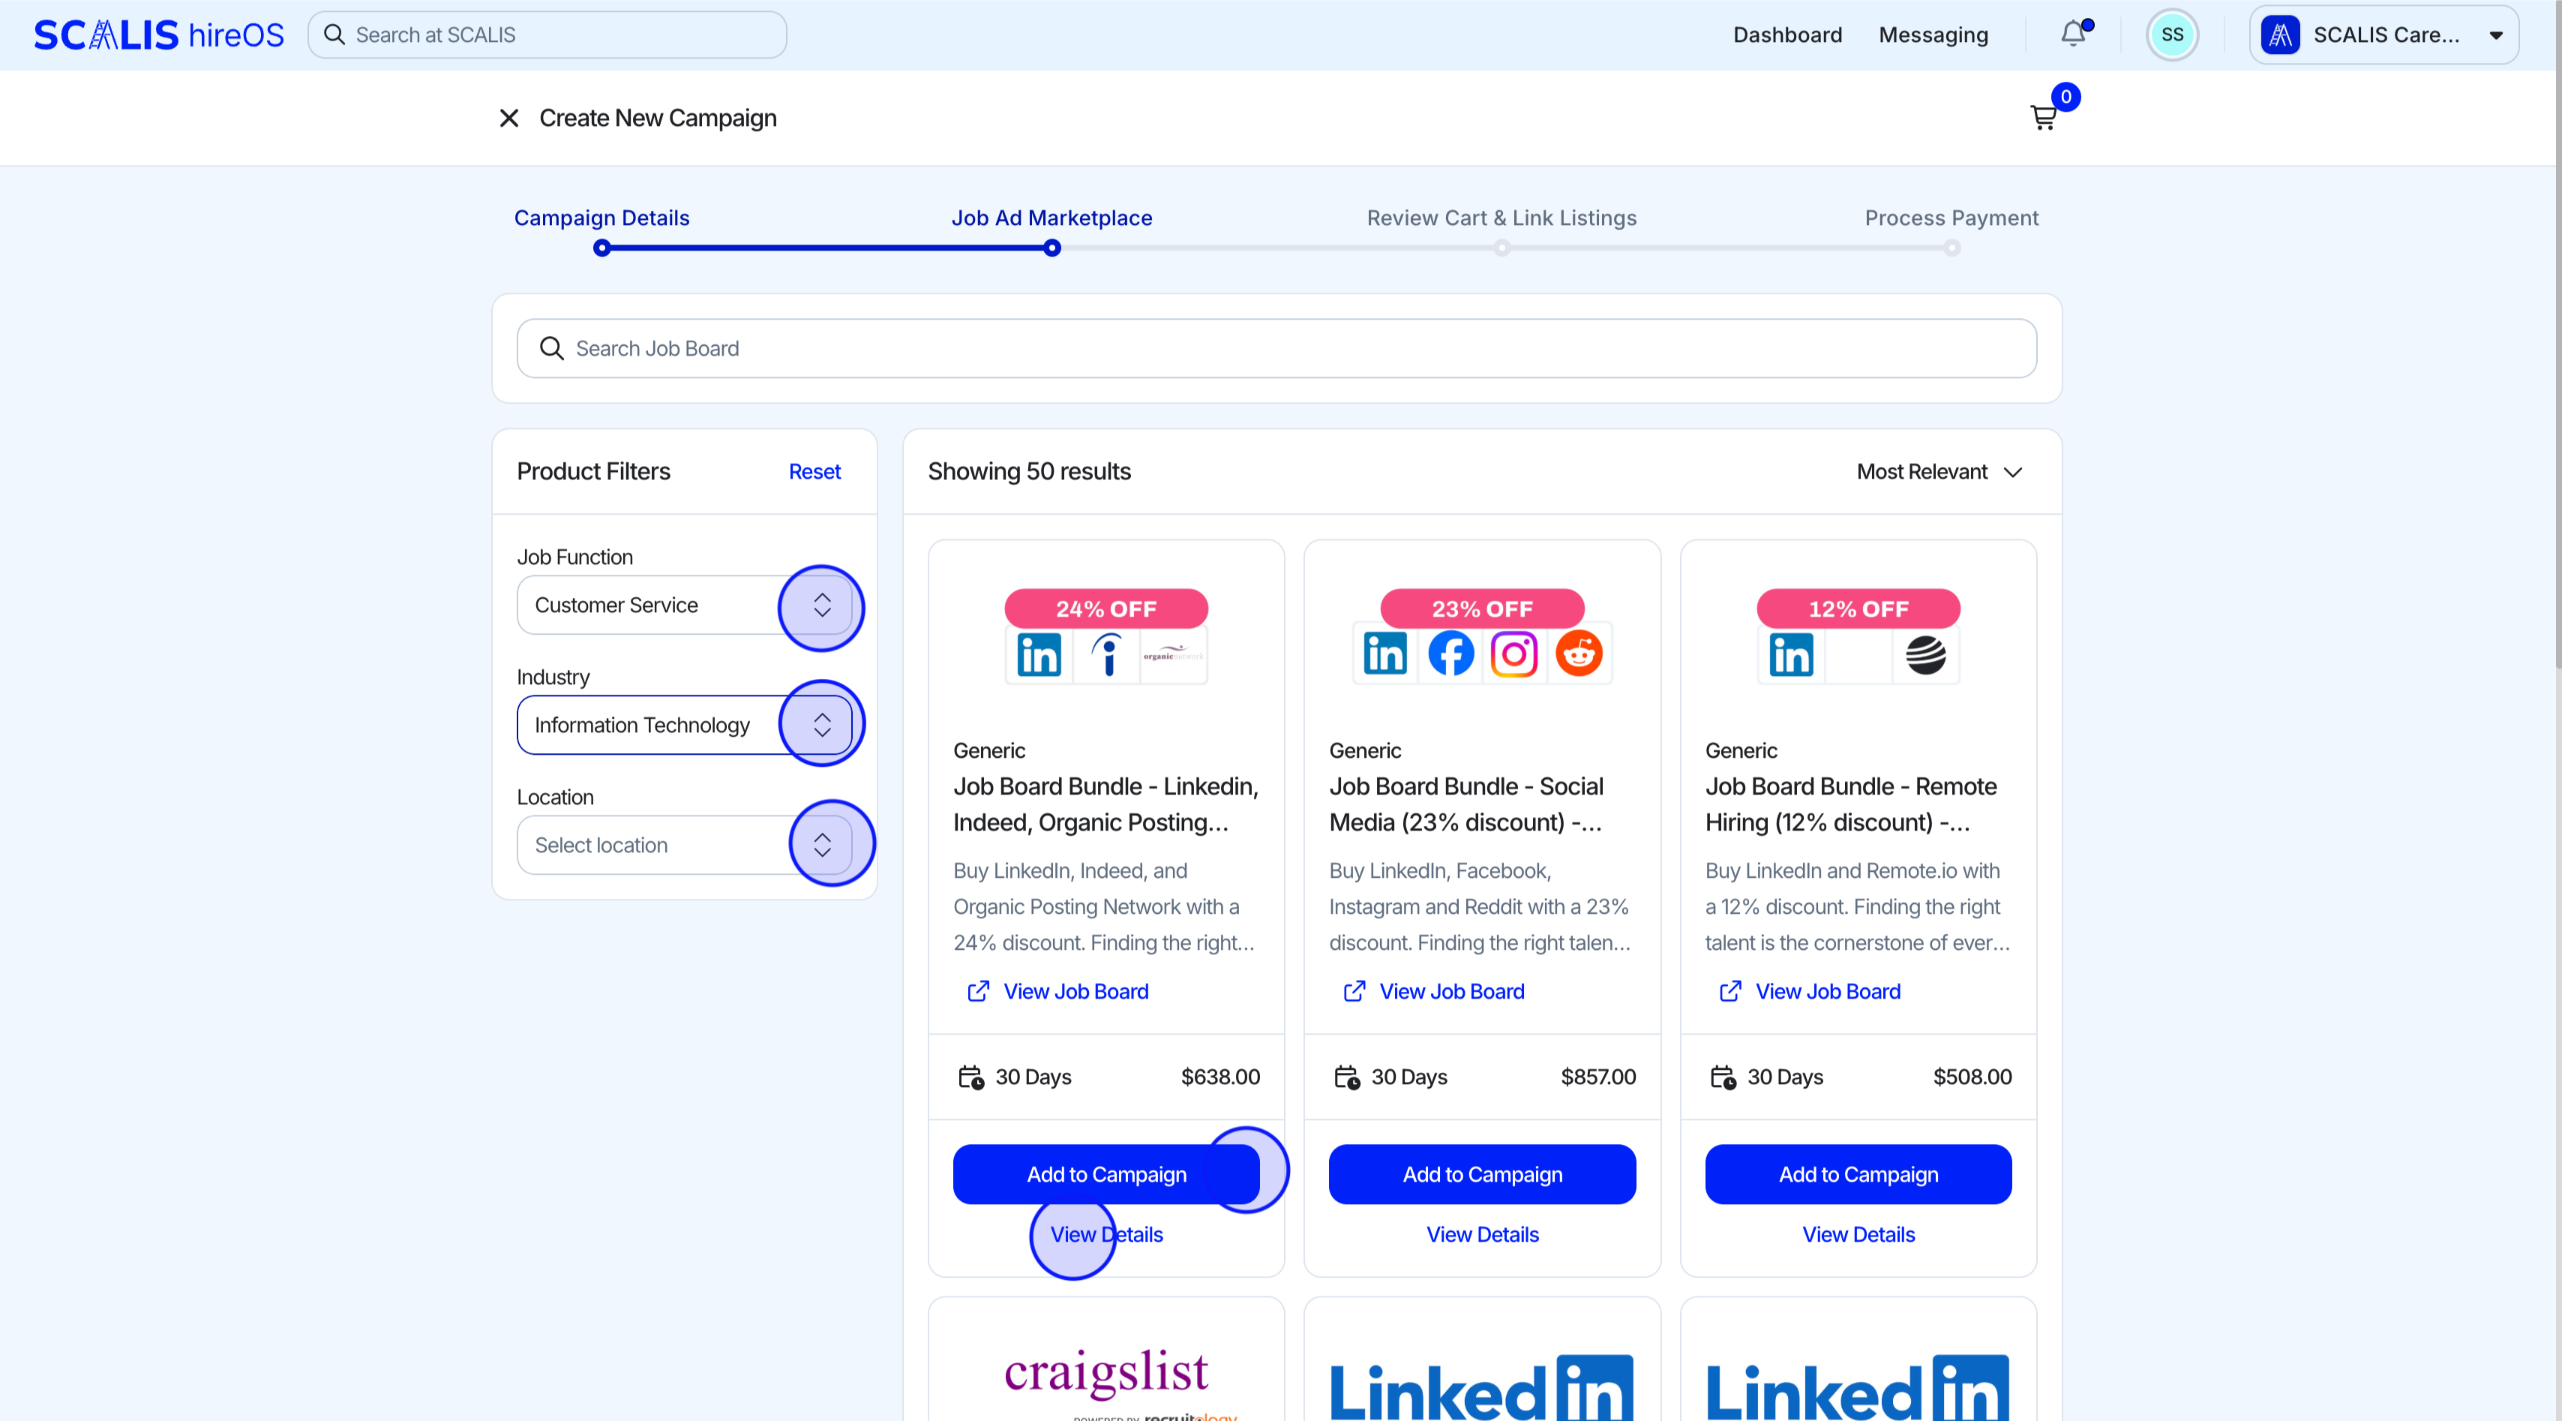
Explore Job Ad Products
After adding your campaign details, browse the available job ad products.
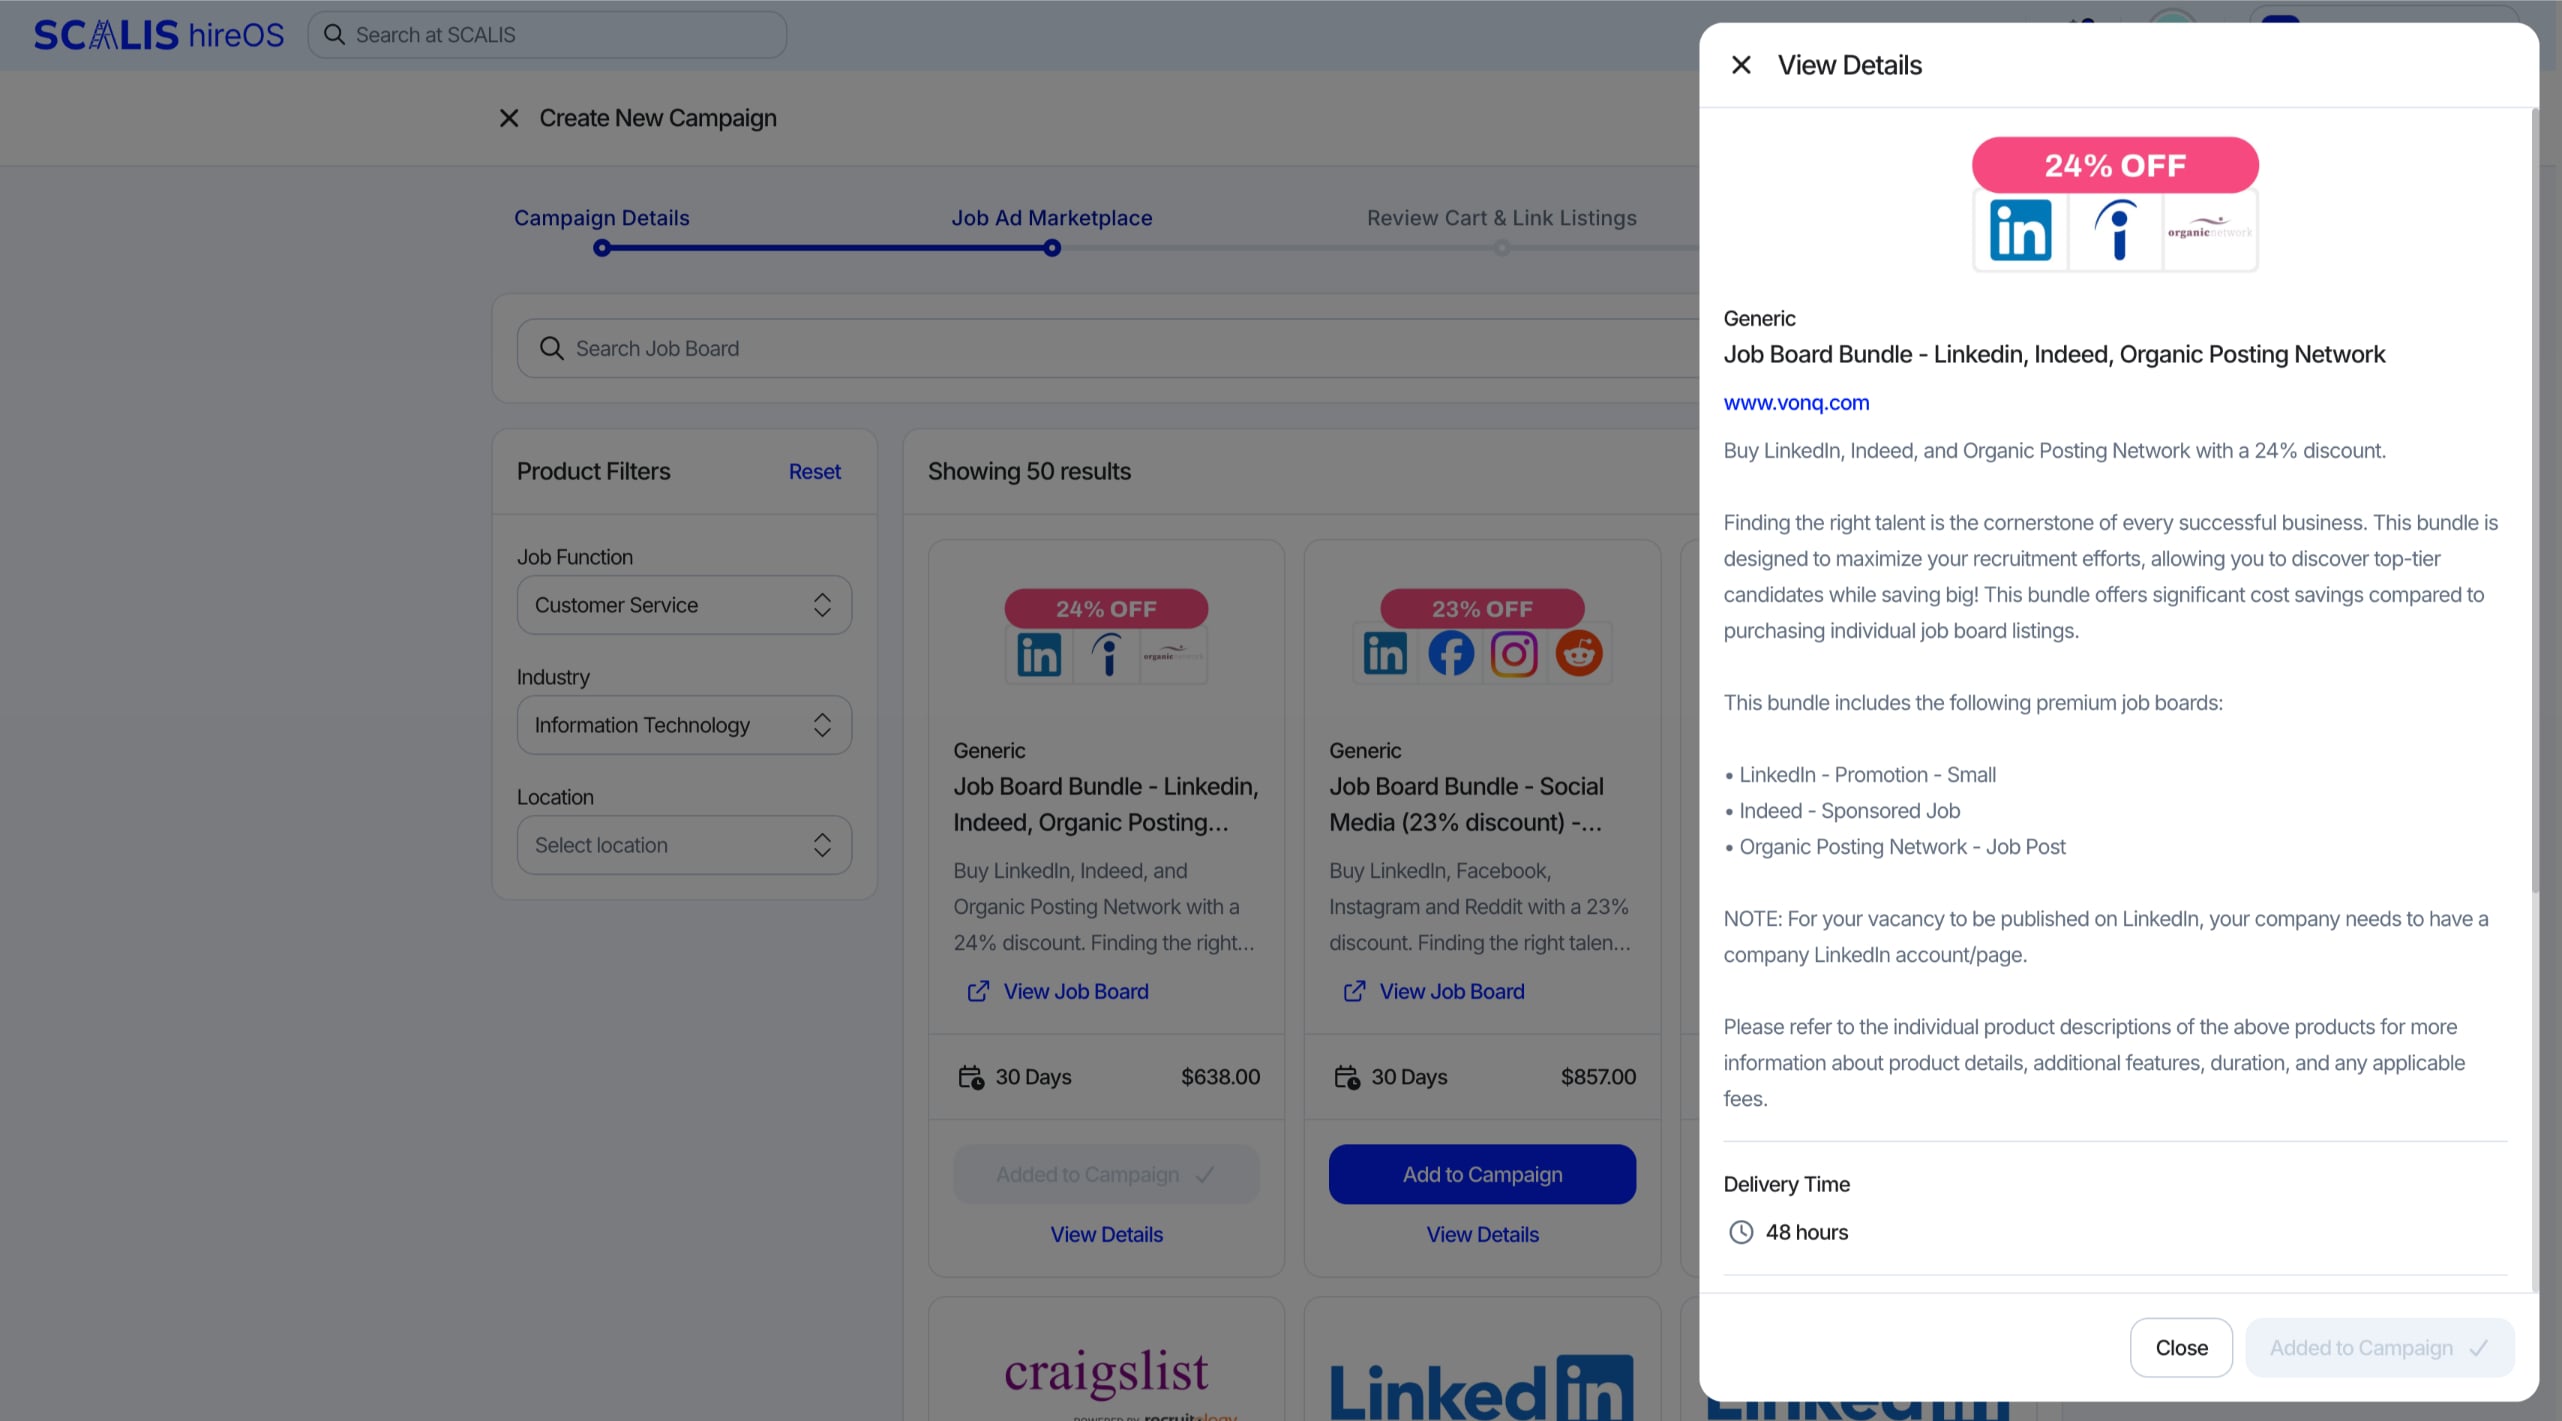
Use filters like job title, function, and location to narrow your options. Click View Details for an in-depth look at any product.
Add products to your cart from the details drawer or directly from the marketplace page with Add to Campaign.
4
Step 4
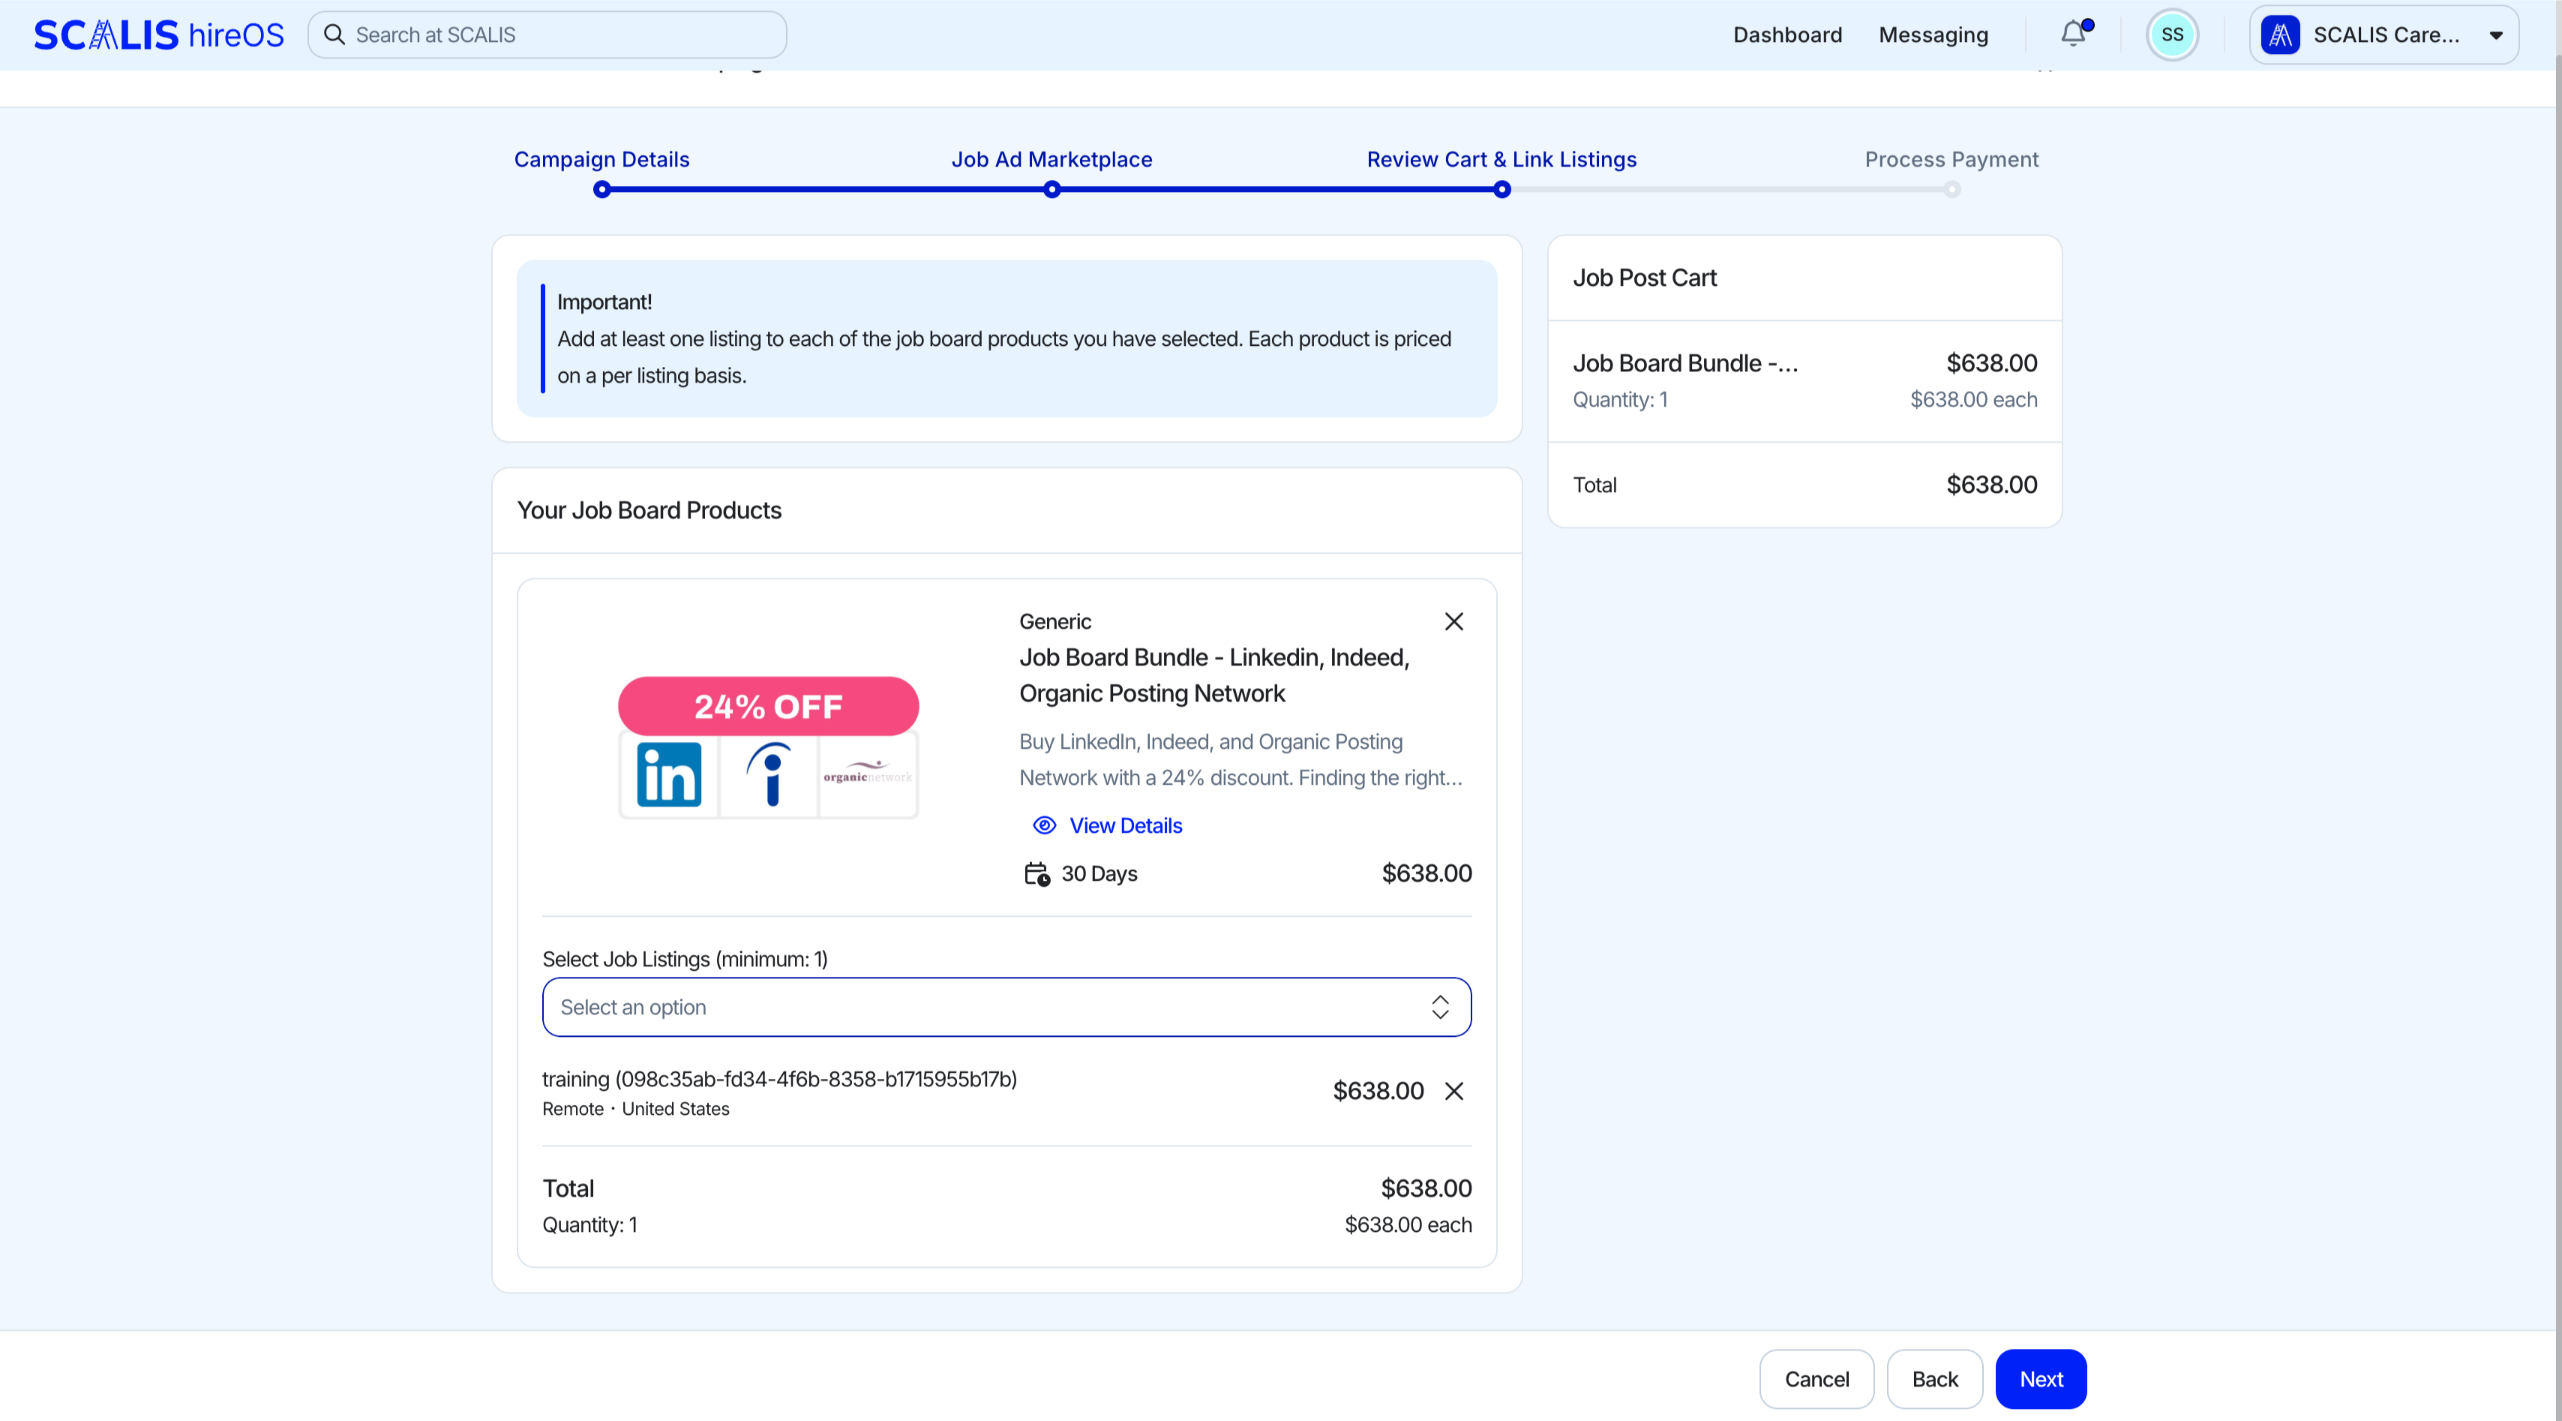
Review Your Shopping Cart
Check your selected job ads in the cart. Add specific listings using the Select Job Listings dropdown.
Remove products or listings by clicking the X to keep your cart just right.
Costs update automatically as you make changes, so you'll always know what you're paying for.
⚠️ Warning: Each listing counts as one product. If you connect two listings to a job ad at $100 each, the total cost is $200.
5
Step 5
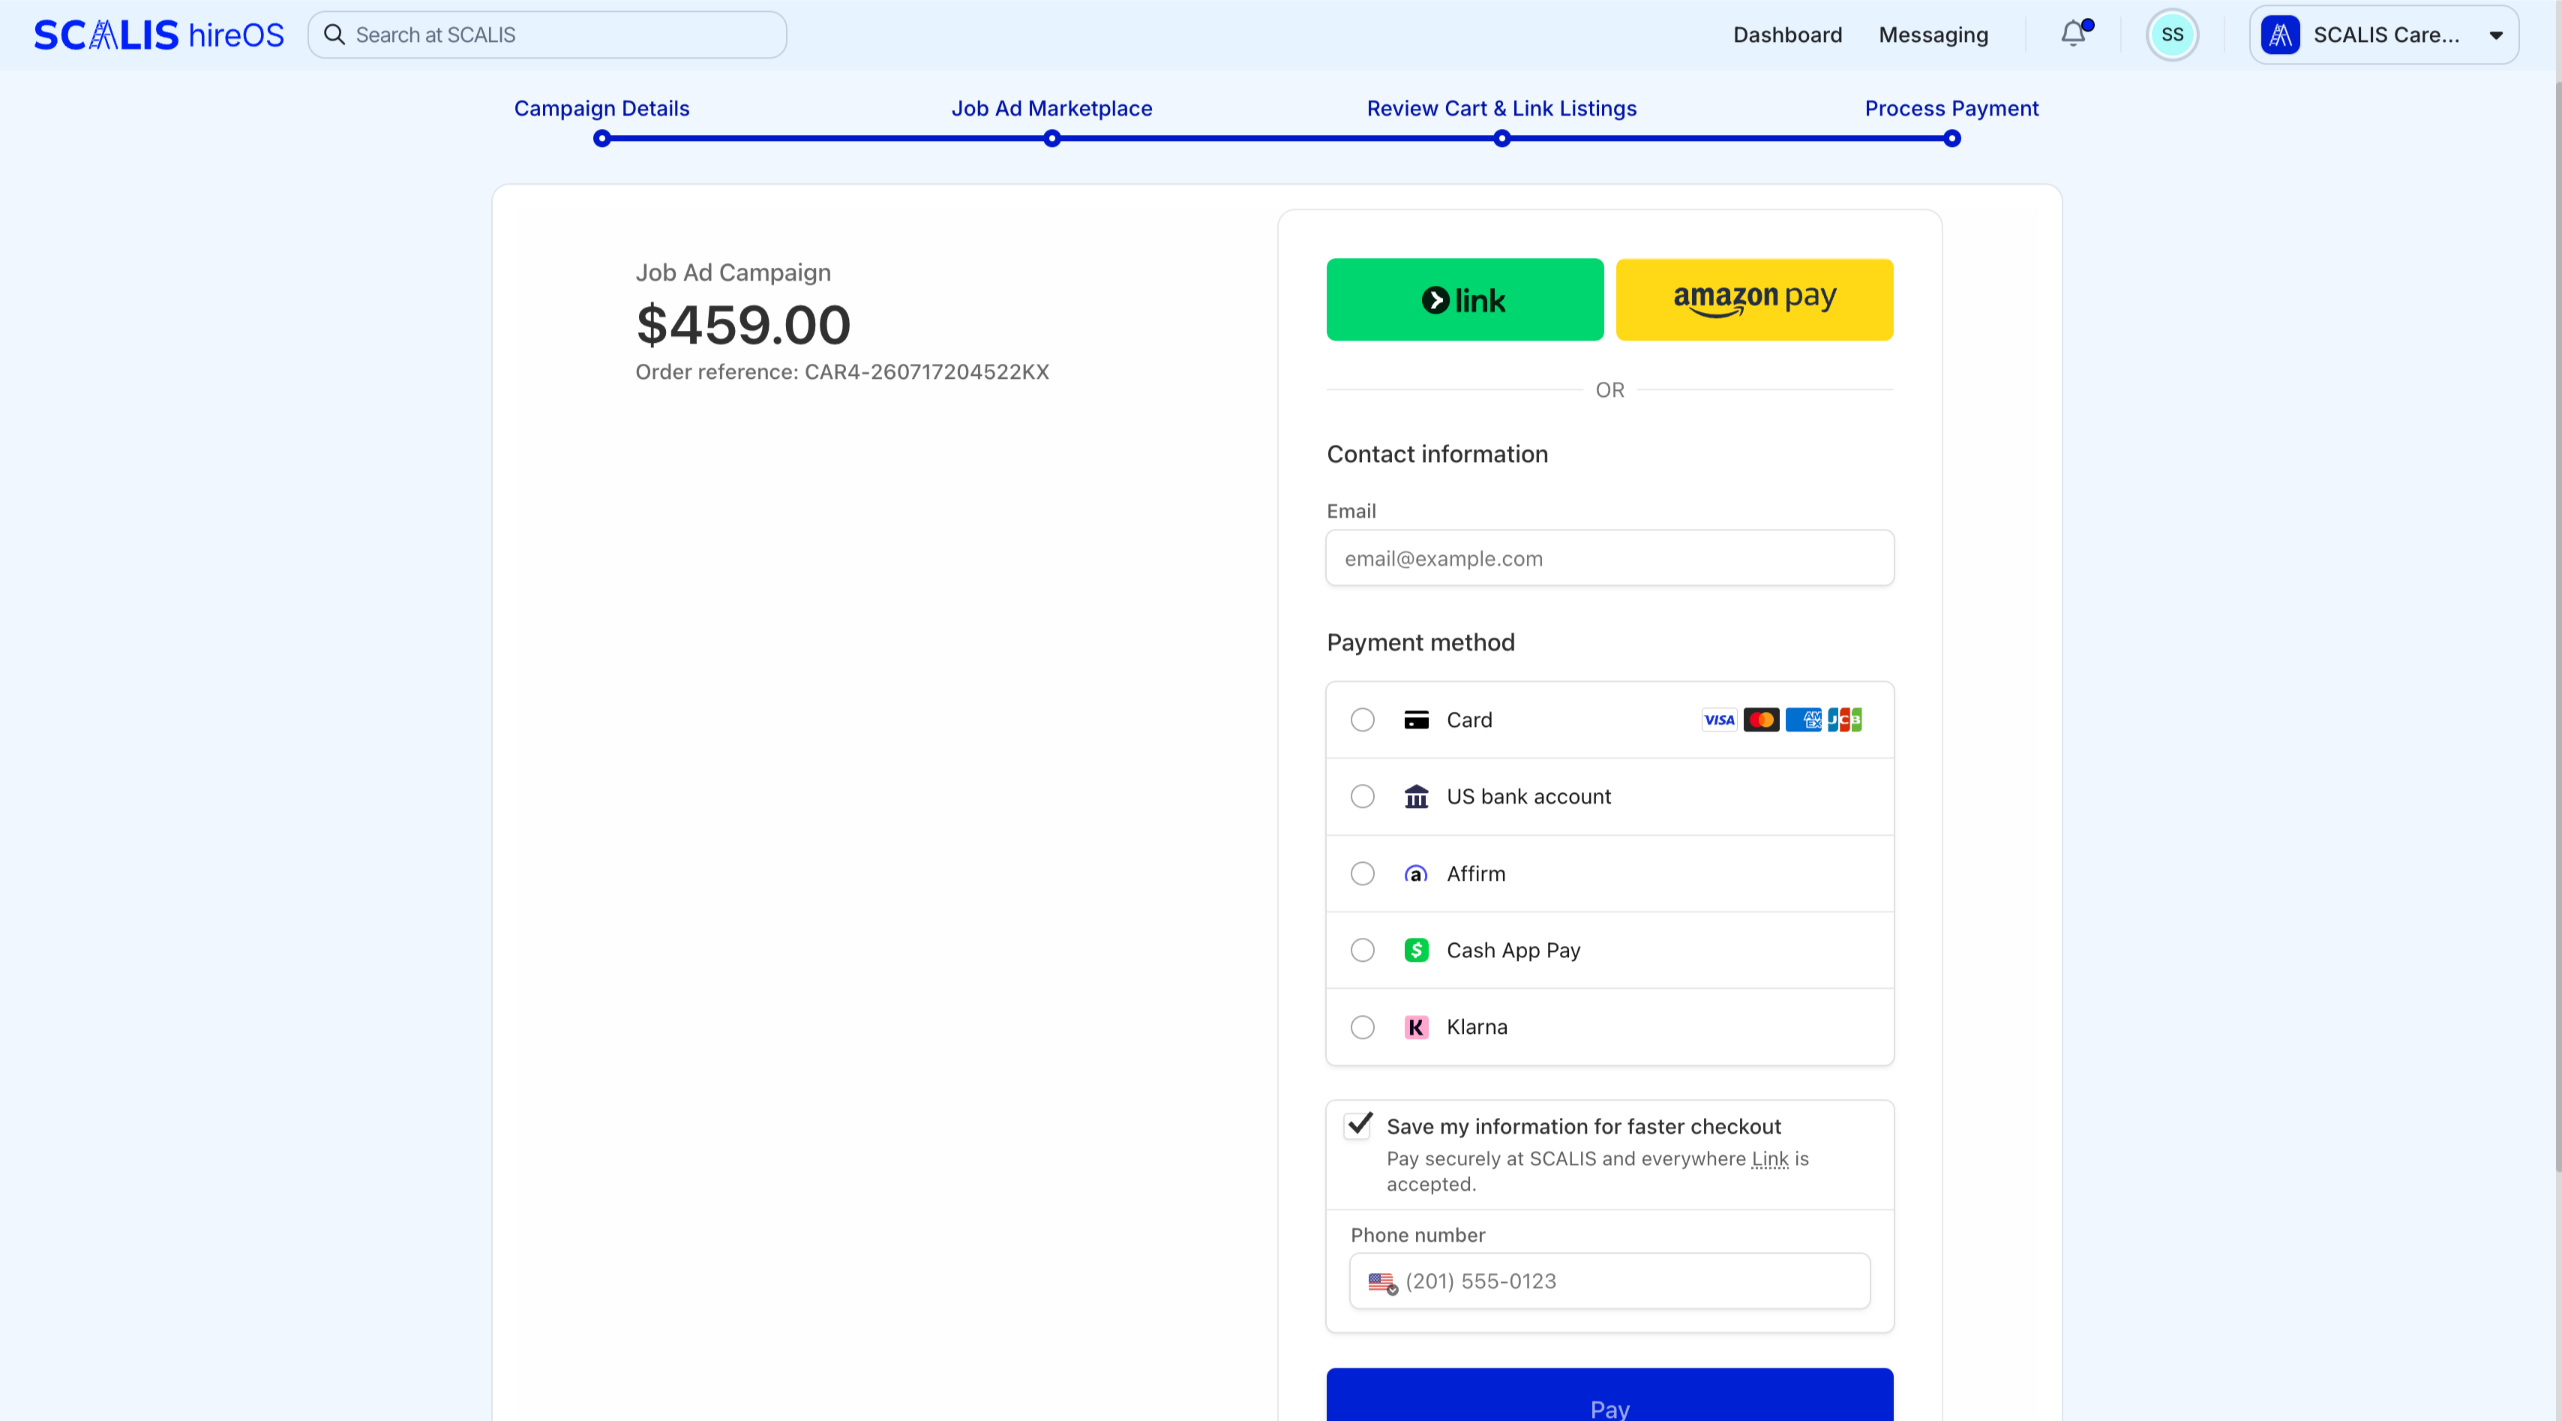
Complete Your Purchase
Head to the Billing Details page via Stripe for a seamless payment process. Once done, click Complete Purchase to wrap it up.
Your campaign is now live, and you'll receive an invoice in your inbox and workspace.
💡 Note: Please allow up to 3 business days for your job ad to show on the third-party board. You won't be charged until the job ad is live.
✓
Final Step
Manage Your Campaigns
Active campaigns: access related actions, like copying or canceling, via the ellipses dropdown.
Expired campaigns: you can still view details or copy the campaign to start anew.
Copy Campaign: pre-fills all fields from the original. Just tweak if needed, and you're ready to go.
View Campaign Details: access the details via the ellipses dropdown to see the effectiveness of your job campaign.

That's the Job Ad Marketplace! Reach out to your CSM any time you need a hand getting your jobs in front of more candidates.