.png?width=1391&height=437&name=SCALIS%20Logo%20(1).png)
GETTING STARTED
Configure your custom rejection reasons and set up One-Click Rejection so your team can reject candidates quickly and consistently.
5 steps3 min read
Setting Up Custom Rejection Reasons
1
Step 1
Navigate to Rejection Reasons
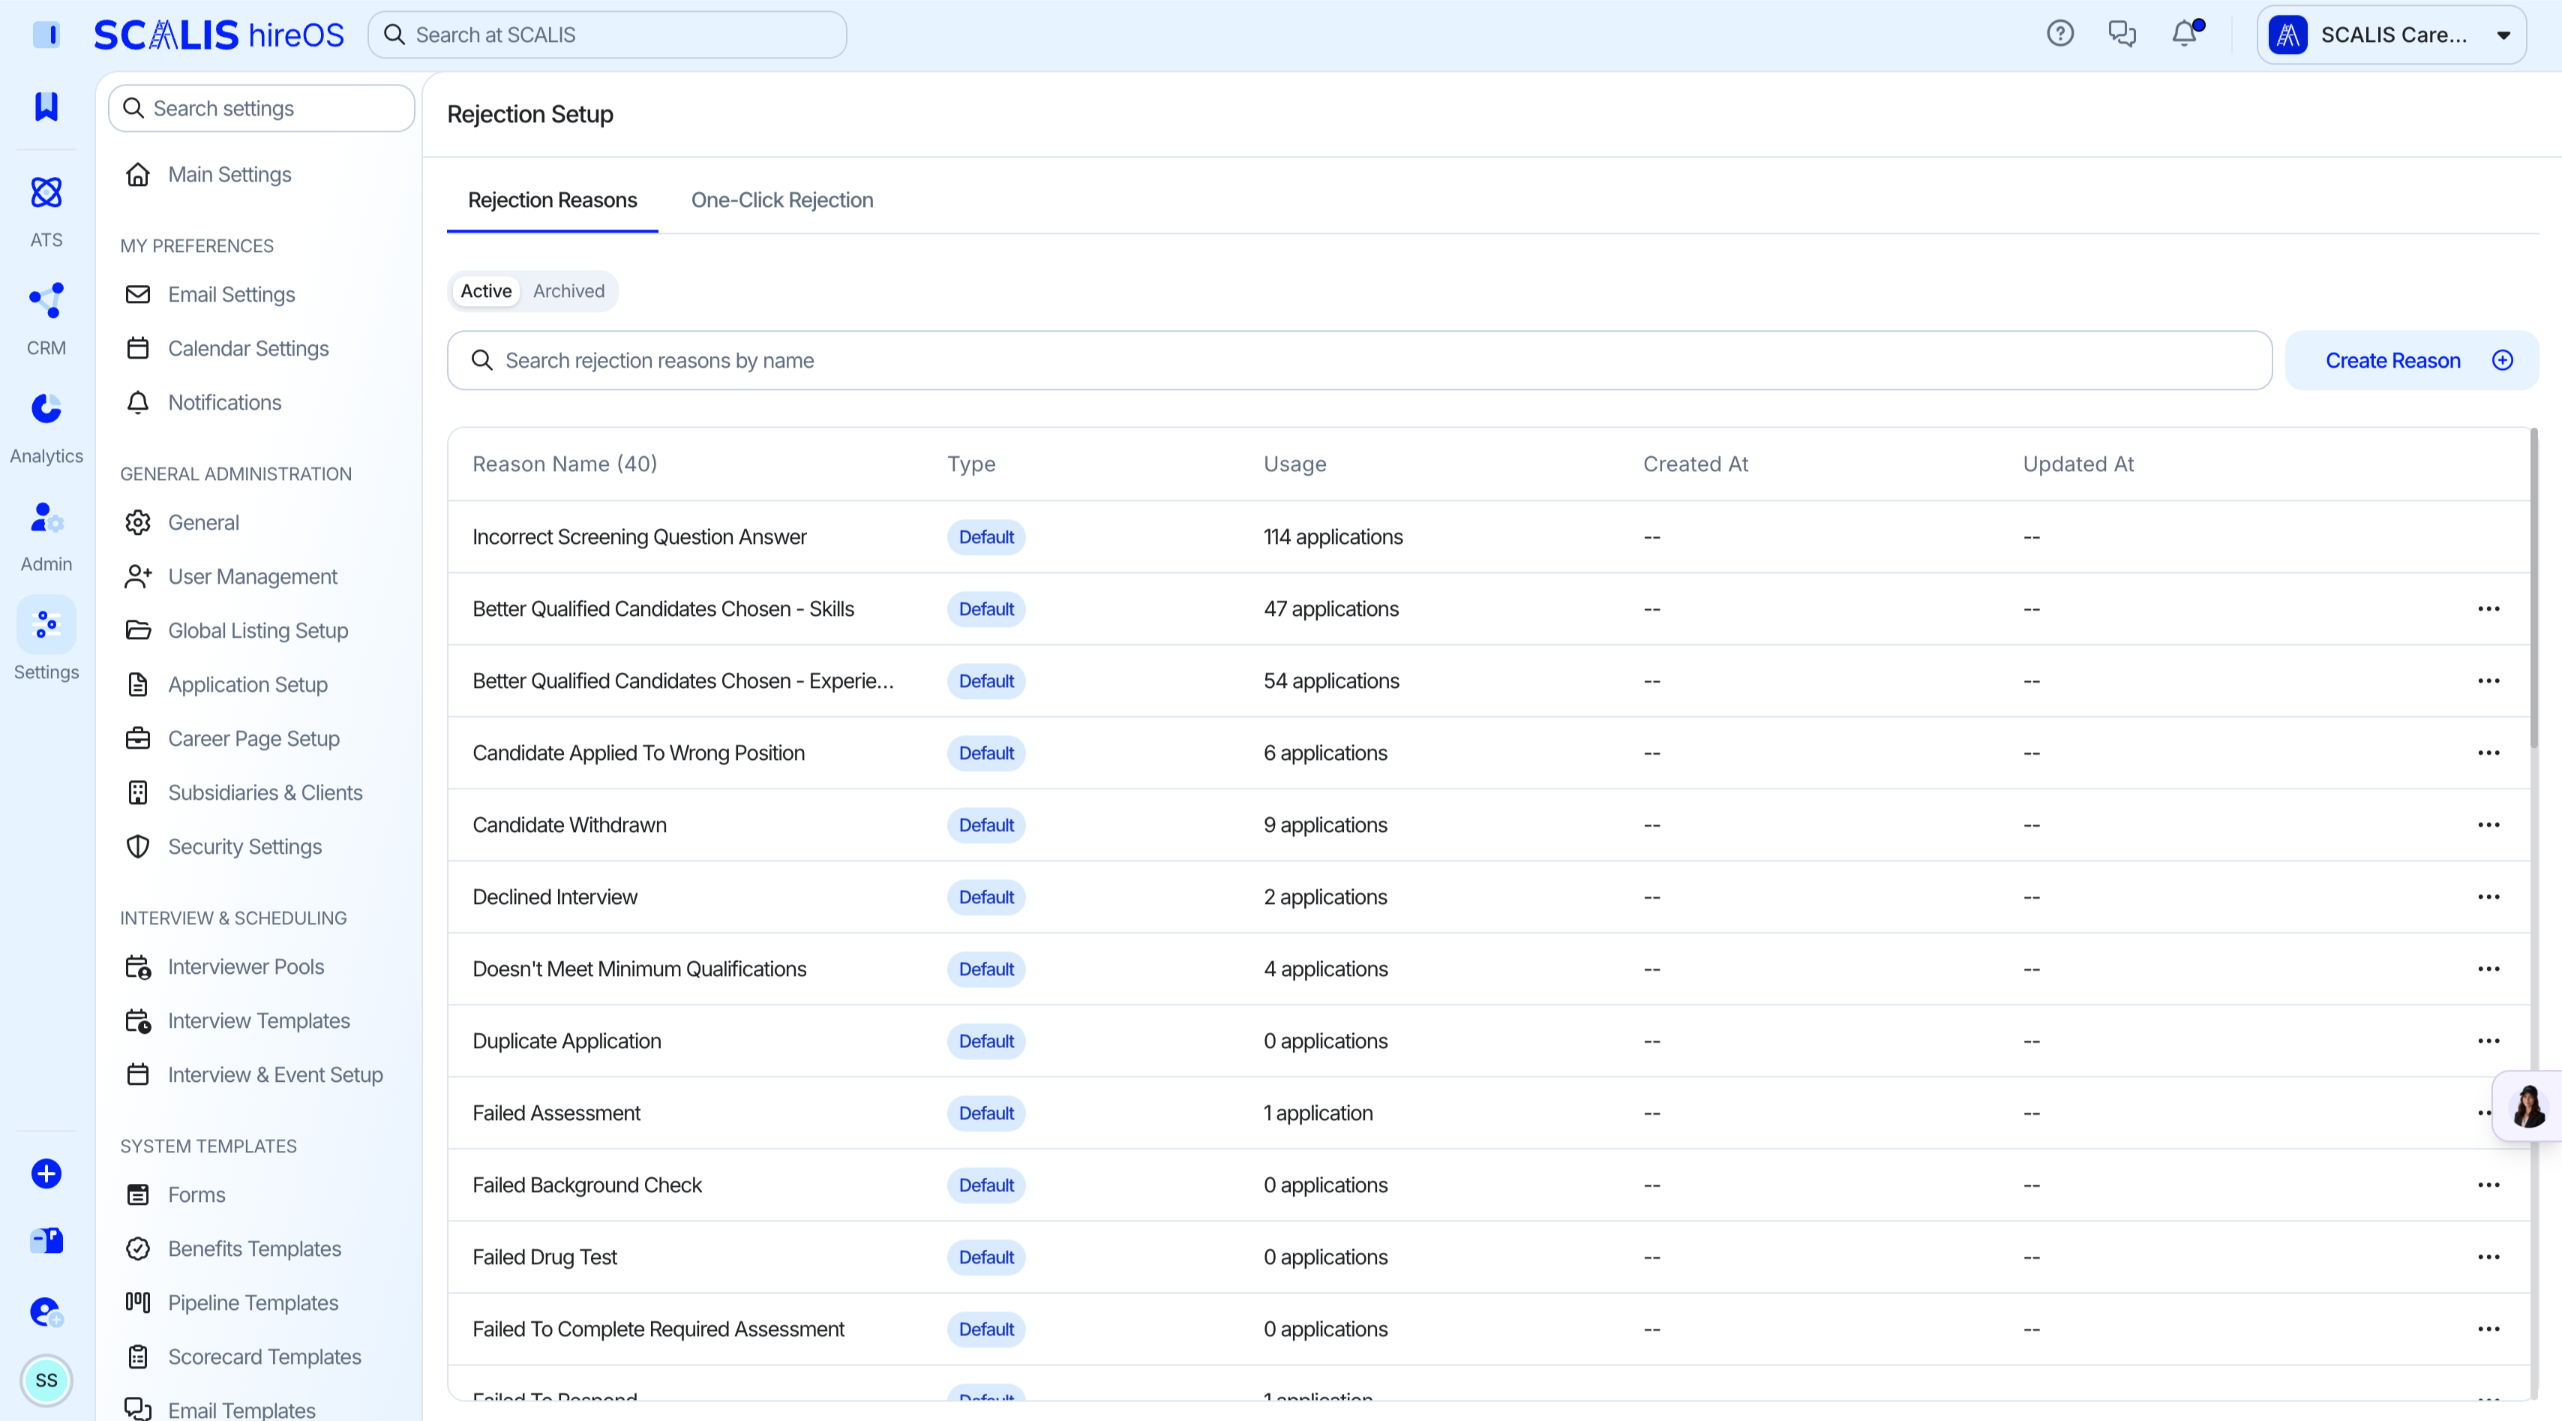
SCALIS provides default rejection reasons, but you can add your own custom reasons for you and your team. This helps you track how your team evaluates candidates and pull analytics on rejection trends.
Click Settings, then go to Rejections, then Rejection Reasons.
Click Create.
2
Step 2
Add and Save the Rejection Reason
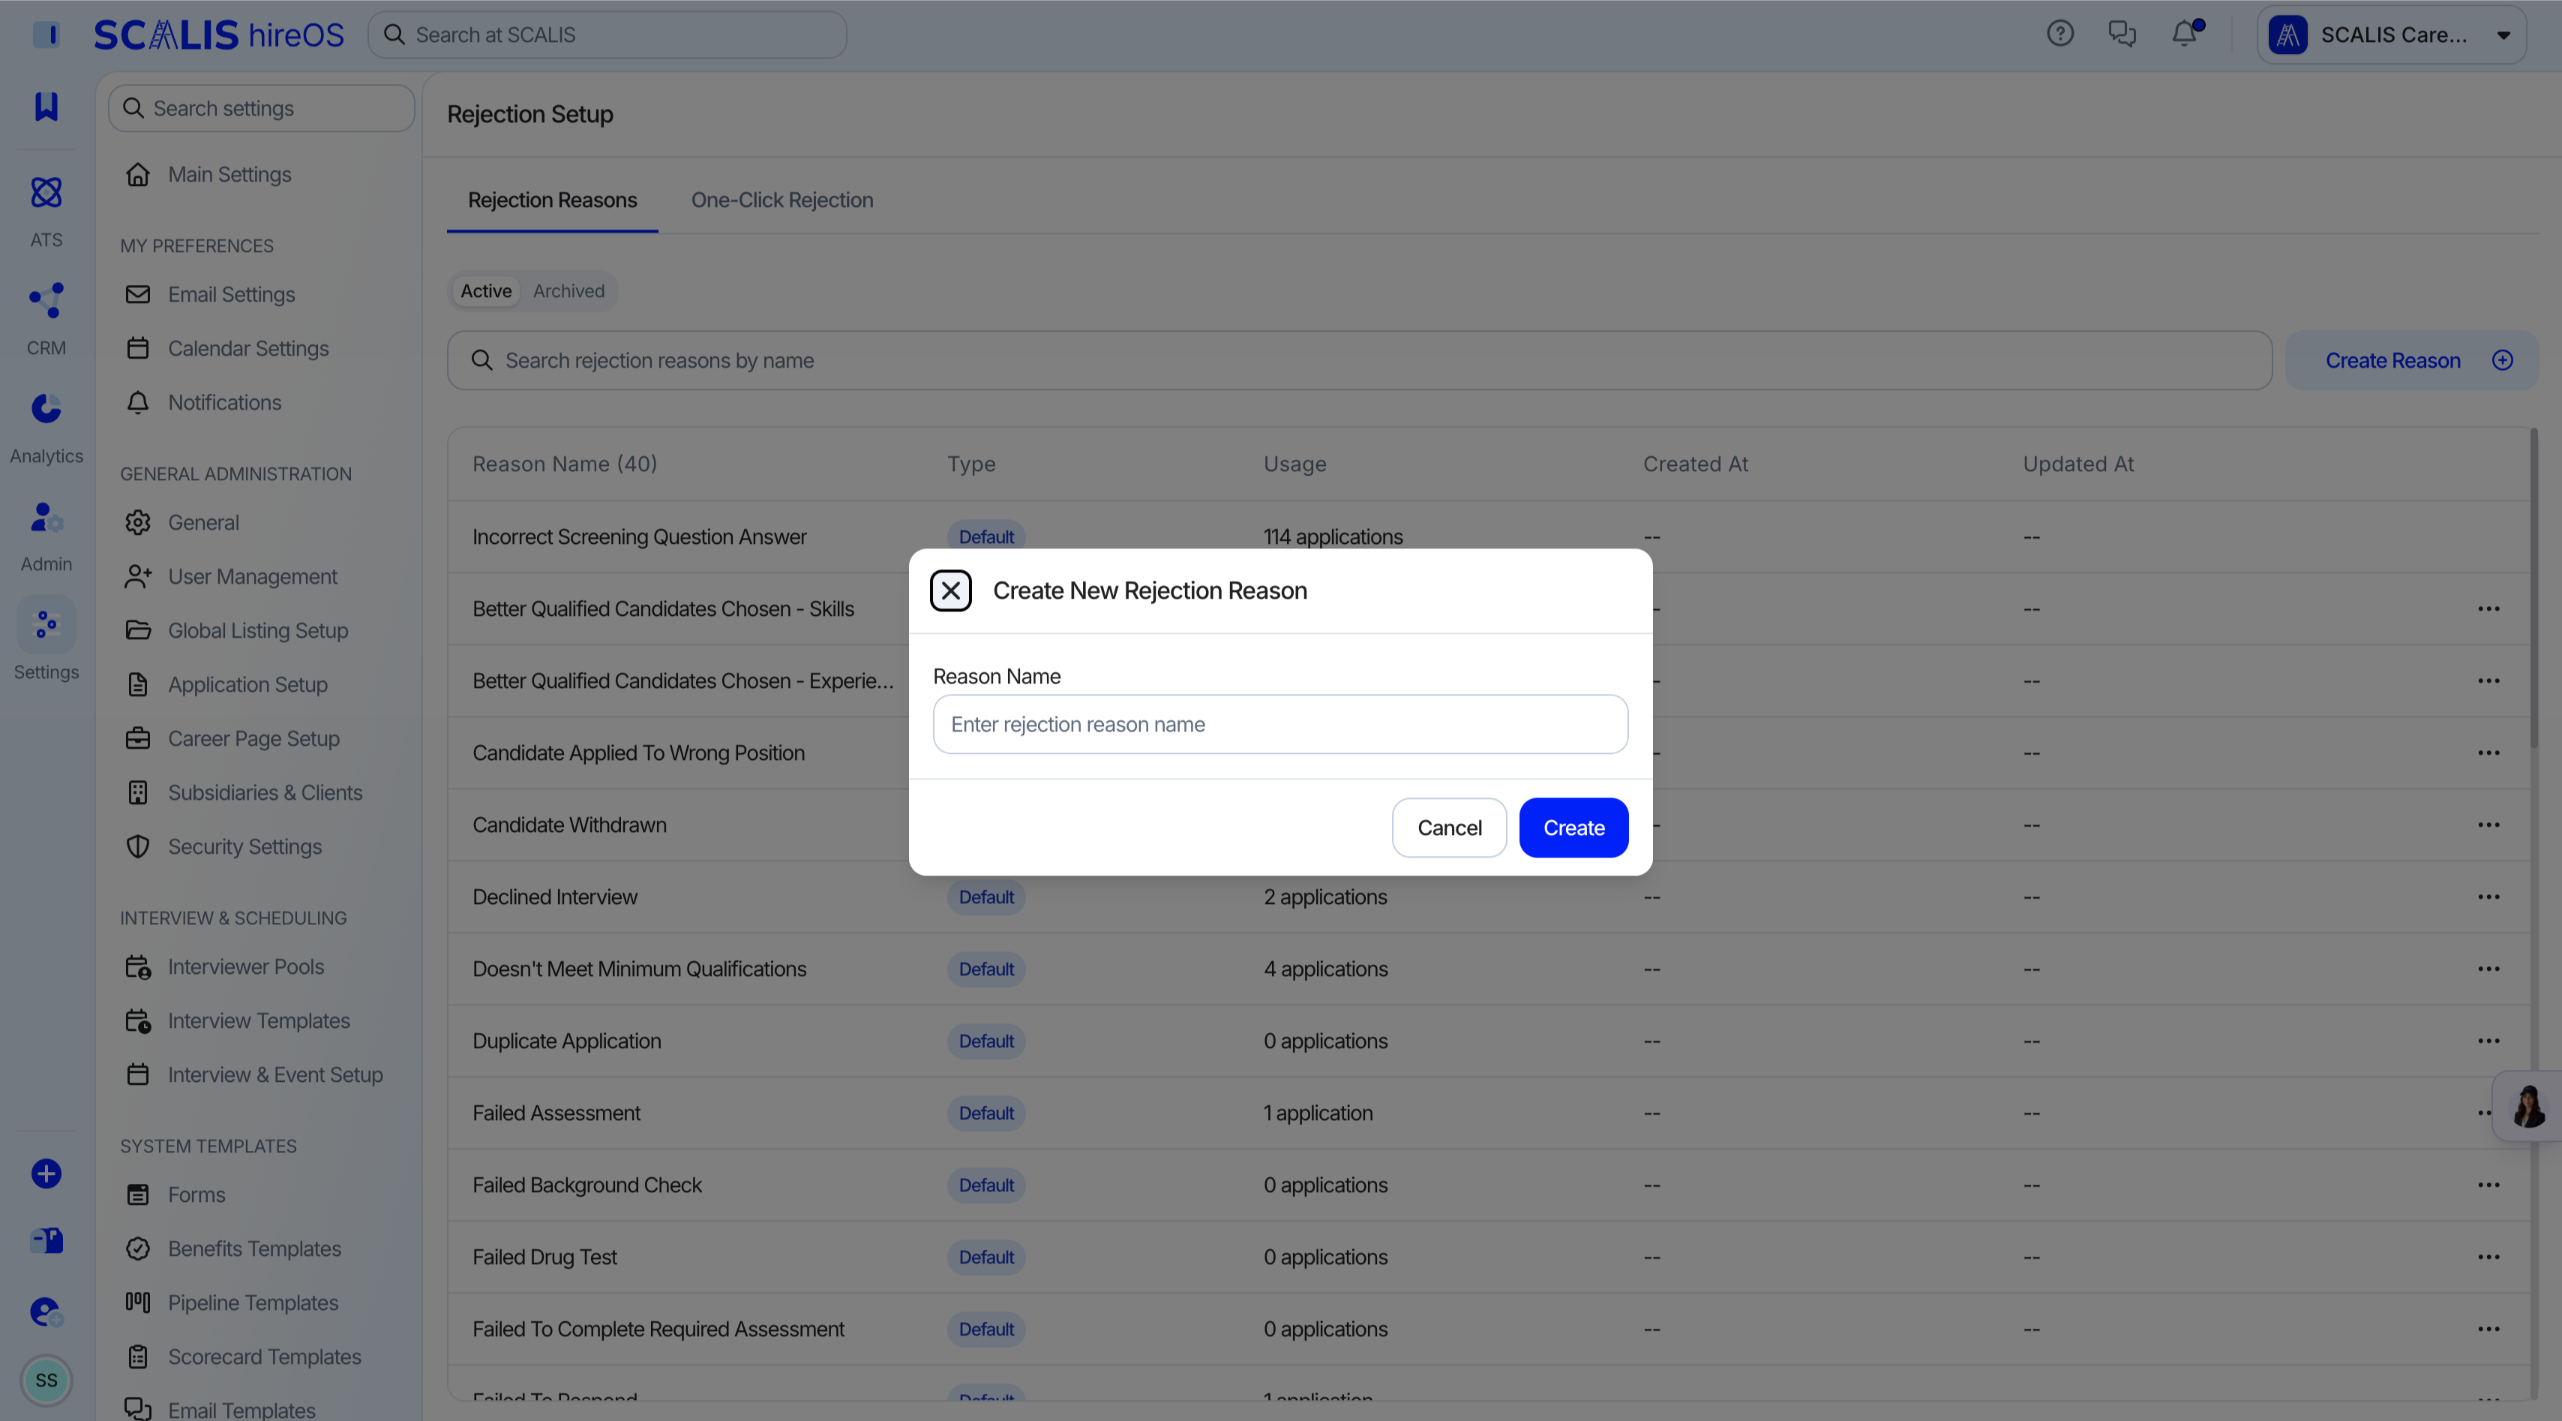
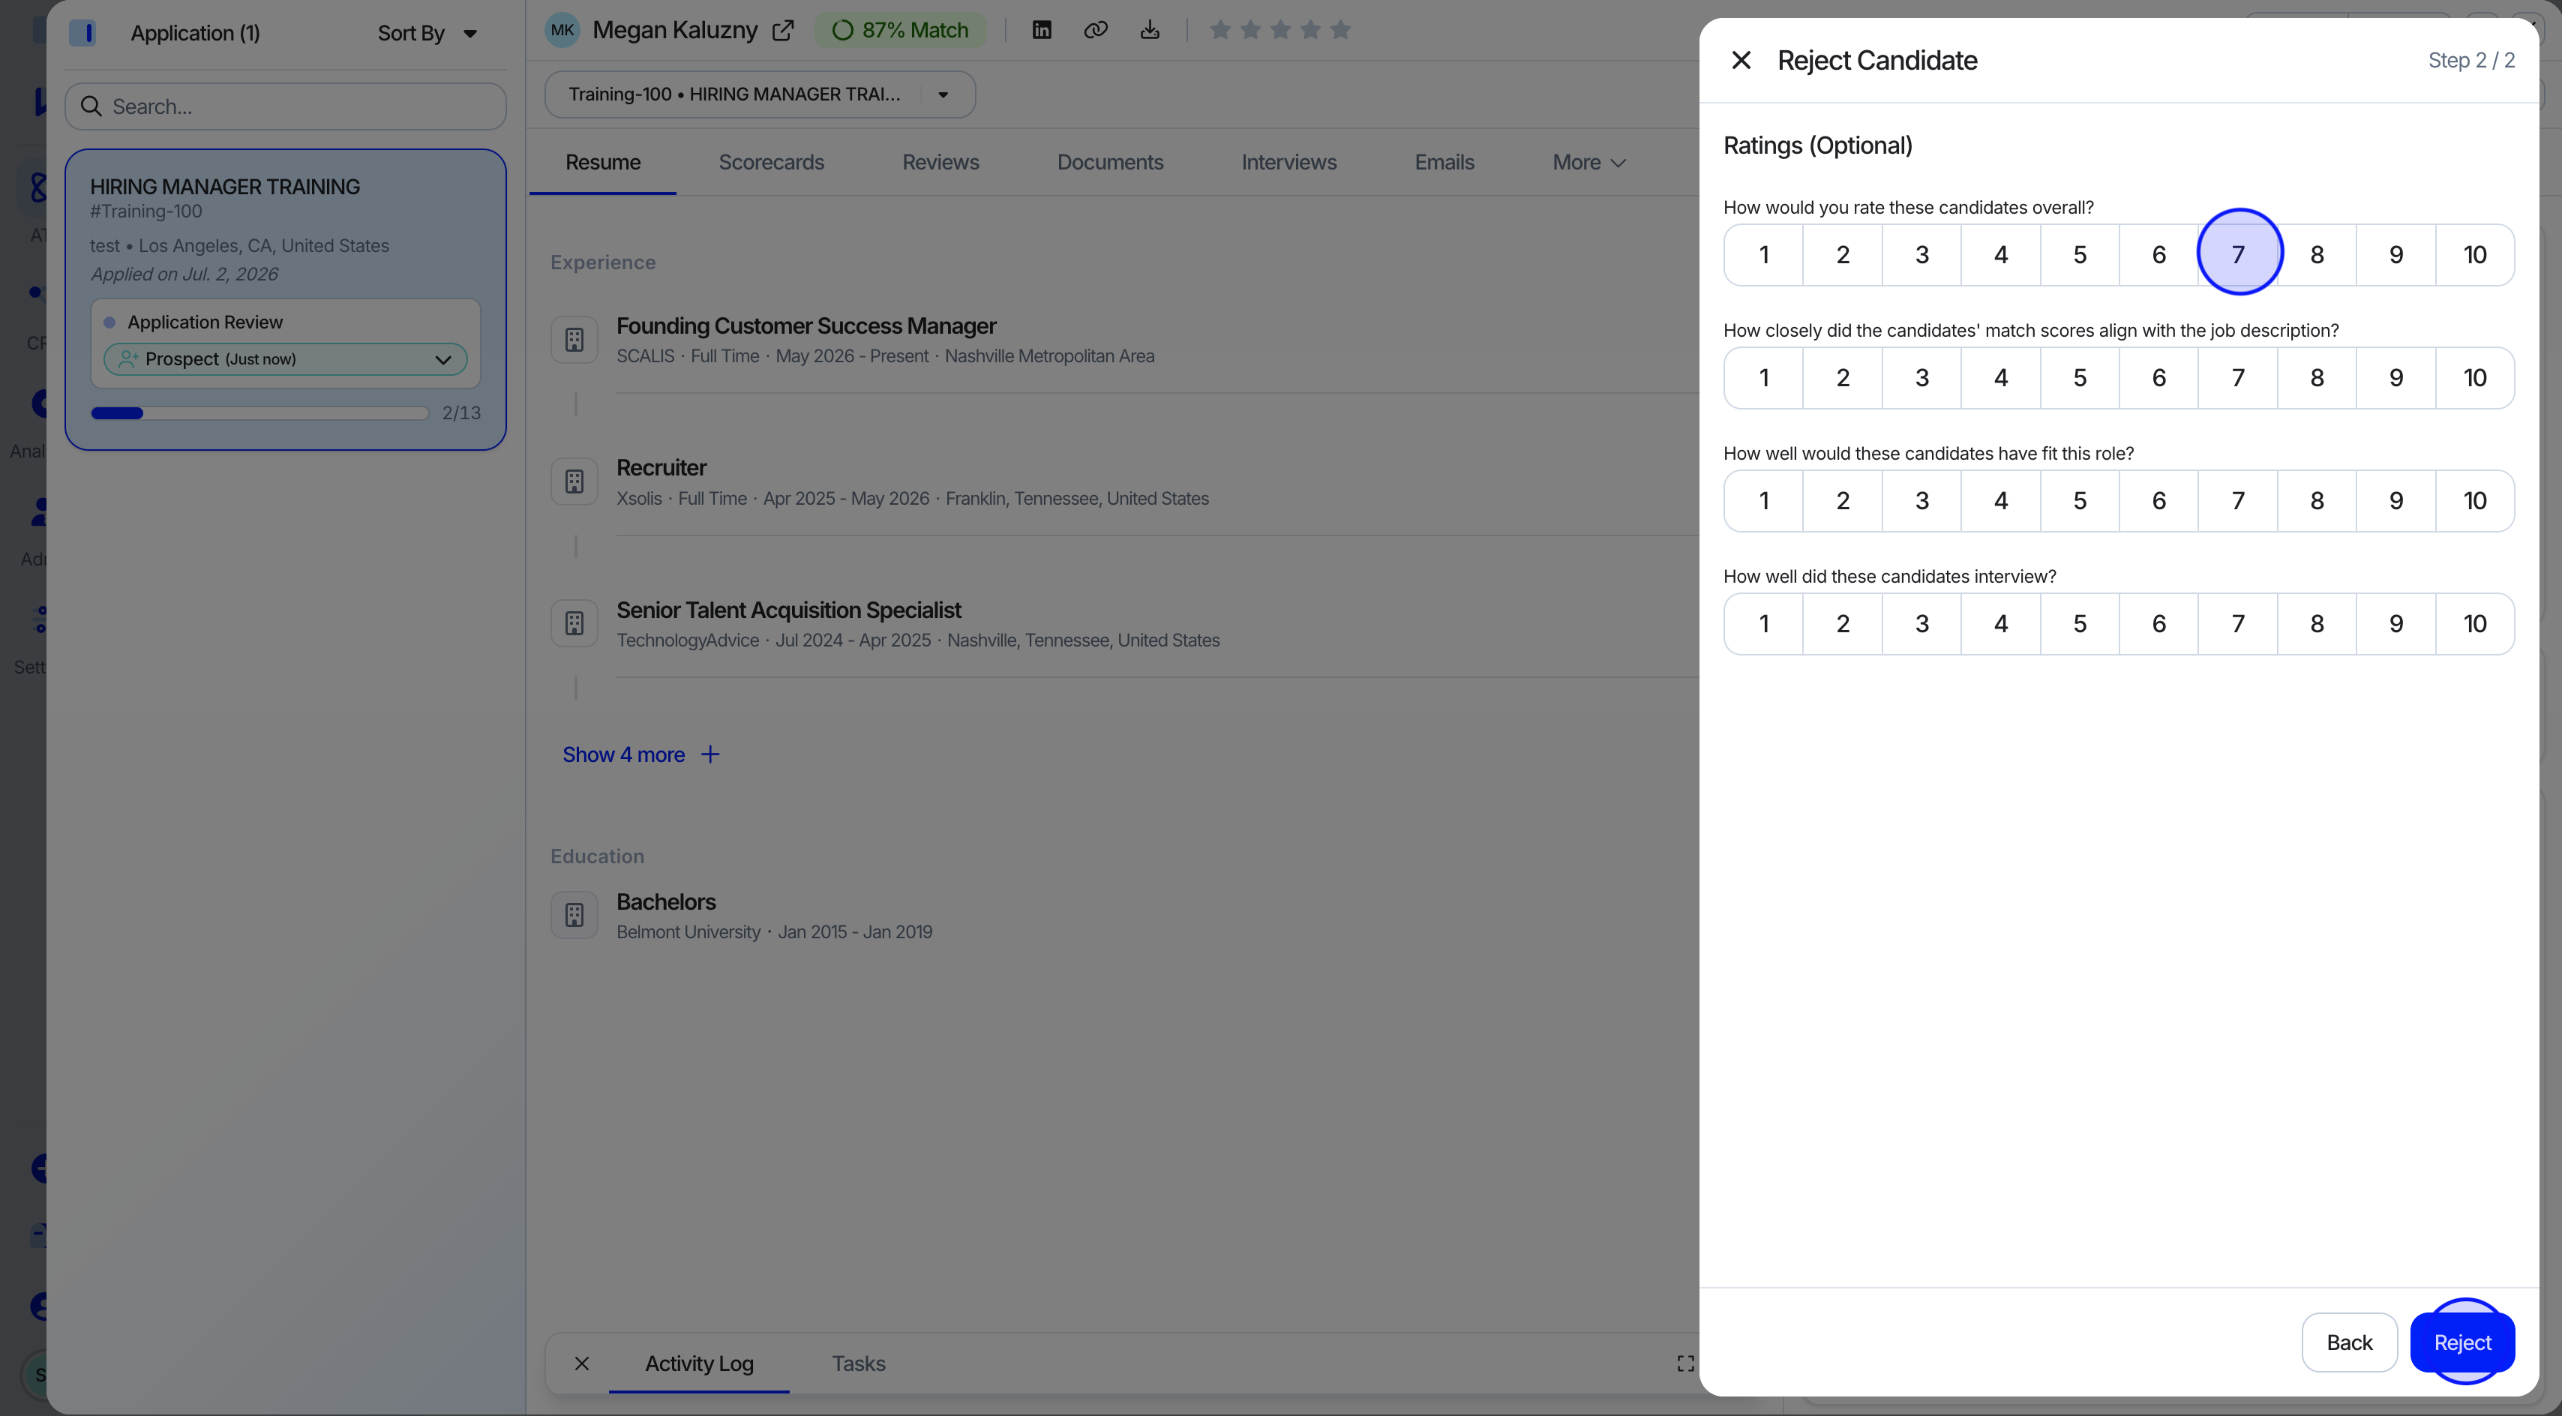
Enter your new rejection reason, then click Save.
💡 Note: Once a rejection reason is created, it will appear as a custom option under Custom Rejection when rejecting a candidate.
Setting Up One-Click Rejection
1
Step 1
Open One-Click Rejection Setup
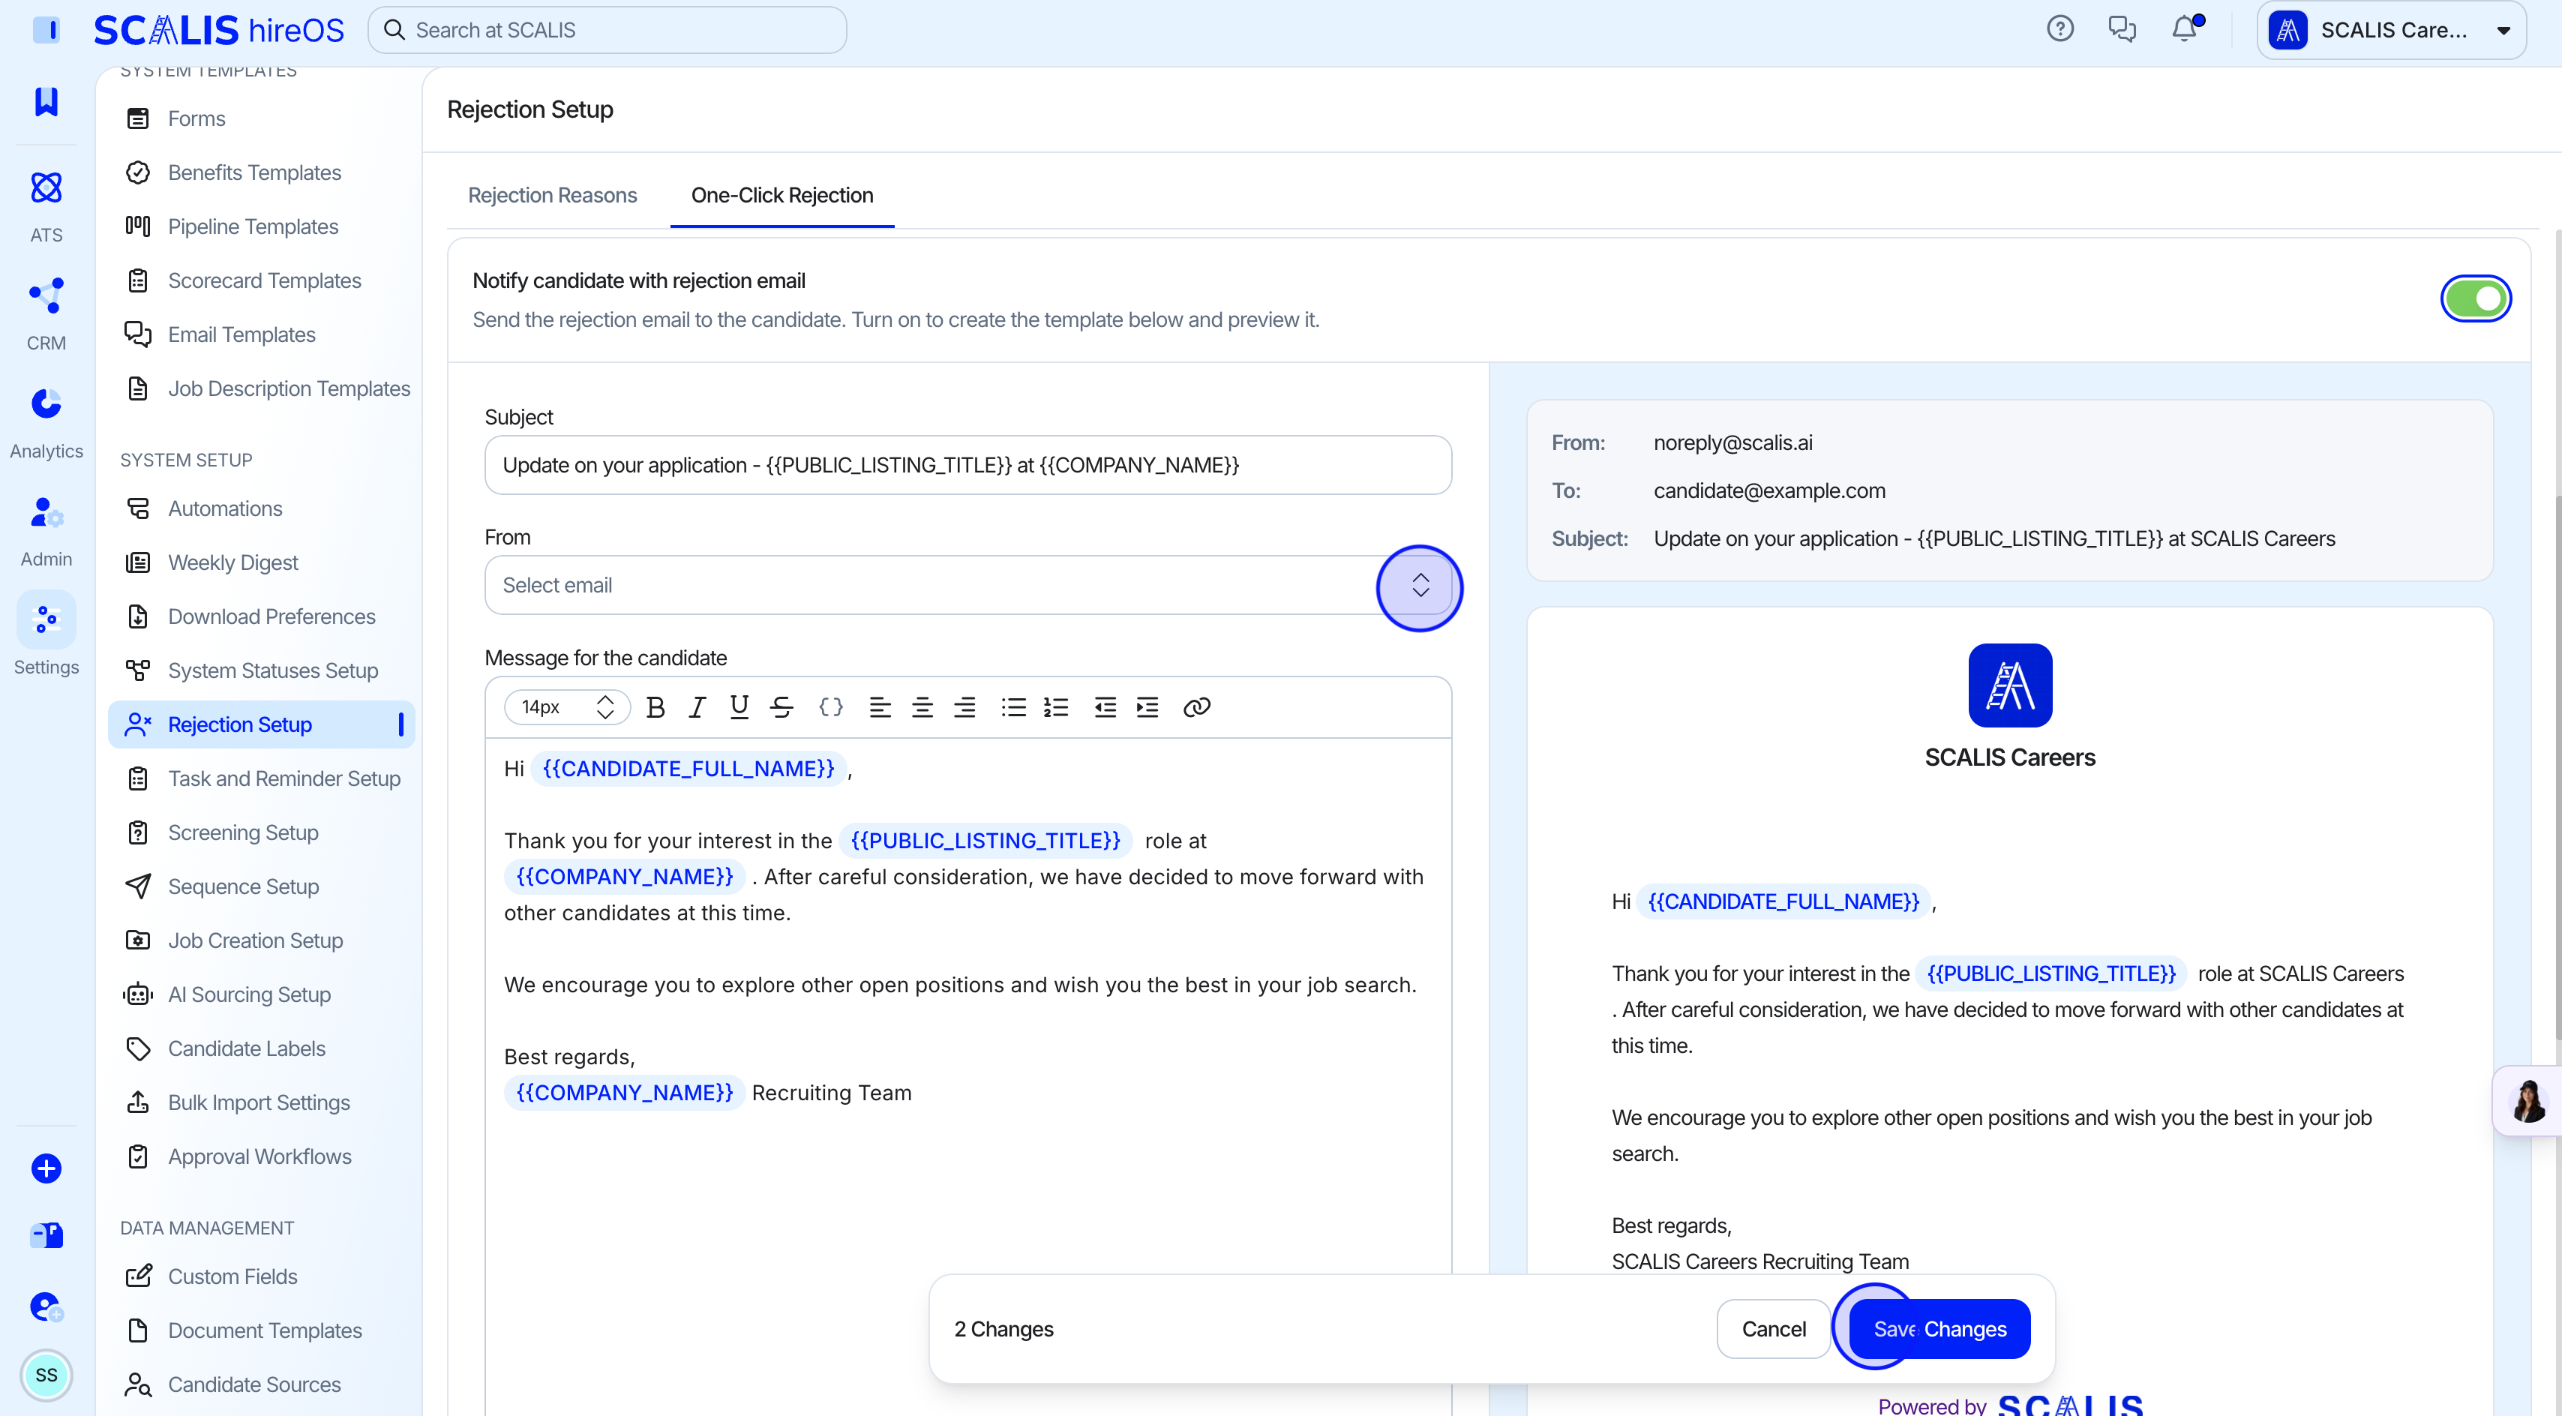
One-Click Rejection lets you create and activate a configurable rejection flow that runs in a single click.
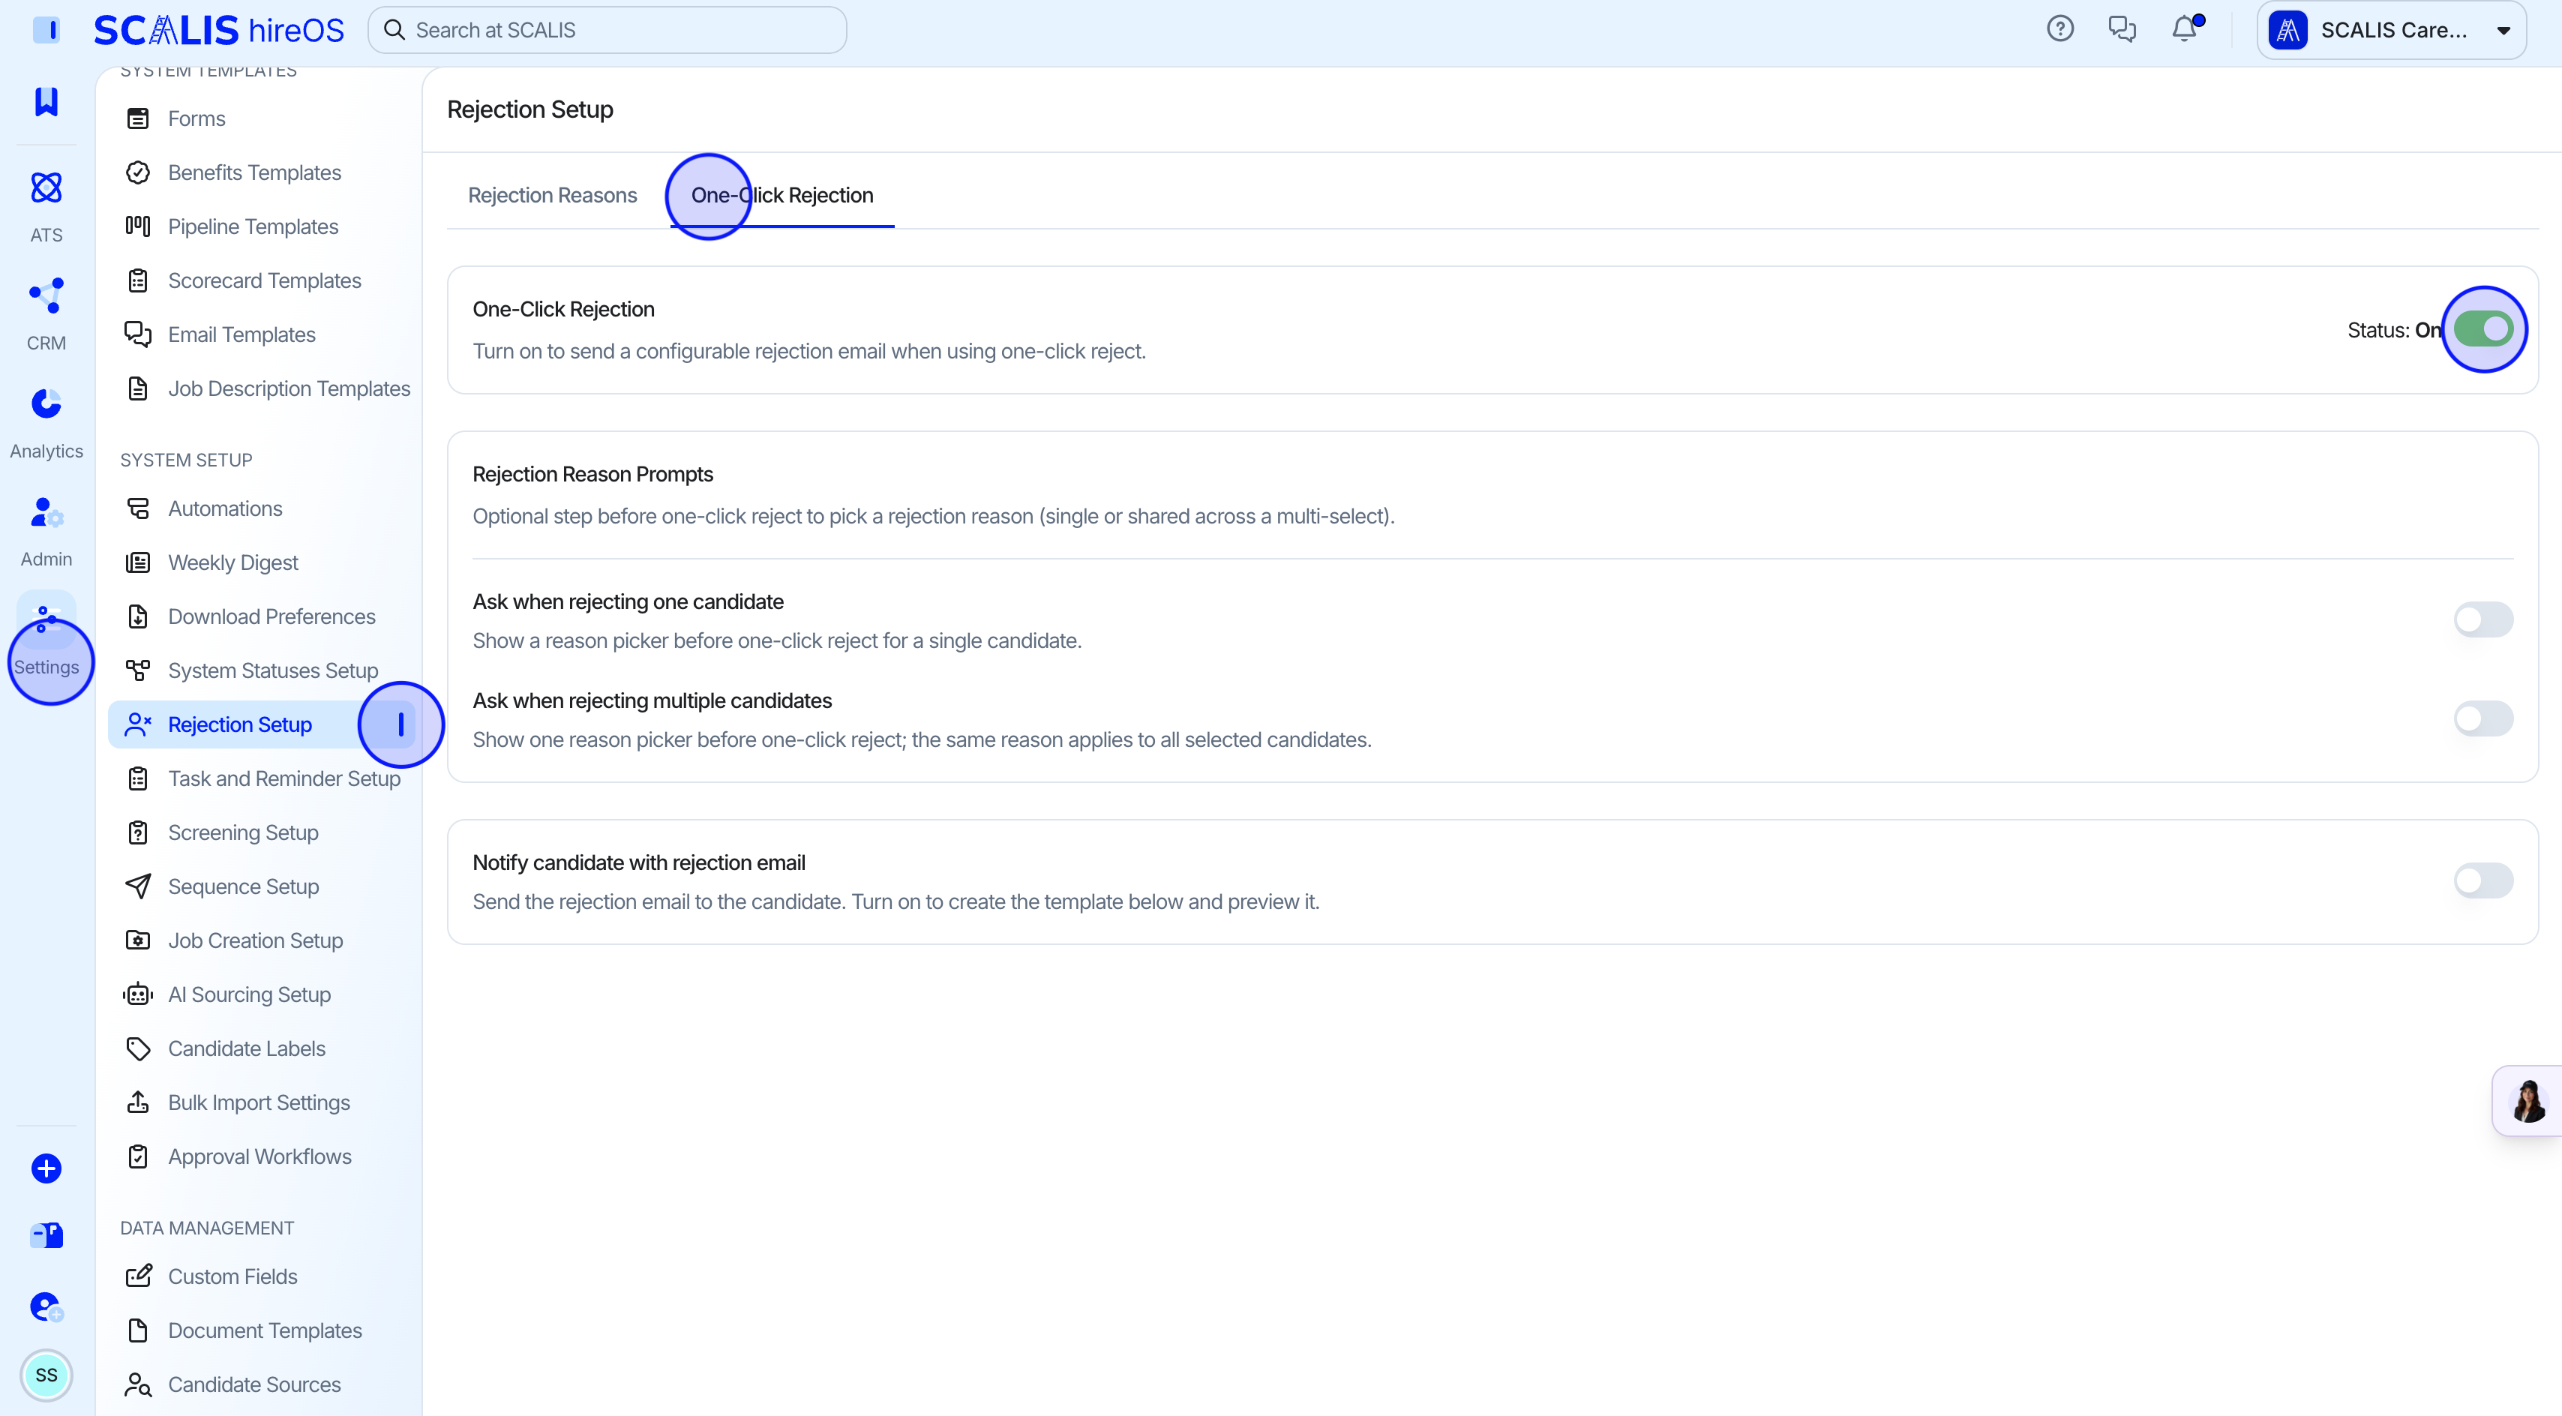
Click the Settings tab in the left navigation, then go to Rejection Setup.
2
Step 2
Configure the One-Click Rejection Flow
Go to the One-Click Rejection tab.
Toggle on One-Click Rejection.
Choose whether to Notify candidate with rejection email.
Toggle on whether you'll be asked to confirm when rejecting one candidate versus multiple candidates.
✓
Final Step
Select the Sender and Email Template
Select who the rejection email will come from.
Choose your rejection email template.
Click Save.
Related articles
Your rejection reasons and One-Click Rejection flow are ready to go. Head over to our Candidate Rejections guide to see how to put them to use. Reach out to your CSM if you'd like a hand.